Final Installation:
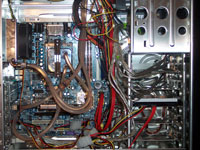
To do the final installation, I could disconnect everything and drain it, then reassemble it within the case, and hope there are no leaks. Another option is to put it in your case pre-assembled (which is what Evercool recommends in the manual), and is the way I installed it. Putting it into the case was simple, by removing the top two 5.25 drive bay covers I was able to slid the fanned radiator, CPU and VGA cooling blocks into the case with ease. Granted this went into a full size case, putting it into a mid tower might be a little difficult. Another way to put it in pre-assembled would be to remove the power supply in order to give you room to slide it into the proper location.
Evercool recommends placing the unit at the top most 5.25 drive bay. I tried this, but immediately noticed an issue. Depending on your case, you might have a bit of an over-hang at the top where the door closes. If you have this over-hang, you will not be able to access the fill port if you need to add water. In both my Antec 1030B and Thermaltake Shark this was the case. It's not a big deal; I just lowered it to the second slot and was fine.
After getting all the components into the case, it's a very simple task of installing the CPU block, exhaust radiator and fan, and the VGA block. This is easy to do, since they use standard mounts. As easy as it is, I did have an issue with both of my full size cases. The Antec 1030B uses brackets to mount the fans, and the radiator will not fit in the brackets. On the Thermaltake Shark, it is designed only for a 120mm exhaust fan, so there is not a good way to mount it. I was able to mount it using the screws tightened against the exhaust metal mesh, but I wouldn't want to leave it that way for long.
Installation Inspection:
Once it's all installed it is time to look at it while it is in use.
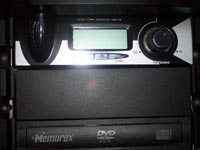
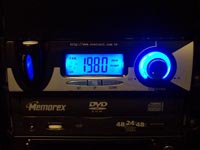
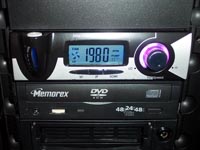
The front panel of the main assembly includes a LCD screen that gives you a good amount of information. It will give you the fan speed of the external fan, and the temperature of the temperature sensor in both F and C (you have to select which one you want). On the screen there are also two animated icons; one icon to show you the internal fan is running. I stopped it while it was running, and the alarm sounds if the fan stops running. The other icon is to show that the pump is running, and water is flowing.
The dial controls the main assembly fan speed. The internal fan speed is not reported on the front LCD, there is a visual cue to the approximate speed. The area around the dial lights up, depending on the speed of the fan. The speed reported on the LCD is the fan connected to the rear power connection, which sadly there is no adjustment for the speed!
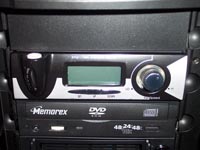
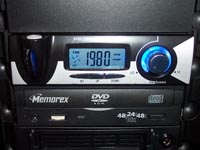
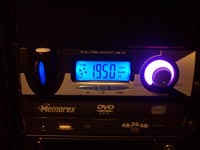
The visual cue for the speed of the internal fan has three settings, but only two of the settings could be differentiated in the pictures, as the last two are very close in color. There is a blue color for low/medium speed. The high speed has two colors, a light pink, and a bright pink/purple. Both colors are very similar, as they are a slightly different shade. Below you can see the dial in the low/medium (blue) speed, and very high speed (purple).
Please read on to the next page for more... Next
Page 1 | Page 2 | Page 3 | Page 4 | Page 5 | Page 6 | Page 7 | Home | Forum | Review Index
|
|


