The Basics (continued):
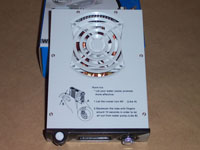
The top of the unit is pretty plain, you get quick instruction on how to bleed the lines, and how to get all the air bubbles out of the lines. You are also able to see the main fan for the pump assembly.
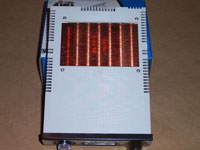
The bottom of the unit is where you will get your first glimpse of the main radiator. As you can see, it is made entirely of copper, which has a good heat transfer rating.
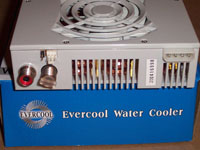
The backside is where you will find the water outtake and intake, along with the temperature sensor, fan controller, and power connection. If you look at the left water valve, you will see a little red o-ring washer that will be on all water connections. This helps prevent leaks, so be sure you do not lose it.
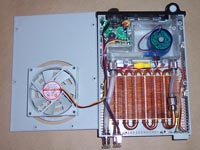
Finally, let's crack it open and see what makes the main unit tick. The fan is a low profile 80mm fan, which is controlled by the dial on the front of the unit. There's a problem, ass the reported fan speed is NOT for this fan, it's for the external fan! This brings up another issue, there is no control for the external fan speed. All of the fans and the temperature sensor are connected via a plug -not hard wired. I really like this, as it allows you to modify/update the fan connections if necessary. Right behind the fan speed dial, you can see a little piezo speaker; this is very loud when the alarm goes off. All of the connections internally are done similar to the external connections, with the same tubing. Everything internally has its place, and is neatly laid out to maximize airflow.
Included Accessories:
As I mentioned before, this is a kit designed to give you everything you need to get a water-cooled system up and running quickly. Now that we know about the main unit, let's look at all the included accessories. I will look at each of the accessories, as they were laid out in the box from top left.
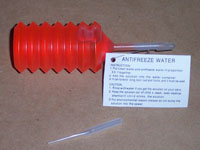
The first accessory is the water antifreeze and antirust additive. This must be added to your distilled water to help keep the water pump and other pipes from rusting. While this is red in its concentrated form, it becomes a faint orange once you add three of the bottles of distilled water. It's not UV reactive, so if you want to put it in a case with windows, you might want to consider picking up other coolants that match what you want. For purposes of my test, I will use the included additive.
Please read on to the next page for more... Next
Page 1 | Page 2 | Page 3 | Page 4 | Page 5 | Page 6 | Page 7 | Home | Forum | Review Index
|
|


