Power Supply:
The included 450W power supply is not exciting at all. It reminds me of the old power supplies before they were spruced up by windows, mirror finishes, additional fans, and cable wraps. That does not necessarily mean it's a bad power supply though, the most important aspect is how well it performs.
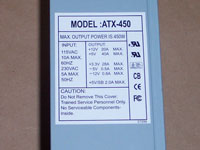
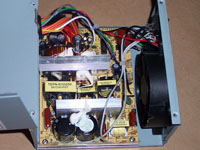
I won't go into much detail on the power supply, since there really isn't much to see. Here is a shot of the plain gray casing, with the usual official voltage ratings sticker.. Nothing fancy at all, there is only one place for air intake, which has no fan attached to it. The exhaust is performed by one 80mm fan, which is quiet enough to not recognize it over the other fans in the case. There are two large heat sinks, but there is no fan to push air across them, the only air movement is done by the exhaust fan.
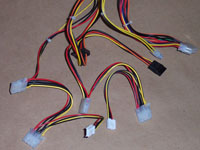
The cables are pretty standard as well. There are the standard 20pin and 4pin power connectors, but no 24pin connector. For the other power connectors, there are three cables. Two of the cables include two (2) 4 pin Molex power plugs, and one floppy power. The other power cable includes two (2) SATA power plugs. Are four Molex plugs enough for a normal installation? Personally, I don't think so, assuming on average 2 hard drives, 1 optical, and fans. You will need to use either pass-through Molex plugs, or use a Molex power splitter, such as the one manufactured by Sunbeamtech.
 Installation: Installation:
Installation works like every other motherboard installation. You put in your motherboard port panel, and install the appropriate motherboard supports. Place your motherboard into place and screw it down.
Remember that when you are installing your drives, you will need to remove the other side panel to put in the tool-less brackets. This is a little annoying, but certainly it doesn't cause a negative impact.
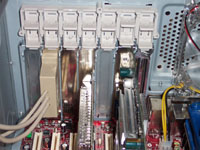
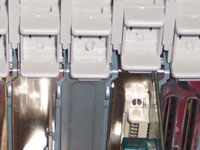
An issue I did encounter was in relation to the tool-less PCI slots. I installed an ATI TV Wonder, PCI USB, PCI LAN card, and PCI modem. All of them went in without any issue, the clips went down and locked into place properly. When I installed my video card, I wasn't able to get the tool-less brackets to lock into place. It would go down, but I was unable to get it to lock into place. Looking closely I realized the issue. The video card is full height, and goes a little higher than the top of the mounting bracket. The tool-less clips have a brace that should be at the top of the card to help keep it steady. This brace was hitting the top of the video card, and obviously wasn't able to go any further. I tried 3 other video cards, a PNY GeForce 5200, 5600 Ultra, and a XFX 6800. They all had the same problem. If you have a video card that uses two slots, you might have problems. If you do have these types of issues, you can remove the tool-less brackets, put your card into place, then reinstall the tool-less brackets. Special instructions are available here
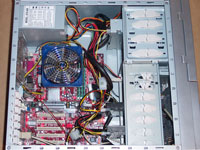
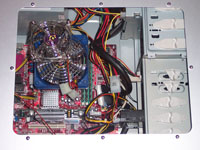
Here you can see the system fully installed with the power supply put back into its proper place.
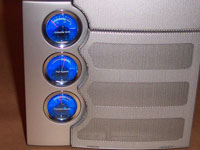
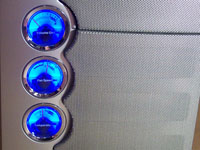
Turning the system on, all the lights activate and the front analog meters light up with blue LEDs. The case looks incredible all lit up! I was pleasantly surprised at how the analog meters looked and worked.
Please read on to the next page for more... Next
Page 1 | Page 2 | Page 3 | Page 4 | Page 5 | Page 6 | Home | Forum | Review Index
|
|


