| Maxtop Diamondback CSX-502 ATX Mid Tower Case - Page 4 of 5 |
Installation:
The installation for this case goes just like any other. The fit is a little tight but the motherboard slides into place without a hitch. Making sure the screws are tight, I move on to installing the drives. Another feature I would have liked to have seen is a removable motherboard tray, as it provides easy installation.
The addition of tool-less drive bays makes the installation process a little smoother. One thing that I liked was that I no longer had to remove the back side panel to gain access to the screws holding in the DVD/CDRW drive. This only sped up the installation, and in the end will make switching drives in and out a less irritating task.
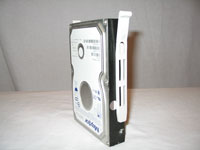
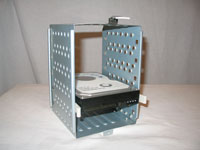
Something worth noting, and a definite high point in the design of this case, are the sideways mounted hard drive bays. The drive bays are mounted in such a way that require you to only push forward to mount the hard drives. I originally took the entire removable tray out, installed the drive and then replaced the entire tray back into position. This was obviously not needed and only added an additional step to installation. It also made pushing the hard drives into position harder as the tray was not securely fastened to anything. With a little wiggling and squeezing the drives slide into place without any issues. Upon removal of the hard drive, the tool-less connector was a bit stubborn as it would not let go of the tray. Thinking about it now I would rather have the drives be locked securely in place then easily slipping out of position.
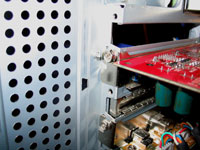
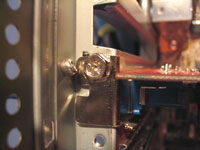
During the installation of my now rather obselete Geforce4 Ti4200, another issue arose with the design of the PCI slots. Right where the video card screw needs to pass through there is the back side of a rivet holding the PCI slot piece into place. This was truly irritating and bothered me for 15 minutes while I tried to find a way to get the card into position without breaking something. I finally discovered that I was being a little too gentle and with the card on a larger angle was able to slide it into position first then push the card into the AGP slot. This got on my nerves again when the time came to remove the card for another review soon to be on Bigbruin.com. The same problem occurred two more times with me getting more and more frustrated each time, while in a near fit of rage I discovered that with a slight angle down and towards the arresting point the card would slide in quite nicely. This is only for installation though, and removal still remains a rather bothersome task. This is obviously a design flaw and should be worked out by the manufacturer.
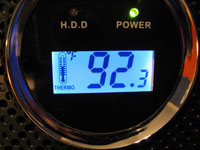
With the system powered on you can now see the brightly lit front panel temperature display. The readout is a bright blue color with a small animated thermometer on the left side. The numbers are clear and easy to read, with them extending to one decimal place. Compared to my ExTech digital thermometer, the included probe was only 1-2 degrees off from the actual temperature.
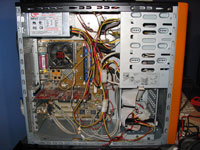
Pictured below is the entire system installed into the case. Notice the rather cluttered appearance of the case with all of the power Molex connectors being used. There was alot of connecting and reconfiguring of the plugs to be able to power everything needed. Note that the exhaust fans have not been installed yet and could provide even more issues with poor airflow.
Testing:
The most important part of any product is how it performs, let's take a look at the power supply's performance. The test system used for testing is as follows:
System Specifications:
• AMD Athlon XP2400+ @ 2.0GHz
• Asus A7N8X Deluxe motherboard
• 1GB Kingston HyperX PC3200 Memory
• Maxtor 160GB Hard disk
• 2x Optical Devices (CDRW/DVD)
• GeForce 4 Ti 4200 Graphics card
• Scythe Kamakaze Heat sink
Please read on to the next page for more... Next
Page 1 | Page 2 | Page 3 | Page 4 | Page 5 | Home | Forum | Review Index
|
|
|
|