| Enermax Maxflow CS-718B ATX Case - Page 4 of 5 |
Installation:
All right lets start off with a list of what will be going into the CS-718B
Asus A7N8X-E NForce II Ultra 400 chipset
AMD XP2400+ mobile @ 2130 MHz (12x175)
Alpha 8045 heat sink with 5200rpm Delta fan 80x38mm
1 gig of Kingston Hyper X PC2700 (2x512)
Powercolor 9600 Pro with 256 megs
Maxtor ATA133 7200rpm 40gig
Maxtor ATA100 7200rom 10 gig
Winfast XP Deluxe TV Tuner card
NEC 2500a 8X DVD Burner
LiteOn 16X DVD
PC Aircon 400 (hot swappable PC air conditioner)
Using on board 6.1 sound and dual NIC
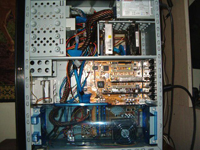
Once I got past the fact that I was working from what up until now has been the wrong side of the case and the fact that the motherboard was going in upside down, this is without a doubt the easiest install I have ever had the pleasure of doing. From the very first thing I did, which was installing the rear I/O panel, things just seemed to fit perfectly. When installing the I/O panel it usually takes me some time to get the darn thing to line up and stay in place. Not with this case, the I/O panels snapped in with a firm feel on the very first try and stayed in place.
The case comes with six brass motherboard stand offs already installed, and a bag of extra stand offs and screws. I went ahead and put the other three stand offs in to secure the motherboard at all nine mounting spots. Just as with everything I put in this case, the motherboard lined up perfectly the first time.
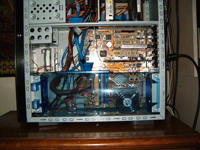
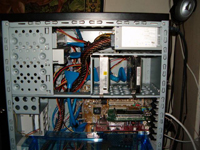
This cased has plenty or room, and even with my big clumsy hands, it was a pleasure to work in. All edges are either rolled over or smoothed out, and I could not find a sharp edge to cut a finger on anywhere in this case. The drive rail system and the PCI/AGP card retention system worked flawlessly, and as advertised required no tools. The installation of all the parts went so smooth there is really not a lot to talk about. One thing I should mention is how I connected the fans and temperature probe. The fan controller can handle up to four fans and when you get the case, the two 120mm fans are already connected to it. I also connected the 5200rpm Delta fan on the CPU heatsink and the 80mm blue LED case fan I added to the front panel fan cage. The temperature probe for the LCD temperature monitor I mounted between the CPU and heat sink right next to the CPU core.
In short, I just can not say enough good about the how easy installation in this case is. Everything is well thought out and works as it is supposed to. To give you an idea of just how smooth it went, from the time I shut the system down to start the transfer into the CS-718B, until the time I was looking at the desktop in Windows with the system in the CS-718B was less than a hour and half. This was not due to me trying to do it fast, in fact I took my time to ensure it all went right. But it is due to the fact that everything from mounting the parts to running the wires was made easy by the quality of the case, its unique interior layout, and room to work.
At this point it almost sounds to good to be true, and I am waiting for the proverbial other foot to drop. Lets move on and see just how well the CS-718B performs.
 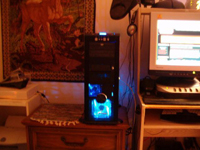
Performance:
All right on paper this case looks excellent. Now lets see if it lives up to the expectation I have of it. First off all the buttons and auxiliary jacks are clearly marked and easy to use. The LCD temperature and rpm read out is bright and easy to read. The power and HDD LED are small but very bright and easy to see. The huge fan control dial is easy to use and makes it really easy to set the fans just where you want them. Just like with the installation, everything functions exactly how it is supposed to, and does it all very well.
Power Supply:
I tend to be pretty fussy about accurate voltage rails. A weak or fluxuating voltage rail can and will cause system stability problems. So my mission was to put as much of a load on the power supply as possible with this system and see how it faired. To do this I had the system loaded with Folding@Home, loaded up the TV Tuner card software, opened a couple of browser windows and put some data CDs in both DVD drives just to get them spinning up, cranked the case fans on to full speed, then to top it all off I stuck the Waffer PAC400 Aircon in and turned it to the Snow Mode. For those not familiar with the PAC400 it is a cooling unit that fits in a 5.25 drive bay and uses two 80 mm fans along with a peitier to pump cool air into the case. Trust me at this point the extra cooled air was not needed, but the PAC400 draws 45watts all by itself and I wanted the extra load to see if the power supply was up to it.
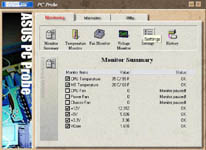
As you can see by the graph and screen shot from Asus Probe below, the Enermax Whisper II 460 watt supply was more than up to it. Not only did all voltage rails stay within specifications, but they were very stable with little to no fluctuation.
Please read on to the next page for more... Next
Page 1 | Page 2 | Page 3 | Page 4 | Page 5 | Home | Forum | Review Index
|
|
|
|


