| 4 Channel Wireless Camera System - Page 2 of 2 |
The Cameras:
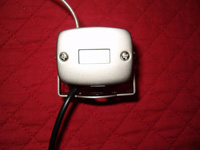
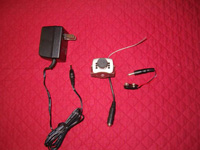
The cameras are small and appear to be very well built. They have a 3 antenna wire and a 3 power lead that plugs into either the 9-Volt battery adaptor or the lead from the AC adaptor. They have a small "U" shaped mounting bracket that allows for tilting of the camera in an up and down motion, but they do not allow the camera to swivel from side to side without moving the bracket. This means that when a camera is mounted on a wall, for example, there is no side to side swiveling to adjust the field of view of the camera. The cameras also house a microphone which provided surprisingly clear audio feed.
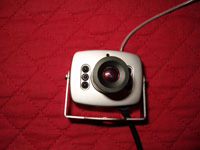 
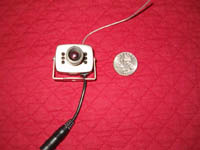
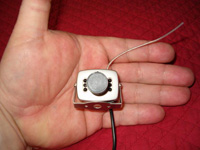
These pictures provide examples of just how small the cameras really are...
One more picture of the camera with the AC adaptor and 9-volt battery adaptor.
Setup:
The Receiver:
Setting up the receiver could not be easier. In fact, I handed it to my 11 year old son and he did it without even reading the manual. It is a simple matter of screwing the antennas into their jacks, hooking up the audio/video cables from the color coded jacks on the back of the receiver and TV, and plugging in the AC adaptor. We used the Auto Group jack so we only had one set of RCA audio/video cables going from the receiver to the TV. If you intend on using multiple monitors, it is simply a matter of hooking up the audio/video cables for each camera channel on the receiver to the individual monitor.
The Cameras:
Although this is not difficult, to get good results it did take a little more time and effort than I had thought. These little cameras are heavy for their size and they will not free stand on the bracket. Because they are nose heavy and the power lead tends to push forward, they must be screwed down. To screw the mounting bracket to a wall, or any other surface, you must remove it from the camera. The screws that hold the camera to the bracket are tiny. Good luck in your search if you drop one! Once the bracket is attached, you remount the camera and plug in either the battery adaptor or the AC power adaptor. If you use the battery adaptor you are pretty much on your own as to how to mount or secure the battery. There are no provisions for battery mounting in the kit and the 9-Volt battery is just too heavy to leave dangling by the lead, in my opinion.
As small as these cameras are I was surprised how much they stand out like a sore thumb when mounted. If you intend to hide them I think you are going to have to make some kind of box as a disguise, or place them in something that will hide the battery or power lead going to it, as well as the camera.
The other issue I ran into was placement of the camera antenna. Small movements of the antenna wire had drastic effects on the reception. I spent many hours moving and adjusting the antennas on both the cameras and the receiver trying to get all four channels to display a good picture.
Operation:
Once everything is hooked up and mounted, use of the system is pretty straight forward. You just turn on the TV and see what is going on.
Camera placement is critical. Very small changes in location of the camera can have a drastic effect on the reception. Also, because the mounting bracket does not allow side to side swivel motion I had to re mount the cameras several times to get both the view I wanted and decent reception.
The specifications say the cameras have an effective range of approximately 660 feet. It may be possible to achieve that in perfect conditions, but in my real world testing I had problems getting any usable reception at anything greater than 70 feet. The farther the camera got from the receiver, the more sensitive the antenna placement became, and in general anything past about 50 feet caused the image quality to suffer.
Now for my biggest problem with the system, which is somewhat of a big one, in my opinion. Battery life on the cameras is terrible. With fresh Duracell 9-Volt batteries I was only able to get about two hours of use. There is no way to turn them off when not in use so there is no way to extend the life short of physically disconnecting the battery. This is not acceptable to me, and after going through two sets of batteries I ended up wiring all cameras up to the AC adaptors.
Please read on to the next page for more... Next
Page 1 | Page 2 | Page 3 | Home | Forum | Review Index
|
|
|
|


