Installation / Operation:
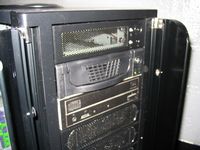
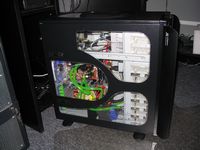
Time to move a system into the Thermaltake Armor and see how she performs. The first thing I did was try a few different 5.25" bay devices with the tool-less system. The images below show a Genica hard drive bay and a NEC DVD burner mounted and ready for action. Once installed, they worked fine, but it was a little tricky getting them in there. It was a tight fit, and I had to use more force than I would have expected, especially on the drive bay. There really are no guides as well, so the drive would get hung on the rails above and below the opening to be used. So getting them in is tricky, but once in place, the tool-less system snapped right into place.
In addition to the items pictured above, I also tried a Sunbeamtech rheobus and two Cremax IcyDock SATA drive enclosures in the 5.25" bays. These proved to be even more troublesome than the first two items tested. The rheobus isn't deep enough to reach both pins on the tool-less clip, and it wobbles a bit while in place. There are screw holes available to make it more secure, but I can picture even shallower bay devices being all but impossible to mount in this case given the design. The IcyDocks required an excessive amount of force to get in or out, and the opening just didn't seem wide enough. I have never had any problem installing these devices in other cases, but I nearly broke a sweat jamming them into the Armor.
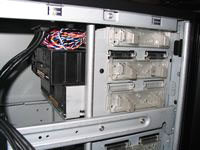
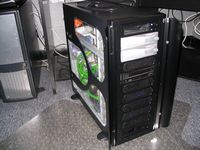
Next I installed a power supply, and again encountered minor obstacles. You can't just lift the power supply up into position as I am accustomed, but you need to negotiate it up into the opening with a bit of tipping, wiggling, and trial and error. It took a minute or two to get past the various obstacles, but eventually it popped into place, as pictured below.
 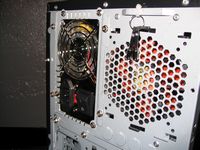
Later in the PSU installation I realized I would not be able to use the extra 90mm fan included with the case. Although it would probably work fine with a typical power supply, the modular cabling design of the Ultra Products Xconnect unit used interfered with where the fan was supposed to be positioned.
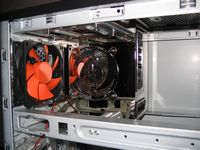
After these few issues, everything else went fairly well. Installation did take a while, but that is only because I was putting a full water cooling kit in with the system. As pictured in the images below, we have a Pentium 4 based system with a Radeon 9600XT AGP card, with cooling provided to the CPU, GPU, and chipset via an Innovatek XXS water cooling kit. The pump, radiator, and everything else all fit rather neatly inside, and perhaps one day I will try to mount the radiator out back, instead of up front.
The images above show the complete installation with the lights on, and the images below show the same views with the lights out. The cases two 120mm fans have blue LEDs which give off a nice glow.
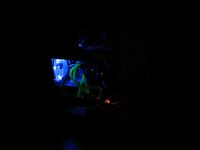 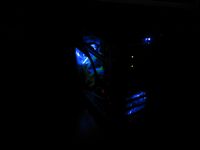
You can see the blue glow from the intake fan right through the front panel, showing just how wide open the perforations are. If you can see the light, you will hear the noise from these fans too. The fans are fairly quiet, but coupled with all the other noises in the case, this system is louder than my previous installation. Probably not a fair comparison since the previous case was sound insulated, with extreme measure taken for silence, but the wide open nature of this case will allow all sounds to come right out. Although the fans provided with the case are quiet, definitely have some sort of fan controller for any other fans you may have on your CPU, chipset, etc...
The noise level is more than the previous case this system was installed in, but how about the temperatures? Considering that this is a water cooled system, I was not expecting to see much of a change, if any at all, but was I surprised! Using Abit's Hardware Doctor to monitor CPU, PWM, and System temperatures on the IS7-G motherboard, the amounts each dropped was quite impressive. Going from a AMS gTower case to the Thermaltake Armor case saw the CPU temperature drop about 4 degrees C, the System temperature drop 7 degrees C, and the PWM temperature drop 11 degrees C. Very impressive!
PWM stands for Pulse Width Modulation, and refers to voltage regulation chips located just to the left of the CPU. The temperatures used to seem so high that I had attached small heatsinks to each, which took the temperatures down 4C, or so. I was quite impressed to see the temperature drop another 11C, and it is all thanks to better airflow within the case.
Considering the substantial decrease in temperatures, I am confident that I can now regulate the speed of the fans to a point where I can eliminate the increased noise and still have safe temperatures.
Please read on to the next page for more... Next
Page 1 | Page 2 | Page 3 | Page 4 | Page 5 | Page 6 | Home | Forum | Review Index
|
|


