| Thermaltake Armor VA8000 Tower Case - Page 2 of 6 |
External Features:
The below left image shows that inside the box's Styrofoam inserts the case is wrapped in a cloth-like bag to protect the finish. In addition, the case also includes a small polishing cloth (pictured with the manual on top of the case). All unwrapped and ready for use, we can see that the Armor case really isn't that much bigger than the Sunbeamtech Transformer. It is an inch or two deeper, but just about the same height and width.
 
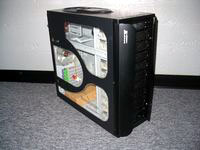
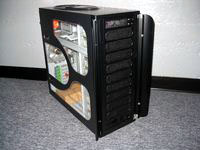
Although not as large as I was anticipating, the Armor is a big case. The sleek looks keep it from looking like a big server box, but it has the internal space to be considered one. Taking a look at the images below reveals a few of the case's unique features. First of all, we have a large, 3-paned side window that allows viewing of just about every corner of the case. Up front we have two interesting 'flaps' in lieu of a door that protect the drive bays. Each flap is on a hinge that allows it to open clear of any optical drive trays or the power button, but when closed provides a narrower opening for cool air to flow through. And while we're mentioning the drive bays that these flaps protect, just take a look at how many bays are provided!! Eleven exposed 5.25" bays could be put to use on the Armor, with two of them being adaptable for use with 3.5" devices.
Taking a look at the side of the case we see that the acrylic window is held on by plastic rivets which are color matched to blend in nicely. The side panel itself is held in place by two latching handles, one of which features a lock (two keys provided). The back of the case is a bit different than your typical ATX offering, and in the next few images we'll take a look at the details that make it special. A few things to note include the inclusion of both a 120mm and a 90mm exhaust fan (I thought 92mm was standard?!?), the sideways power supply mounts, and absolutely huge thumbscrews.
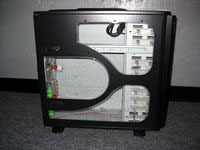 
Taking a closer look at the below left image you see the two keys for the side panel ship attached to the 90mm exhaust fan. The power supply mounts on its edge, with the side that would be facing down facing the windowed side panel. The combination of the 90mm exhaust fan and the PSU's exhaust fan should help keep things nice and cool. Just below the 90mm fan you can see 4 circles stamped into the case's sheet metal. These can be punched out, and used for running tubing to an external water cooler, or for an externally mounted radiator. A nice touch, and one that could really make a water cooling system look integrated with the rest of the setup.
 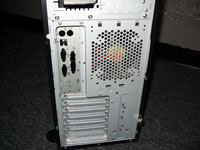
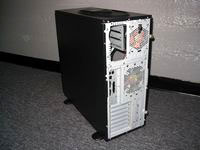
The above right image shows the lower section of the Armor's backside. The back panel holding the 120mm fan, expansion slots, and ATX back plate can all be removed from the case, and doing so is one step to make this case BTX compatible. This whole section of the case comes off by removing a few screws, and it would have been nice to have seen the motherboard tray go with it as well. I have still yet to review a case with a removable motherboard tray, and this is about as close I have gotten so far!
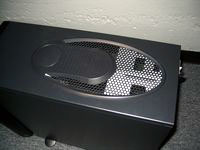
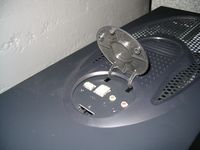
The top of the case is pictured below, and continues the theme of offering unique features to just about every surface of the Armor. A large oval is cut out of the top, and a perforated mesh is inserted to allow for enhanced cooling. This area is just above the power supply and processor are, so heat rising from these sources can rise right out of the case, even if any of the exhaust fans didn't blow it out the back. In front of the mesh oval there is an enclosed area that opens to reveal a Firewire port, two USB ports, and two audio jacks. Nice convenience items, located in a fairly convenient location to boot.
Please read on to the next page for more... Next
Page 1 | Page 2 | Page 3 | Page 4 | Page 5 | Page 6 | Home | Forum | Review Index
|
|
|
|


