Internal Features:
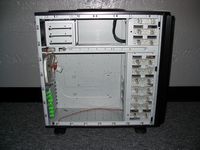
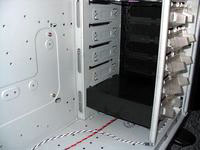
Alright, we had a good look at the outside features, now let's see what we have inside. The image below provides an overview of the innards with the side panel removed. We can see all of the drive bays up front, what looks like tool-less expansion slot latches out back, and maybe another drive cage up by the PSU... Let's take a closer look.
Ten of the eleven exposed 5.25" drive bays feature the clear plastic clips show below. The fourth from the top doesn't have one due to interference from the support member, but all the rest are tool-less thanks to this device. A 5.25" device can be slid into an open bay until a guide on the far side catches it, and then the clear plastic clip can be snapped into place. The screw holes on the side of the 5.25" device accept pins on the plastic clip, and that is how things are held in place.
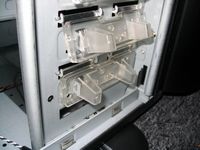 
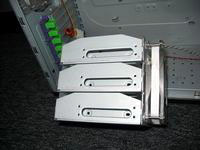
In the lower section of front bays is a drive cage designed to hold three 3.5" drives. The cage is held in place by the tool-less system shown above, but any 3.5" drive installed needs to be mounted using screws.
Take a look at the floor of the case. All of those holes may aid in air cooling system, but they are more appropriate for aiding a water cooled system. The grid of holes can be used for mounting a water pump to the floor, and I intend to take advantage of these holes in order to mount my Eheim 12V unit.
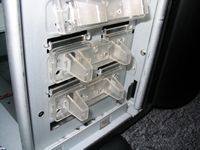
The drive cage is shown below, and as you can see the clear 120mm intake fan is mounted to the front. I'd prefer to see the fan mounted to the case itself, that way the drive cage could be eliminated if not needed. As is, if you want to use the 120mm fan, you need to keep the cage installed. Taking a closer look at the drive cage, you can see that not only do you need screws for mounting any drives, but that you will probably need a magnetic screwdriver. The slotted openings used to access the mounting holes are fairly narrower, and I could not get in there with a finger and a screw driver at the same time...
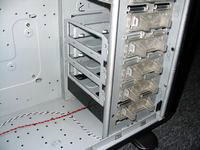
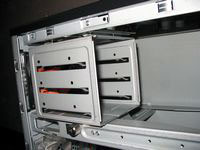
The images below take a look at the upper rear of the case, and another removable drive cage. This cage is held in by another massive thumbscrew on the bottom and a lever that clips it to the top of the case. Behind the drive cage we see a traditional orange Thermaltake fan, as well as the opening for a power supply.
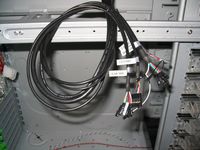
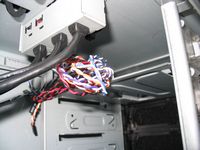
The convenience connections on top of the case are accompanied by a healthy bundle of cables on the inside. The images below take a look at the well insulated cables, each of which features labeled connectors for easy installation.
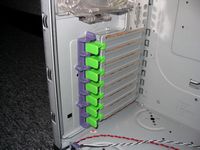
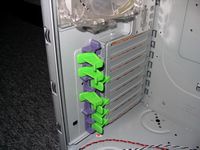
The images below show the tool-less expansion slots, with the vibrantly colored latching mechanisms. A green tab is popped open, a card is inserted into an open slot, and the green tab is then popped back into place to secure the card. Simple enough.
Please read on to the next page for more... Next
Page 1 | Page 2 | Page 3 | Page 4 | Page 5 | Page 6 | Home | Forum | Review Index
|
|


