The Basics (continued):
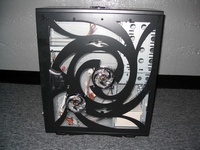
The windowed side panel covers more surface area than most I have seen, and features a swirling design created with several smaller window panes. The center swirl cut into the side panel resembles the pattern of the Blade fan grill, and by no coincidence the two 80mm fans on the side also feature the Blade fan grill.
The above right image shows off the rear of the case, which features a mount for another 120mm fan, with the same honeycomb pattern grill to allow for good airflow. The power supply area features a small bracket that can make installation of different PSUs easier, and both the left and right hand side doors of the case are held on by chromed thumbscrews.
A close up of the windowed side panel is shown below. There are two 80mm clear LED fans with the Blade style fan grills, and a lockable handle used for accessing the inside of the case.
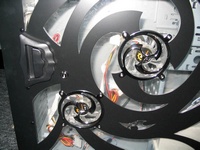
The back side of the side panel is shown below giving a clear look at how the locking handle works, as well as the fact that the window is one large sheet of acrylic held in place by rivets. The fans are also shown in detail, and the interesting feature is the extremely long power leads sheathed in clear tubing and sporting both 3-pin and 4-pin power connections. The length and choice of power connectors is very convenient, and the sheathing just makes for a much tidier appearance.
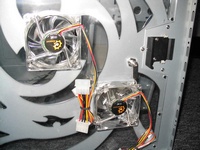 
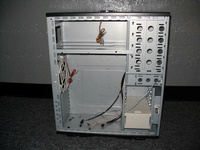
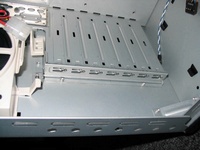
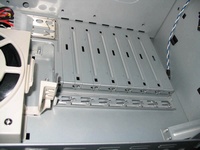
The below left image shows that the top exhaust fan is the same as the clear LED fans found on the side panel. The below right image gives an overview of the entire case's insides. I have already noted the high number of exposed drive bays, but in the lower front corner you have 6 more, laterally mounted, hard drive bays. For a case with the outward appearance of a gamer's rig, there is some serious space for hardware onboard!
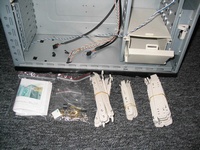
Inside the laterally mounted drive bays is a plastic "tool box" which contains most of the accessories included with the case. The toolbox is held in by two screws, and can easily be removed if the space becomes needed for drives. Inside the tool box one finds the direction sheets, various tool-less drive rails, and plastic bags full of various screws, nuts, zip ties and anchors for cable management, a small pc speaker, the case keys, and a few other odds and ends that might come in handy. The drive rails are well constructed, and may be the best set I have ever used. The plastic is strong and durable, and they mount to the drives using metal pins that can be repositioned for a better fit. Not only are they high quality, you also get a set for every drive bay, five for the 5.25" bays, two for the 3.5" bays, and six for the internal hard drive bays. This is the first time I have had drive rails for the floppy bays, and I like the convenience of making everything tool-less.
 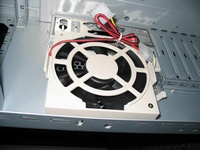
The above right image shows another tool-less feature, the 120mm exhaust fan. Unlike the front 120mm mount, this one actually includes a fan.
The images below show the tool-less expansion slot system. One strip of metal lays across all of the AGP/PCI slots with a white plastic lever at the top. By pulling the lever away from the back of the case, the metal bar along the slots opens up, allowing cards to be installed. When ready, just slide the white lever back until it pops into place, and all of the cards are held in place. If someone decides they would prefer the use of screws to hold their cards in, the tool-less bracket can easily be removed, and screw holes are available at every slot.
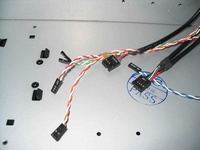
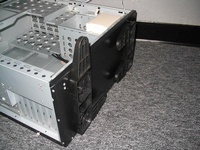
The below left image shows that each of the front/top panel connectors is well labeled to simplify installation. The below right image shows off the cantilever feet that swing out and lock into place, providing the case with greater stability.
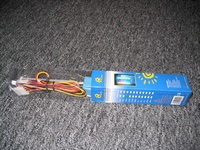
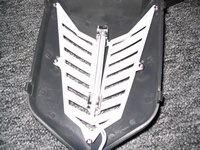
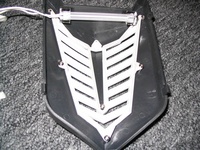
One accessory that wasn't found in the tool box is the CCFL shown below. A green cold cathode light is included to help light up the case, and the kit comes complete with the inverter and a PCI slot plate with an on/off switch.
 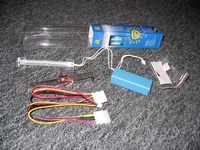
Some Velcro is included, and the below left image details Sunbeam's suggested installation position behind the front grill. I decided that I would prefer to have a similar lighting effect, but wanted the CCFL tube out of site, and went with the installation shown in the below right image.
Please read on to the next page for more... Next
Page 1 | Page 2 | Page 3 | Home | Forum | Review Index
|
|


