Components (continued):
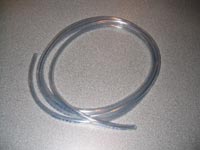
The below left image shows the small Plexiglas reservoir provided with the kit. The top is secured by a press fit and o-ring, and a small thumbscrew in the cap can be removed to release any pressure and make removal a bit easier. The below right image shows the approximately 3 meter coil of 1/2" tubing provided with the kit. The tubing bends easily, but was strong enough that I had no issues with it kinking. But, I did see small shavings of it come off whenever it would rub against the edge of my video card, or other somewhat sharp edge in my case.
 
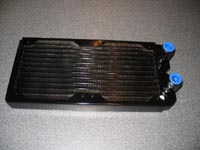
The radiator provided with this kit is just massive... It is a Black Ice Pro DUAL Radiator, which supports two 120mm fans, and as with all connections in the kit, has the push on connectors. The radiator has a glossy black finish which looks sharp, but for the one area that was damaged, perhaps during transit. As seen in the below right image, an area about 3/4" in diameter was dented, and the paint chipped away, revealing what appears to be a brass body. Doesn't look like it will impact flow, and it is located in an area that will not be visible during use, so I am not too concerned.
 
With a radiator like this, you need two have two good 120mm fans to make it work. Asetek has chosen two ADDA brand, low noise fans that are wired to share one 3-pin power connection (despite the Asetek site saying the fans are provided with the push on fittings found on all water connections). I wouldn't recommend plugging these things into a motherboard header, and luckily you won't have to consider that, since an outlet is provided on the control unit.
 
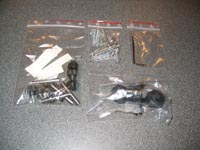
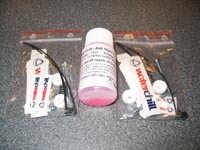
The two images below detail the balance of accessories included with the kit. The below left image shows the various mounting hardware for use on different processors, as well as a wrench for removing the plastic caps, a few suction cups to mount the radiator, screws for attaching fans to the radiator, and some thermal paste. The below right image shows the small container of enough Water Wetter for one installation, and the individual mounting kits for both the chipset block and GPU block... Complete with bolts, washers, thumbscrews, a few stickers, and a sleeve of thermal paste each.
 
The recommended use of the Water Wetter calls for 10 ml to be used per installation, and thatís basically all you receive in the bottle. A bigger bottle would be nice, as you'll need more if you ever drain the kit, or move it to a new system.
As I mentioned earlier in the review, the kit comes complete with CPU water block caps to provide a universal fit with the main processors of today. Pictured below are the caps for use with Socket A and Socket 478 CPUs...

And... if all of these pieces have you thinking such a project might be a bit too much to take on, there is plenty of documentation to help. The images below show the various pamphlets specific to the installation of each component, which provide numerous diagrams and written instructions in several different languages.
 
Please read on to the next page for more... Next
Page 1 | Page 2 | Page 3 | Page 4 | Page 5 | Page 6
Home | Forum | Review Index
|
|