The Water Blocks (continued):
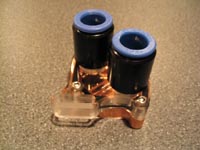
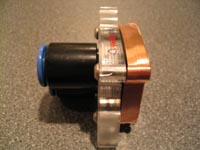
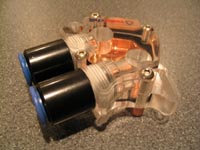
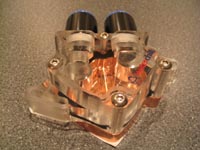
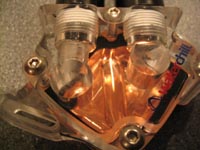
The block pictured in the next four images is the chipset cooler. The universal design is intended to fit Intel, AMD, SIS, and VIA northbridge chips. The block features the same type of clear plastic cap and copper base, but on this one, the copper is even thicker. The below left image provides a close look at the two push on fittings towering straight above the water block, while the below right image provides a bit of a look in at the machined channels in the copper base.
This water block mounts via bolts for motherboards that have through holes, and for the (Intel) boards with clips for mounting the chipset cooler, Asetek has provided zip ties to secure bolts to the clips... A novel idea that should work well, and I may actually try on another system that has water cooling on the CPU and GPU, but not the northbridge due to the block not being compatible with clip mounts.
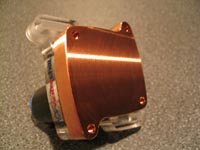
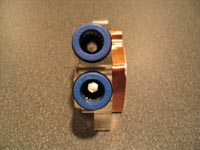
The profile of the block is visible in the below left image, and shows just how thick the copper base is. The below right image shows the bottom surface of the water block, which is extremely flat and machined smooth.
The block featured in the next series of images is the GPU cooler. Similar in foot print to the chipset cooler, the most obvious difference is that the push on fittings are mounted to allow for the tubes to come out the side, so as to render as few PCI slots useless as possible. The height of this beefy block is definitely going to block one PCI slot, maybe two, as it is.
The below left image gives a look inside the GPU water block and reveals a bit of the detail of the channels machined inside. The below right image shows the profile of the block that reveals yet another thick piece of copper bolted to a substantial top cap. Although not pictured, the base of the block was similar in finish to the chipset block, with a smooth, flat surface ready to make good contact with a mating chip.
After a quick look at the water blocks alone I am a bit impressed. If you didn't notice, I used the word beefy a few times, which is definitely warranted, as these three water blocks are quite robust!
Components:
Being a complete water cooling kit, you obviously get more than a few water blocks, so lets take a look at the balance of the components provided with the kit... Time to turn the flash back on (it made too much glare on the copper and plastic cap to use a flash to this point).
The images below show the 115V Hydor pump capable of 1200 liters per hour, which, coupled with the 1/2" tubing should keep the water flowing through the system nicely.
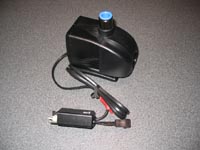 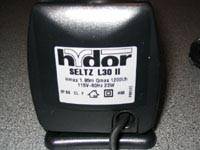
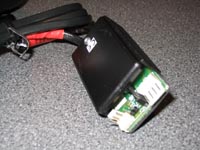
The pump has a small module at the end of a wired lead that Asetek calls the "WaterChill Control Unit" which allows the pump to receive power from an external 115V source, but receives the signal to turn on or off from the computer via a 4-pin floppy style connector. Also featured on the control unit is the header for the radiator fans, as well as a header for adding an optional LED to indicate power status.
 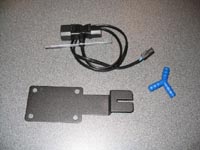
The above right image shows a few accessories, two of which are specifically related to the pump. The coiled cable provides a 115V pass through connection that sends power to your pump, as well as to you standard power supply, and includes a PCI slot cover to make the installation clean. The black bracket is intended to mount to the base of the pump and provides a small platform for the reservoir to sit on, and the blue Y connector is intended to combine the two tubes exiting the CPU water block back into one line.
Please read on to the next page for more... Next
Page 1 | Page 2 | Page 3 | Page 4 | Page 5 | Page 6
Home | Forum | Review Index
|
|


