Ultra Products Mini Portable Hard Drive Enclosure 3.5" (ULT31310):
Physical Features (continued):
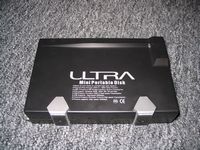
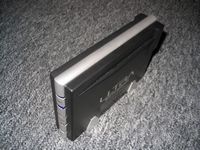
The two images below give us our first look at the actual enclosure. Basically, it is a black plastic rectangle with silver trim and feet. The side of the enclosure features the Ultra Products logo, as well as a fairly long list of the devices features. That type of information is generally saved for the packaging, and including it here doesn't do much for it in terms of style. The enclosure has a simple appearance, but all that text makes it look even more mundane.
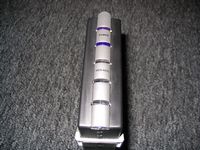
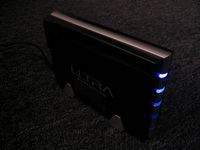
To make up some style points, the front of the enclosure features LEDs that indicate power and drive activity. Although there are 5 'lenses', there are only two LED functions, but as we will see later there are actually 4 LEDs to make sure enough light is generated.
 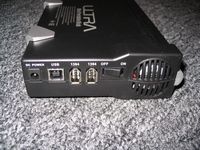
The above right image shows some of the features of interest. From left to right we have the power plug, a USB B plug, two Firewire plugs, a low profile power switch, and a 40mm fan. The layout of the connections seems convenient enough, and the switch is positioned to be easily accessed, even if all the connections are in use.
Taking a look at the four images above, you will see that there aren't many holes in the case, except for a couple very small ones on the bottom. The cooling fan is designed to blow hot air out the back, but where is it supposed to be drawing the cool air in? Hopefully there is enough open area for the fan to do its job.
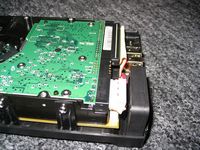
The image below shows an overview of the disassembled enclosure. This is accomplished by removing a screw from the center of each silver foot, and then sliding the foot off of the device. Once both feet are off, the two halves of the housing are still held together by clips beneath the band of silver trim along the top. A bit of pressing and prying gets things apart, but be gentle as it doesn't take much force.
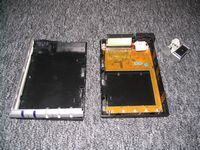
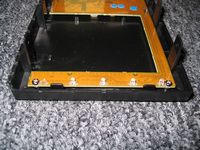
As can be seen in the image above, and in the close ups below, the Ultra Products ULT31310 uses one "C" shaped PCB to hold all electrical connections together, instead of running wires from a smaller PCB to the LEDs, and so on. The below left image shows the internal connections for accepting a typical IDE hard drive, and the below right image shows the 4 LEDs that indicate power and drive activity.
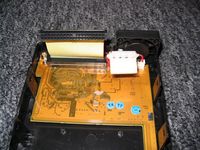 
In addition to the oddly shaped PCB, the other thing I noticed at this stage is that the 40mm exhaust fan was not secured to the enclosure, but just loosely held in a slot. It was free to move a bit, and upon further inspection I discovered traces of glue on one half of the housing. It was intended to be secured, or may have been secured at one point, but had come free. Be sure to check that, as it may lead to rattles and other undesirable noises during operation.
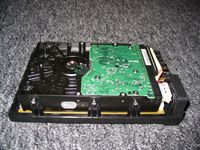
Installation isn't overly involved, and involves connecting a hard drive to the power and data cables, and then reassembling the device. Although it is not necessary to use all six screws, Ultra Products has provided tabs and enough screws to secure your drive at every mounting hole. Everything lined up nicely, and the only (mildly) difficult part was plugging the extremely short power lead into the back of the hard drive. There isn't much room for a longer lead, but the length did make it tricky to assemble. Once assembled and fully installed, the below right image shows just how close the power connection is to the exhaust fan. If the fan was not glued down, you could count on it hitting the plug and making some noise!
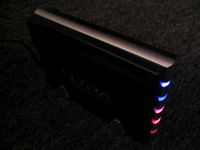
Once reassembled, the device was powered up, and the images below provide a glimpse at the light show it creates. The blue glow in the below left image indicates that the device is on and the drive is inactive. The additional red glow seen in the below right image is experienced when the drive is active. The lighting isn't overpowering, but it will do well to indicate the device's status, as well as make the case modders out there feel that this enclosure fits in with their system.
Please read on to the next page for more... Next
Page 1 | Page 2 | Page 3 | Page 4 | Page 5 | Page 6 | Home | Forum | Review Index
|
|


