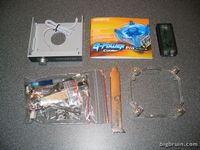
Accessories:
In addition to the cooler, all of the items pictured below are also included in the Gigabyte G-Power Cooler Pro kit. There are various adaptors for different CPU sockets, the fan controller module, a 3.5" bay fan controller, a bracket to use the fan controller in a PCI slot, a rather substantial (multi-lingual) manual, mounting hardware, thermal paste, and a few other odds and ends.
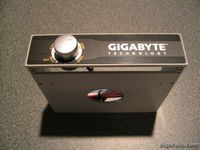
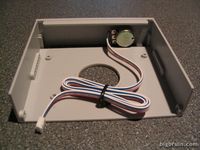
The images below take a look at the front and back of the 3.5" fan controller. The face of the unit not only indicates a speed, but also a noise level, which is a unique feature for a fan controller. To use this dial in the PCI bracket, you remove the knob and slip the potentiometer out the back, and reassemble everything around the PCI bracket.
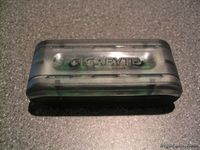
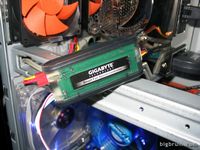
The small device pictured below is the "Smart Fan Speed Control" module which is required, in addition to either the 3.5" or PCI device. The 3-pin lead from the fan is plugged into this device, as well as the lead from the fan control dial. Then, an included lead is run from this device to a fan header on your motherboard. It seems to be an unnecessaryextra bit of hardware and wiring, but the proprietary wiring of the fan control dial's lead makes it required, if you want fan speed control. If you have a different fan speed controller, or don't care to use a fan speed controller, the 3-pin power connector on the fan can be plugged in anywhere you typically would connect a fan.
Installation:
Installation was completed on an Intel Pentium 4 Socket 478 system, as pictured in the images below, and descibed in more detail in the Testing section. The large tabs on either side of the cooler's base were used to accept two clips found in the collection of the G-Power's mounting hardware. The means of securing the cooler to the socket is fairly typical, but the oversized design of the cooler makes it far less convenient than your typical cooler. The radiator and fan combination overhangs the clips, and it is almost impossible to access this area with a system fully assembled. As with many of the larger heatpipe cooler assemblies, it is recommended that the motherboard be removed from the system in order to make installation as easy as possible. Getting other obstructions like the memory and graphics card out of the way will also help.
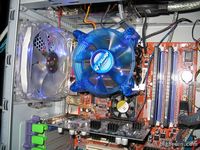 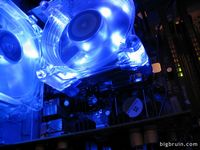
It may have taken longer to install this cooler, but it wasn't difficult by any stretch of the imagination, and required no tools in order to get the job done. The final instalation is well secured to the motherboard, and looks sharp, as shown in the images above. The image below shows the "Smart Fan Speed Control" connected for this installation.
Please read on to the next page for more... Next
Page 1 | Page 2 | Page 3 | Home | Forum | Review Index
|
|


