The Basics (continued):
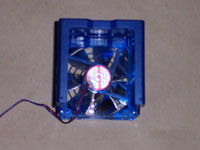
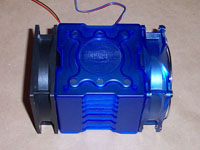
I noticed that you could attach a second 92mm fan on the opposite side of the included fan. This is a new design that I have not seen before. You can have the fan blowing cooler air into the heat sink, and the second fan pulling the air through the fins. I will test this later, after I have finished the stock layout testing. The 92mm fan attached to the fan assembly is rated for 1500 - 2800 RPM, with a noise level of 15 - 28dba. Unfortunately the fan power cable was not wrapped, which isn’t a showstopper, but if you're putting a nice looking heat sink into your PC, people will notice it. Wrapping the power cable would have been a nice touch.
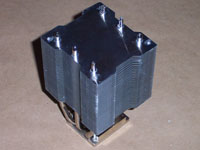
Removing the fan assembly, you can see the full heat sink, heat-pipes and aluminum fins. There are three sets of heat-pipes to cool the CPU. The top side of the base has a place for the mounting bracket; it is easy to install. These heat-pipes are bent into a U shape to dispense the heat through the aluminum fins. If you look closely you can see some little screw holes in the corners, this is how the fan assembly will attach to the heat sink fins.
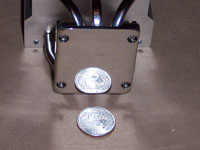
The base of the heat sink is made out of aluminum, with a nickel plate finish. The finish on the base is smooth and flawless, with a high-gloss mirror finish.
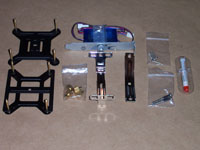
As with most universal heat sinks, Evercool has included a small tube of thermal paste, and all the various modern motherboard brackets for Intel P4, LGA 775, AMD XP, and 64. Many of us already have fan controllers, or our motherboards controls the CPU fans. Evercool does not stop at that assumption; they have included a PCI slot fan controller. This is a great addition, but would have been helpful if it would have been a 3.5 drive bay controller, or possibly be able to interchange them as necessary. For a complete installation, nothing is left for the user to provide.
Installation:
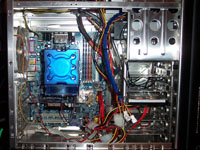
Installing the HPC-925 was simple. If you are replacing a heat sink, be sure to remove your old heat sink and clean off the CPU for any thermal paste left behind. Another pre-installation task is to make sure your motherboard will allow you to use screw-based brackets. This was an issue with my Gigabyte K8NXP-SLI motherboard; I resolved the issue by purchasing a 3rd party bracket that replaces the bracket that is supplied with the motherboard.
Since the heat sink itself is not very large, installation was simple. Place the thermal paste on the CPU, put the heat sink in place, add the bracket and screw it in.
Please read on to the next page for more... Next
Page 1 | Page 2 | Page 3 | Home | Forum | Review Index
|
|


