| ThermalRock Eclipse Mid-Tower Case - Page 3 of 4 |
Installation:
Lets start off with a list of what is going to get installed into the Eclipse case.
Asus A7N8X-E motherboard
AMD XP 2400+ Mobile with Alpha 8045 Heat Sink + Delta 5200rpm fan
1 gig Ultra PC 3200 (2x512)
Power Color 9600 Pro
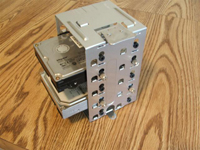
Maxtor 40 gig IDE hard drive
Maxtor 10 gig IDE hard drive
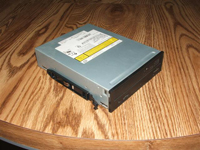
Samsung 16x DVD drive
NEC 8x DVD burner
Leadtek Winfast XP 2000 TV Tuner
PCI to USB 2.0 expansion card
Using onboard sound and NIC
Enermax 460 watt power supply
Sunbeam 20 in 1 front panel
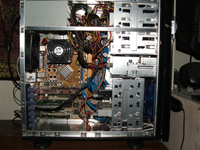
The first thing I did was to remove the rear I/O panel and replace it with one that fit my motherboard. The next thing I noticed was that one lone brass motherboard stand-off was already installed in the case, while the rest were in the plastic bag with the rest of the hardware. Looking a little closer this stand-off does not have a threaded screw hole but instead a small nipple sticking up to help align the motherboard when installing it. Once the other stand offs were added the motherboard slipped right in. Between the I/O panel and the special stand-off, it was very easy to align the motherboard. The special stand off was a nice touch that made lining up the motherboard much easier.
Once the mother board is mounted, you can put your tools away. The rest of the installation is totally tool-less. The 5.25 drives, as well as the 3.5 floppy drives, install with a drive rail that snaps easily to the drive and then slides into the drive bay.
 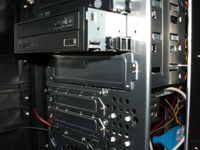
Although no floppy drives were installed, the floppy drive cage comes out very easily and is held in place by a simple to use spring loaded latch. I see no issues mounting any devices in this drive cage.
The hard drive cage has a small thumb screw securing it at the bottom of cage and a latch at the top. As mentioned before, the mounting holes have rubber grommets in them and small thumb screws are supplied for mounting up to five 3.5 hard drives. With the drive cage removed, the use of the thumb screws for mounting the hard drives was about as easy as it gets.
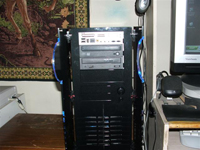
Although it was a pretty tight fit toward the end, I did manage to get everything stuffed into the Eclipse case with no issues. The layout is well designed and with a little work hiding the wires should not be too much of an issue. At this point I have not spent any time hiding anything and the case still does not look too messy.
Please read on to the next page for more... Next
Page 1 | Page 2 | Page 3 | Page 4 | Home | Forum | Review Index
|
|
|
|


