Contents (continued):
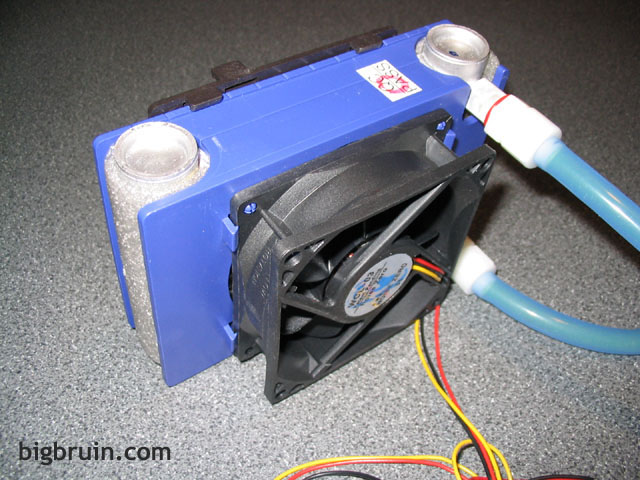
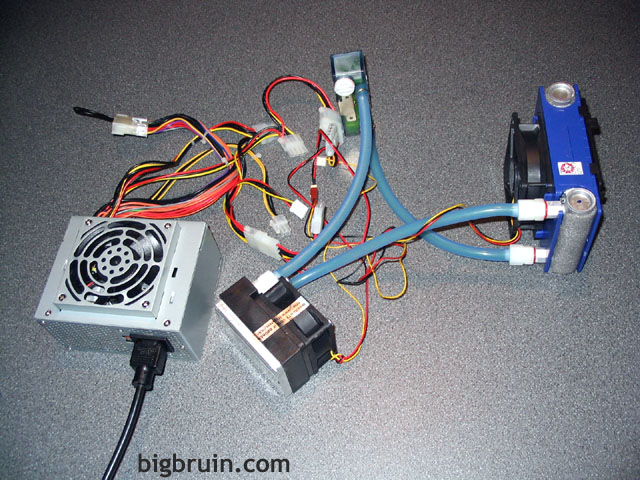
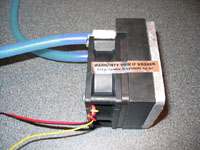
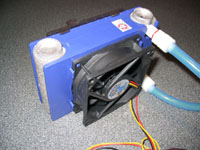
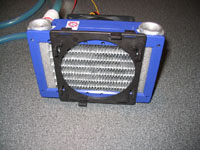
The images below provide a look at the water block / pump combination. The aluminum water block is attached to a slim black housing, which in turn has a 60mm fan mounted to it. You may be asking, why a fan? Or if you noticed that the base of the fan is sealed you may be asking, where does the air go? The design is fairly clever, and makes for a simple drive mechanism that reduces the chance of leaks. The pump is magnetic, and therefore requires no physical coupling to drive it. The fan is simply there as a motor to drive the pump which is located in the black housing between the water block and the fan. An exploded view of the pump can be see at this link on the 3RSystem website, which makes the operation more clear. The wired lead to the pump (fan) is split to accept power from a 4-pin connection, while allowing RPM sensing via a 3-pin connection. While running at a full speed of about 2400 RPM (according to Motherboard Monitor 5), the fan and pump are nearly silent.
 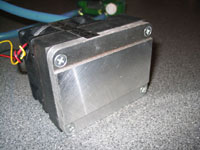
The base of the water block is visible in the above right image, and isn't all that impressive. The aluminum is fairly flat, but not particularly smooth featuring machining marks and various other nicks and imperfections. Many reviews will polish the finish of a water block before testing, which seems like cheating to me... The manufacturer sent it out this way, so they must intend for it to be used this way (and it will be for testing, although I'll probably get it nice and smooth for a final install).
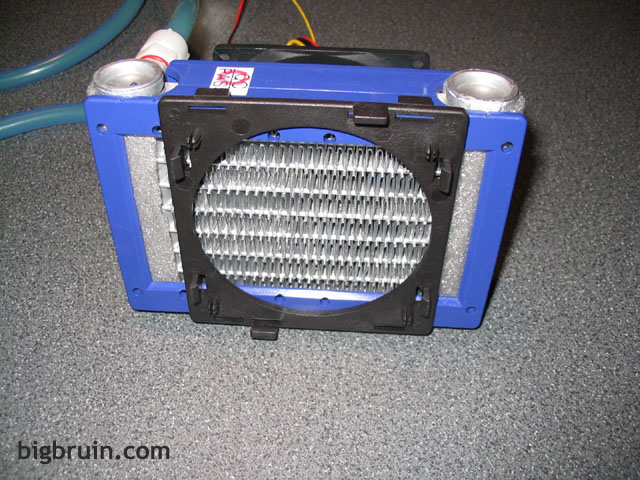
The compact aluminum radiator has a capacity of 60 CCs (2 ounces), and uses a four pass arrangement to optimize the surface area for heat transfer from the water to the air. As pictured below, the radiator is housed in a blue plastic shroud which features a tool-less mount for an 80mm fan on one side, and includes a removable black bracket for adding another 80mm fan to the other side. The low noise 80mm fan included with the kit spins at 1400 RPM, and receives power via a 3-pin connector. The ends of the radiator are wrapped in adhesive-backed foam, identical to the spare sheet pictured earlier in the review.
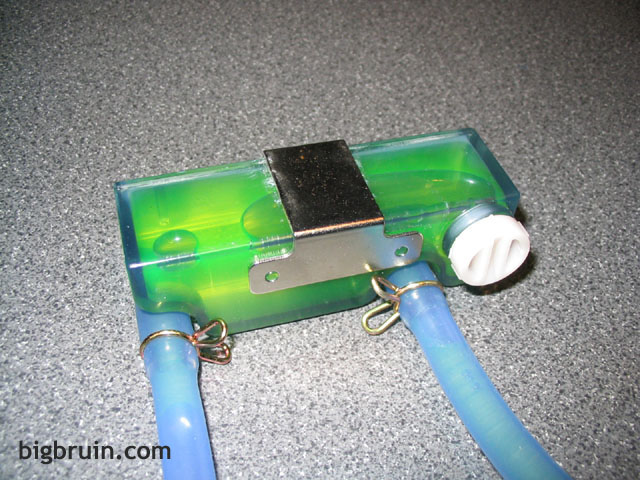
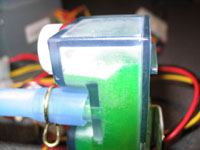
The translucent green reservoir has a fluid capacity of 35 CCs (1.2 ounces) and can be replenished via the white cap pictured below. The opening is quite small, and it would be wise to find a syringe or eye dropper to make refilling easier. While the water block and radiator use plastic compression fittings for accepting the tubing, the reservoir features much less attractive spring clamps to squeeze the tubing to stubs. The seal is still water tight, but these connections are far less robust.
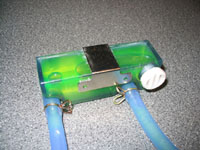 
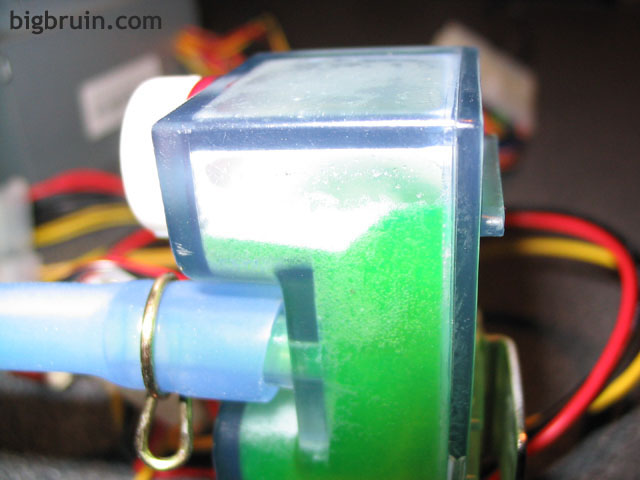
The above right image shows a close up of the spring clamps found on the reservoir, as well as showing the level of fluid found in the reservoir upon delivery. The water foamed until it was topped off, which could also be remedied by the inclusion of one of the additives available such as Water Wetter and InnovaProtect. The manual details that only distilled water should be used in the system, but I will eventually add some InnovaProtect for good measure.
Installation / Operation:
Before the Poseidon WCL-03 was installed into a computer, it was leak tested for about 30 hours. As shown below, it was left out, connected only to a test power supply and monitored for any leaks. No leaks were found, and after this phase of testing the reservoir was opened and topped off with distilled water using an irrigation syringe.

The leak check was the first time power was put to the Poseidon WCL-03, and I initially assumed there was a problem... I connected the wires to the power supply, plugged it into the wall, and I heard nothing. I quickly checked all the connections (all good), and leaned in for a closer look, at which point I noticed it was indeed running. The fans are nearly silent, earning their label of "Noise Zero", and at this stage of the testing I am confident this is the quietest cooler I have yet to test!
The Poseidon WCL-03 CPU Water Cooler was installed on a system with the following specifications:
AMD XP2800+ processor
Gigabyte K7 Triton nForce2 Ultra 400 Motherboard
Sapphire Radeon 9600 AGP card
512 MB GeiL PC3200 DDR memory
Hercules GameSurround Fortissimo 7.1 sound card
(2) Maxtor 40 GB ATA-133 hard drives in RAID-1
Windows XP Professional operating system
Enermax CS-10182-BA Server Tower Chassis
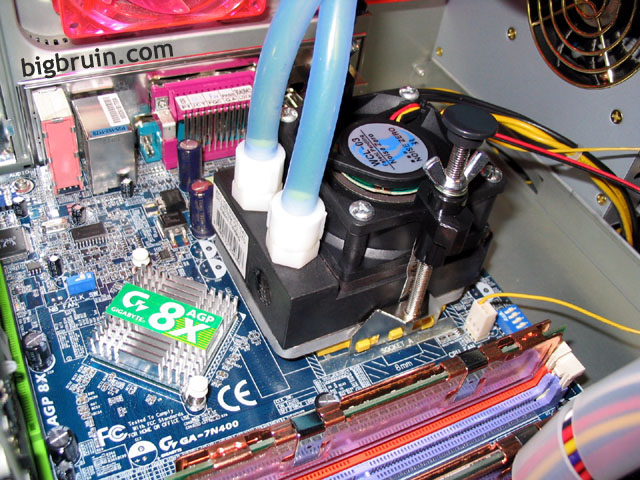
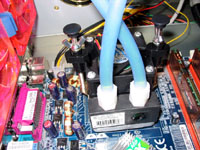
The images below show the water block securely fastened to the motherboard in the recommended orientation... The manual suggests placing the tube connections either 90 or 180 degrees clockwise from the step in the CPU socket. With the metal clips hooked to all three mounting lugs, the wing nuts were then tightened in an alternating pattern of one turn for each screw. When finished, the wing nuts bottom out on the plastic clip, and the whole mechanism is securely fastened to the motherboard! Although the extensive tightening of the screws had me concerned about crushing the CPU core, all went well, and I was relieved to see the fit work out so well.
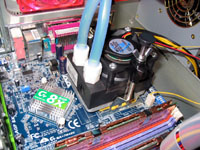 
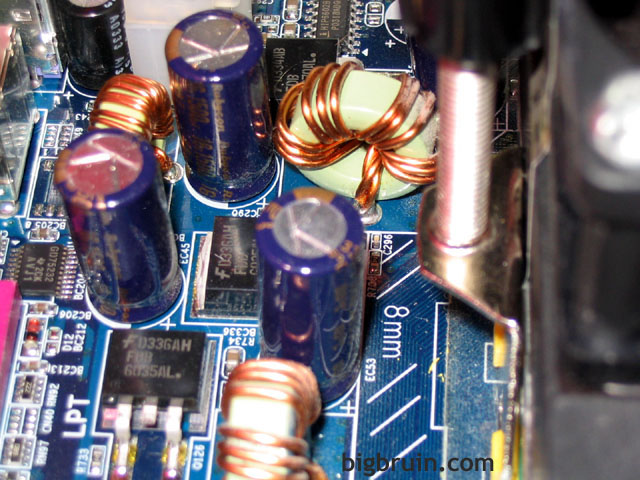
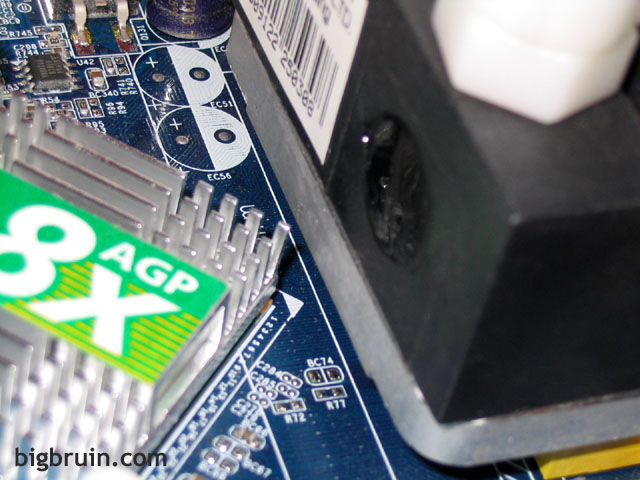
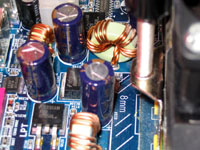
The images below show close ups of some of the motherboard features that the WCL-03 water block comes very close to. Each motherboard has a different layout, but the slightly elongated shape of the water block could create interference with capacitors, the northbridge heatsink, or other common features. If the northbridge heatsink on this board wasn't such a minimal design, there may have been problems with the installation...
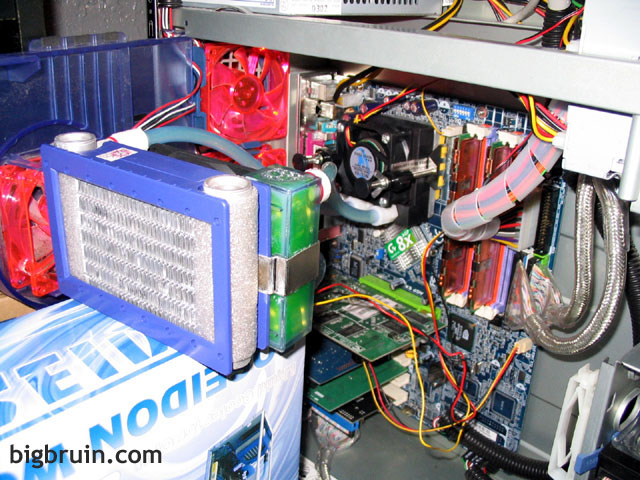
The Enermax CS-10182-BA seemed like a great choice for this cooler with numerous 80mm fan mounts, including; two on the side, two on the back, and one on the top. I had hoped to use the case's top fan mount for installation of the radiator/fan, but the tubing wouldn't reach. I then realized that the tool-less fan mounts found on the case, and the tool-less fan mounts of the WCL-03 were going to make installation in any position a little tricky. You can't quite make it happen, and some improvisation will be necessary for a permanent solution... which I haven't developed yet. So, testing was conducted as pictured below, with the WCL-03 sitting atop its box, blowing into the open case.

Please read on to the next page for more... Next
Page 1 | Page 2 | Page 3 | Home | Forum | Review Index
|
|