| Sunbeamtech Tuniq Tower 120 CPU Cooler - Page 2 of 4 |
The Basics (continued):
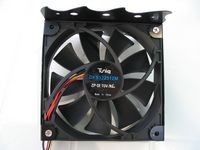
Below we see the fan removed from the cooler. A large metal plate with a box frame holds the fan with a few screws. For final assembly, this is then slid down through the middle of the radiator and held in place with four more screws. The fan is a somewhat plain looking black unit with a total of 9 fins that should push a little more air than a similar fan with fewer blades. Due to the standard design of the mounting, the fan could be swapped out for any other 25mm thick 120mm fan, allowing those with a penchant for LED fans to pick the color of their choice.
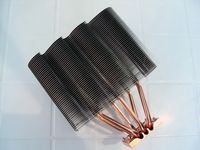 
The top view is what a user would see through a case's side window, and the 'flame' pattern cut into the fins gives the Tuniq Tower a little extra style. The ends of the heatpipes can be seen poking through the top plate, as well as the four screw holes that are used to secure the fan assembly to the heatsink.
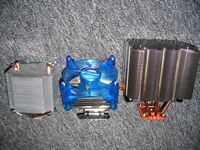
And to further emphasize just how large this cooler is, have a look at it side-by-side with an Arctic Cooling Freezer 4 and the Gigabyte G-Power Cooler Pro. It dwarfs these other coolers, which I used to think were bigger than usual.
Accessories:
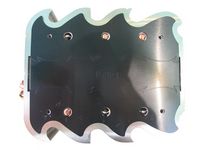
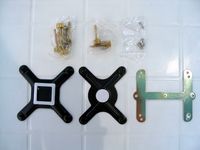
The kit includes more than just the cooler, and the following pictures show the extras that ship with the Tuniq Tower. The below left image shows the two back plates for Socket 478, LGA775, and K8 (754/939/940) motherboards, the H plate which goes on top of the cooler's base, and the various screws that may be needed for installation. The H plate has holes for the screws to pass through, and each is marked to indicate which type of motherboard they were intended to be used with.
 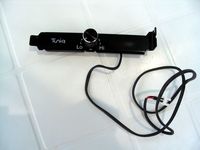
The above right image shows the PCI bracket fan speed controller included. The fan has two leads coming off of it, and one is specifically socketed to receive the fan speed controllers lead. If a user did change out the fan, the use of the fan speed controller would most likely be eliminated. Many coolers now include a fan controller that can either be used in a PCI slot, or in a 3.5" drive bay. I am more inclined to use one mounted in the front of the case, and it would be nice to see one included with the Tuniq Tower.
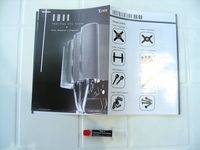
The other items found in the box include a syringe of thermal paste and a fairly detailed manual with text and images to walk you through the installation on any system.
Please read on to the next page for more... Next
Page 1 | Page 2 | Page 3 | Page 4 | Home | Forum | Review Index
|
|
|
|


