External Features:
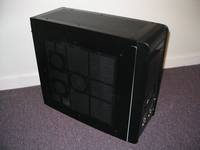
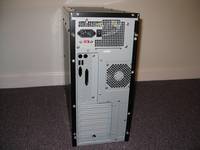
The below left image gives an overview of the case from the front corner. You can see all of the perforated holes in the side, front, and top, which give the case its unique appearance and hopefully a cooling advantage. Although the holes are part of the case itself, you can see an array of screw heads around each perforated area. These function to hold an internal filter to the inside of these areas. This filter is a woven synthetic material, perhaps nylon, which should allow air and heat through, but will hopefully cut down on dust inside the case. This image also makes it look like the side panel doesn't fit quite right, due to the wide gap at the lower front edge. This was remedied was the case was taken apart and put back together... it just shipped that way.
 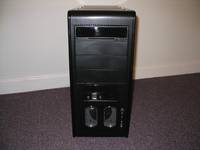
The above right image shows the front of the case, where you have 4 exposed 5.25" bays and 1 exposed 3.5" bay. It may look like 2 3.5" bays, but the USB and audio panel is permanently affixed to that location. One of the 4 5.25" bays features a stealthed optical drive cover, and in the accessories you receive a second one of these, making sure that your DVD/CD drives will match the case well, no matter what. At the bottom of the front of the case, you see a unique dual oval cutout with an open mesh insert, which is the inlet for the front case fan.
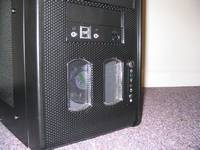
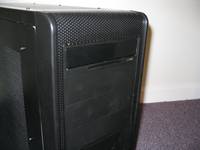
The below left image provides a close up of this fan inlet, where you can get a better look at what reminds me of a car's grill. Just to the right of the openings you have the power and reset buttons, along with the power and HDD activity lights. The below right image takes a closer look at the top portion of the case's front and especially the stealth optical drive bay cover.
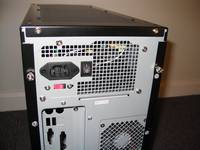
The images below show off the back of the case. You can see the fairly open pattern cut for the 80mm exhaust fan, and that the power supply has no fan on the exterior. As mentioned earlier, it uses one 12cm fan, and it is located inside the case.
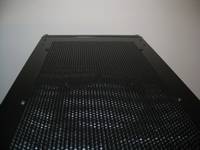
The below left image details the top of the case, where you can see more of the tiny holes punched into the steel. Behind this surface, and many others, you can make out the brackets used to mount fans, as well as other features perhaps just intended to strengthen the panels.
 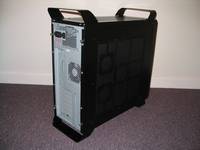
The above right image shows off the case with the feet and wings installed. Each of these brackets has two clips to pop them into place, as well as two screws that firmly secure them to the case. They provide some more style points to the case, as well as adding handles rigid and strong enough to be used to lift a full case. With them installed, my mind quickly rushes back to the 1980's and I see a paint job making this case into the A-Team's van with ease!
Please read on to the next page for more... Next
Page 1 | Page 2 | Page 3 | Page 4 | Page 5 | Page 6 | Page 7 | Page 8
Home | Forum | Content Index
|
|


