| View previous topic :: View next topic |
| Author |
Message |
jedihobbit
Rated XXX

Joined: 22 Mar 2007
Posts: 238
Location: Central Virginia, USA
|
 Posted: Tue, 13 Oct 2009 18:22:33 Post Subject: DreamCatcher 3.5.....THE LAST VARIENT!! Posted: Tue, 13 Oct 2009 18:22:33 Post Subject: DreamCatcher 3.5.....THE LAST VARIENT!! |
  |
|
As mentioned in the last entry for DreamCather v2.0 in January of this year many changes have occured, so........
Due to being fickle and determined by the fates, DreamCatcher has again morphâed and I decided to attempt one last worklog. The âoriginal last buildâ was supposed to be DreamCatcher v3.0. However with me not making up my mind as to what was going to go where (especially with several new components showing up); all of my builds went through several changes (on paper thanks goodness!). Ultimately this lead to DC no longer being top dogâ¦â¦.and it has received a parallel transfer.
After much hem and hawing it was decided to keep DC as the âblingâ water cooled system, but it changed positions with Kermit the Folder. Since the mobo/proc assembly has changed and it will be my primary SMP folder this will be DreamCatcher v3.5. Much thought went into this as originally it was slated to receive the Asus M3A78-CM / Kuma 7750BE. I felt that if DC v3.5âs primary mission was to look pretty and be water cooled a tri-core would make more sense. Had thought of including the GTX 260-216 also but couldnât afford the water block. Here are the mechanicals:
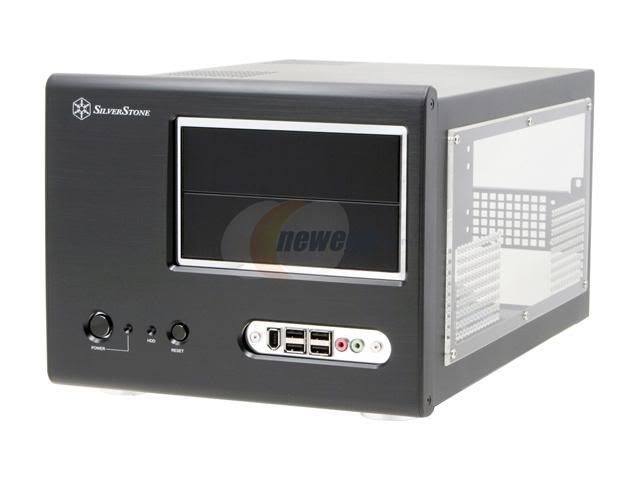
CASE: SilverStone SOG1
PSU: Enermax Infiniti 650W
MOBO: Biostar Tf780G AM2+
CPU: AMD PI X3 8750BE
HSF: Cuplex XT di
GPU: Evga 8800GTS w/AquagraFX 8800
MEMORY: TWIN2X2048-8500C5DF
HDD: Seagate 7200.10 ST380815AS 80GB
Optical Drive 1: TBD
A lot of things occurred between v2.0 and the now v3.5, hopefully Iâll present it in a meaningful manner. One of the reasons an Ultra MX6 (v2.0) case was dropped is primarily due to wanting a full coverage water block for the GPU. In the MX6 the PSU is directly above the vid card which precluded using the one I wanted. In the SG01 the PSU has been moved above the CPU giving me the extra room required.
February, 2009
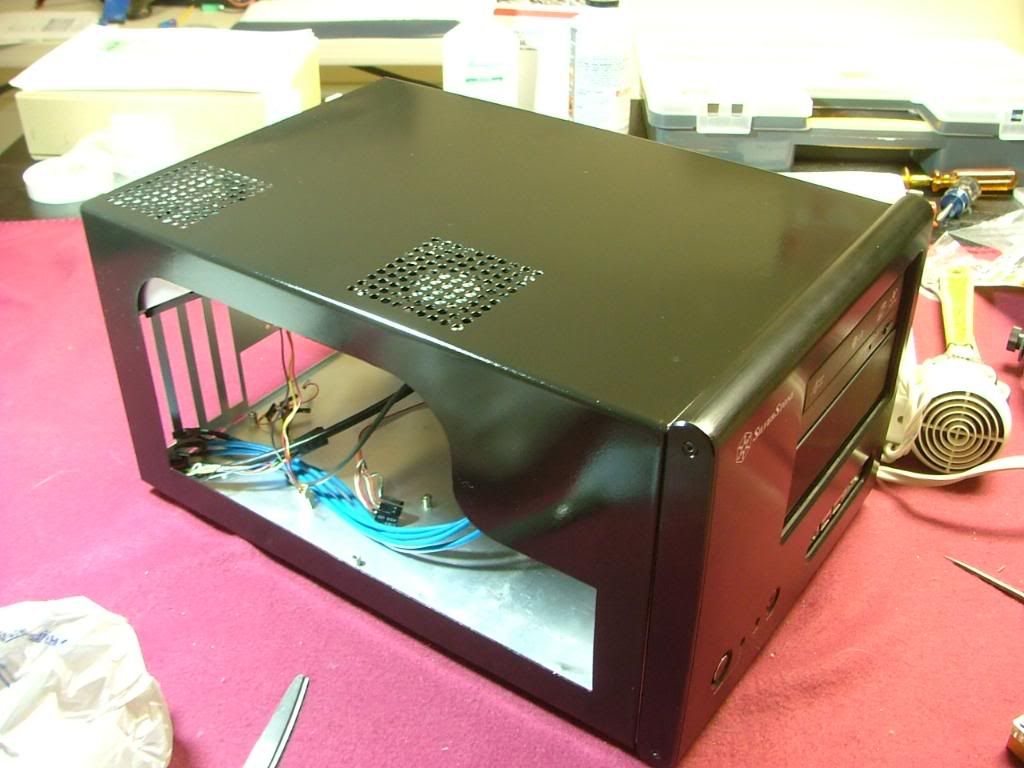
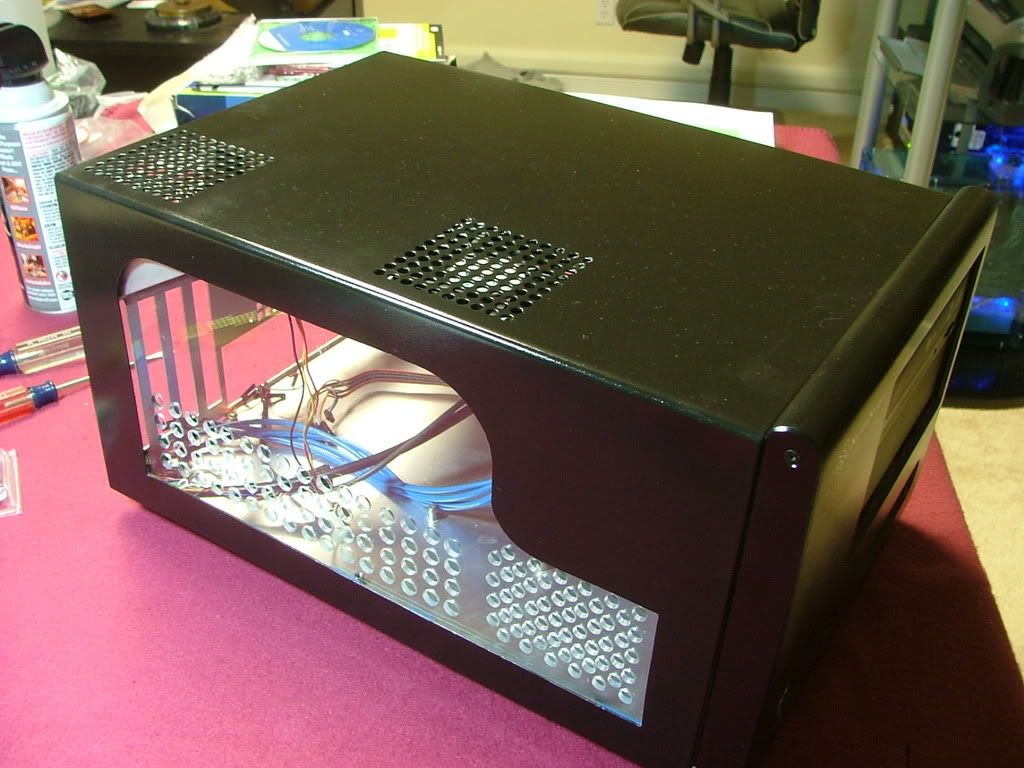
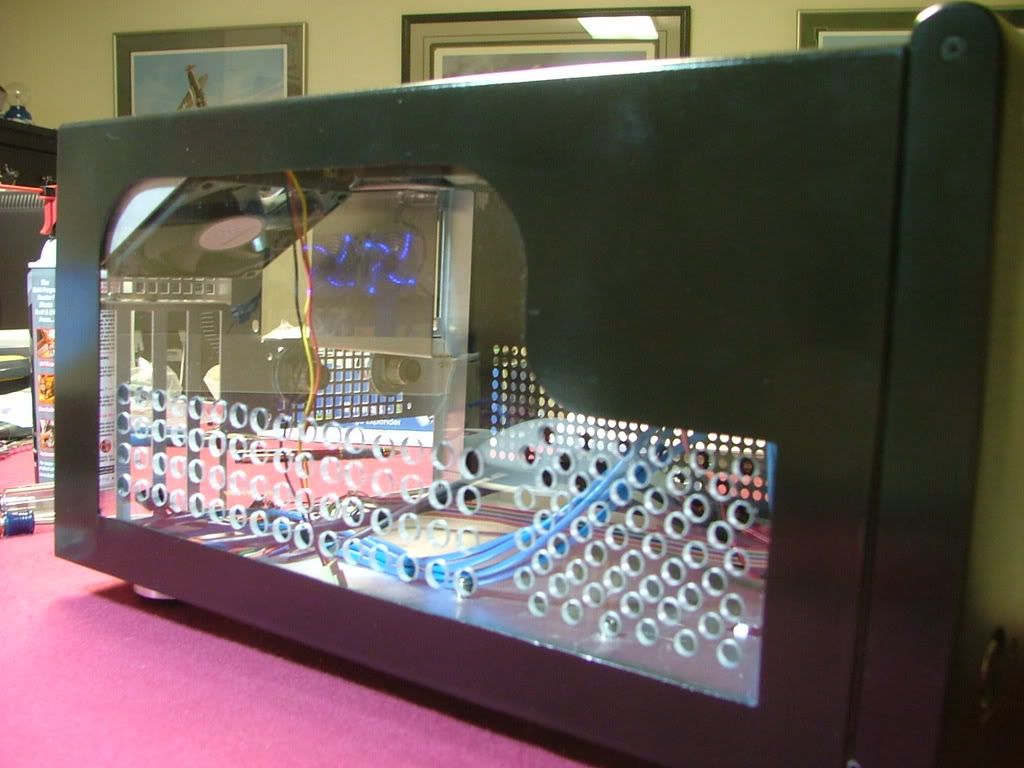
The case was bought used and the prior owner cut a window in the side and apparently had a rad screwed to the top. These are his picturesâ¦â¦â¦ and yes the dust was free!
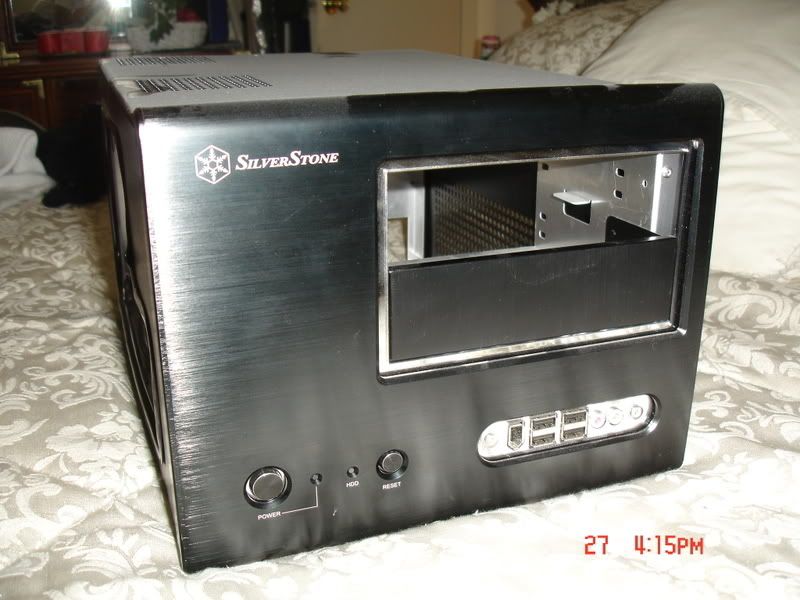 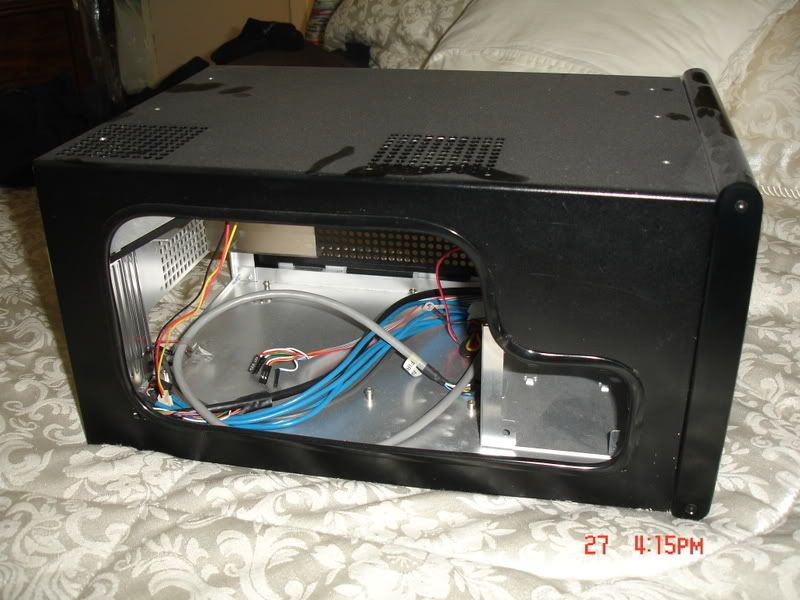
Something the prior owner must not have taken in to consideration when doing the window is how little space there is between an interior window and the frame. Edging had been used to cover the cut, but if one was to attach a piece of plex for a window with the edging in place it would not have fit.
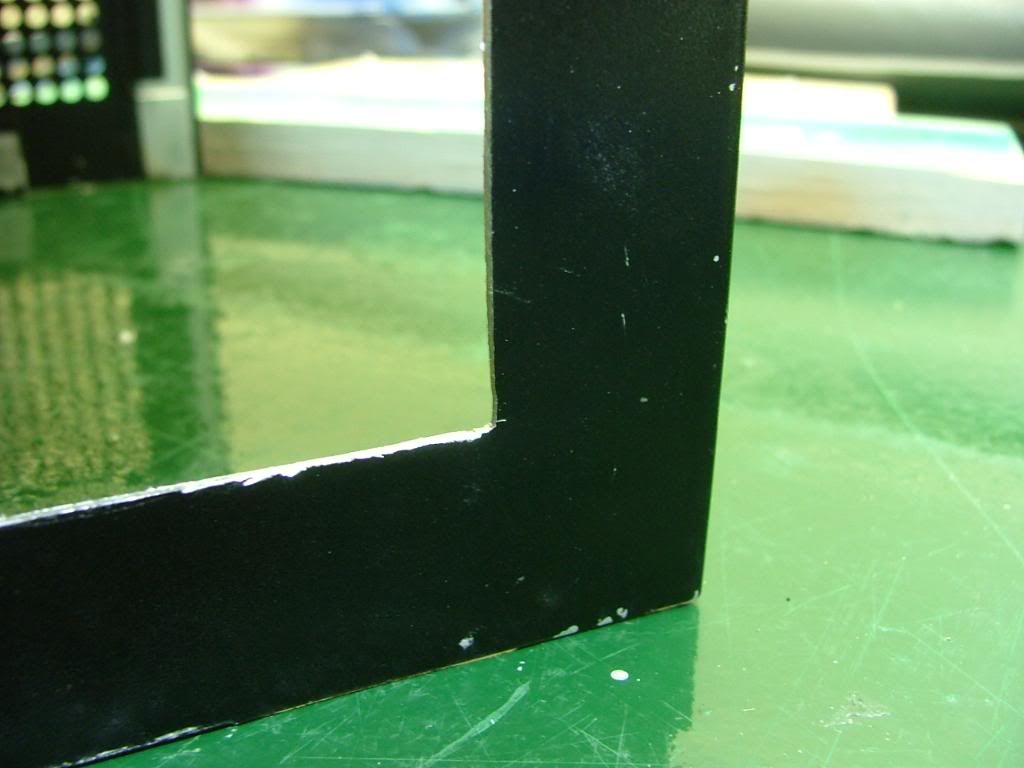
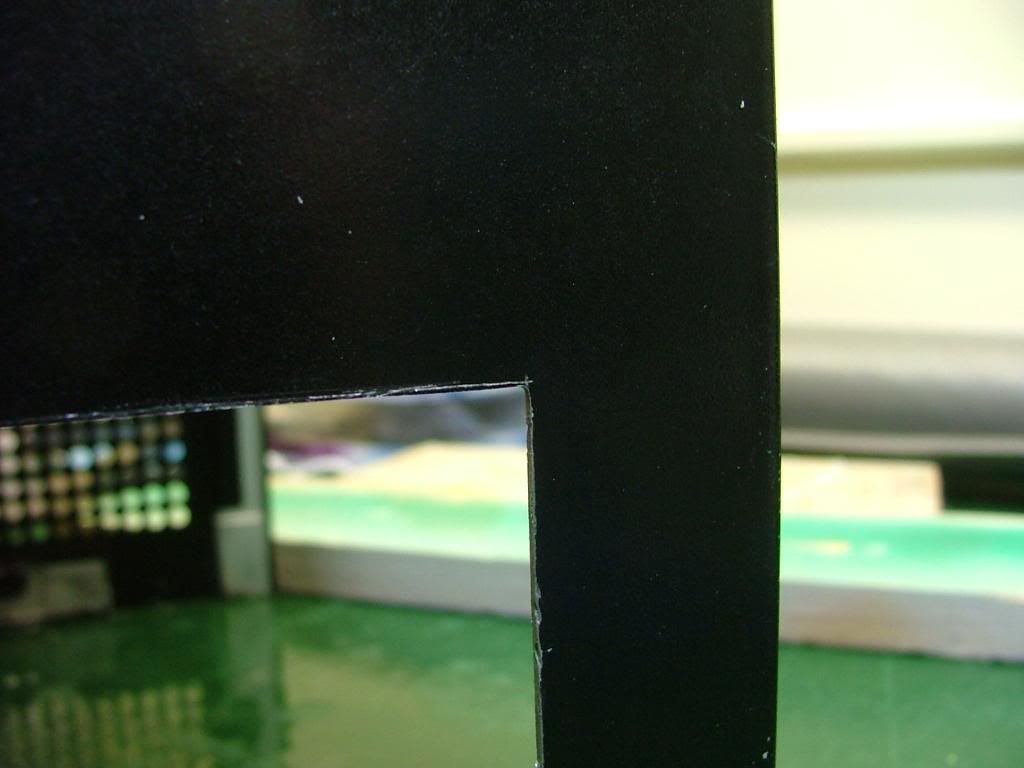
So I removed the edging and found a pretty good edge for the cutout. Where it was âroughâ is in the bottom corners where the cooling holes are located. As you can see here â¦â¦â¦.
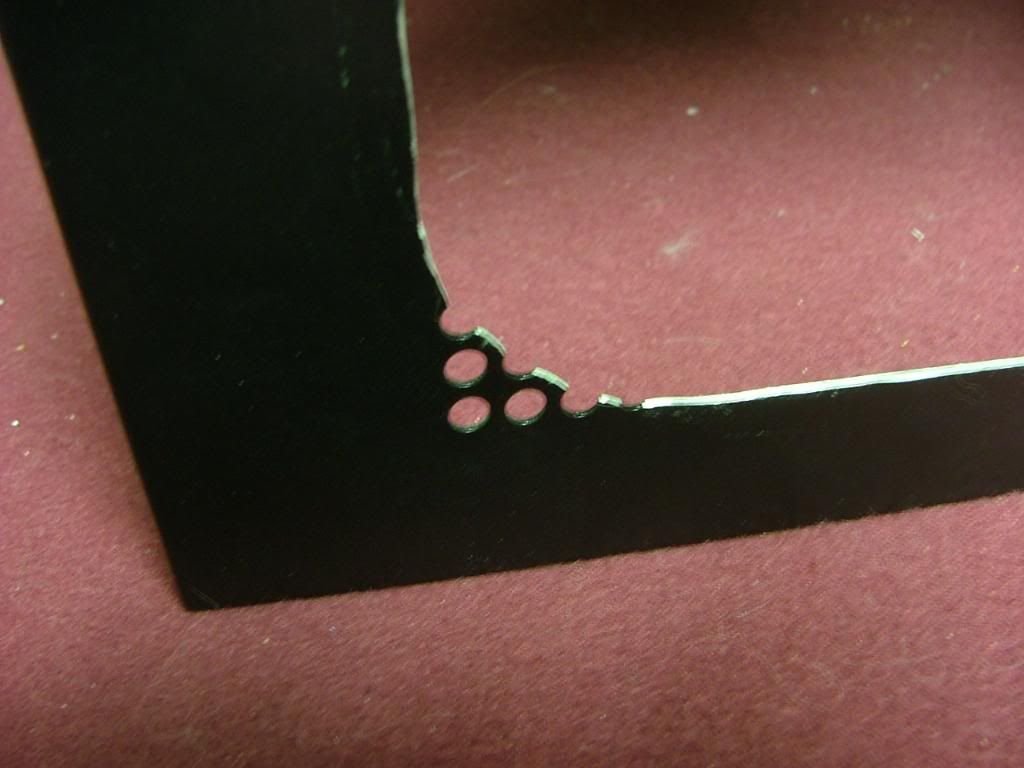 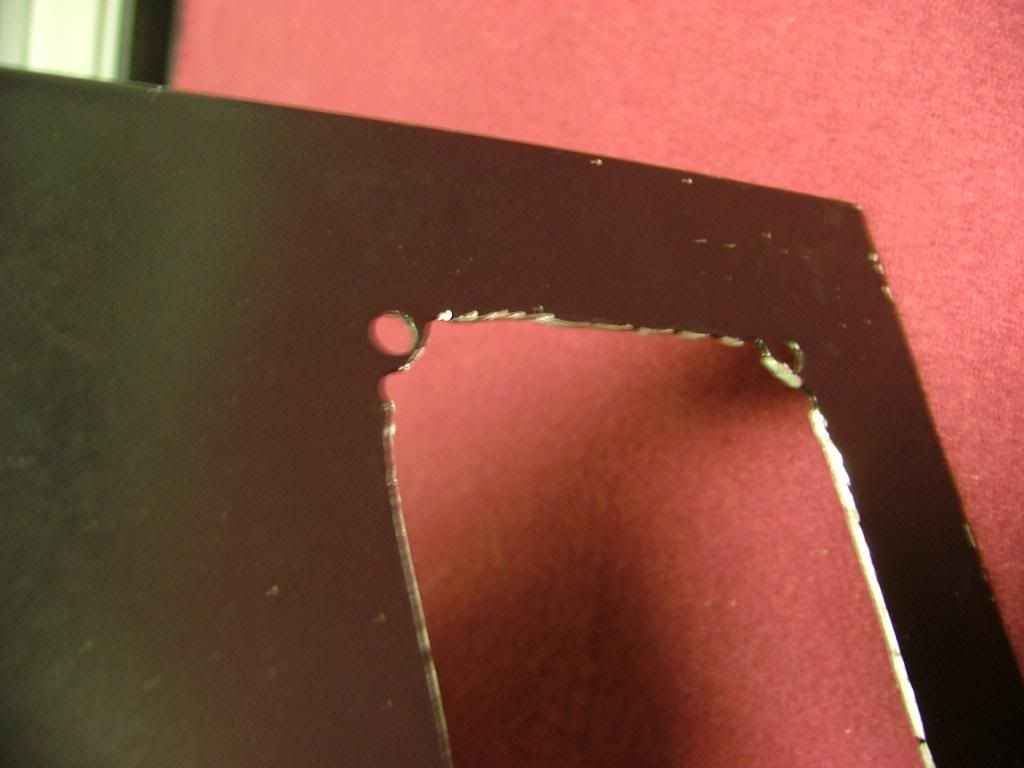 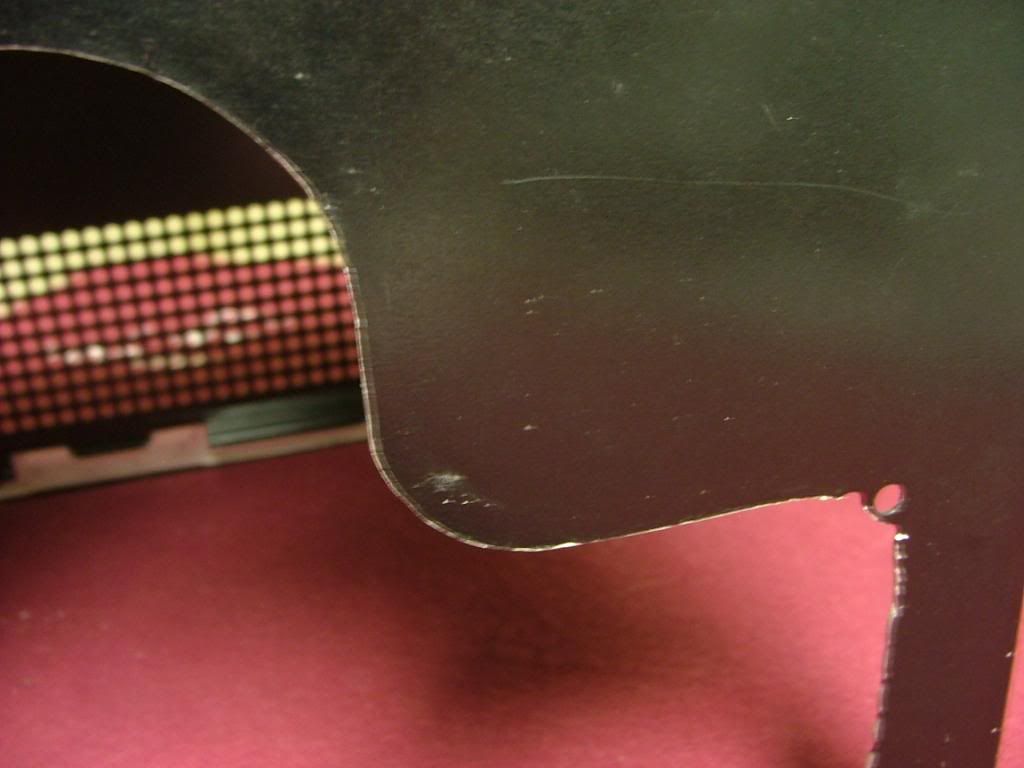
I decided to âsquareâ the corners as best I could and file the âroughâ areas to be the finished edge and attach the window behind. I now know why the SOG1 factory windows are mounted on the outside.
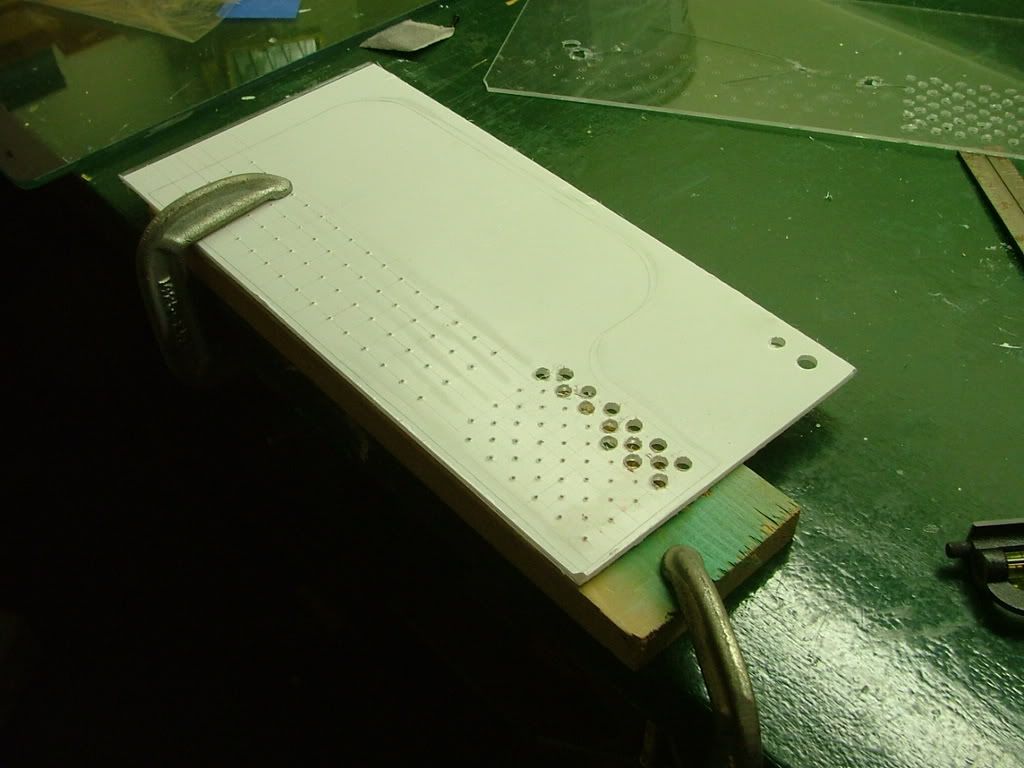
Had a spare piece of plex lying around so decided to do an âengineering sampleâ of the window. One of the big things in putting in that window is Iâve lost all of the lower cooling holesâ¦.especially those required by the hdd cage fan.
I taped the plex to the opposite side and scribed holes based on it hole pattern. My spacing and sizing will be different as Iâm afraid of cracking the plex if the holes are too close. Decided on multiple small holes in the hdd area with fewer large holes (3/8â) for the rest. Here you see the rough layout with center punches prior to drilling. The centers are âeye-balledâ so it wonât be all that nice and neat!
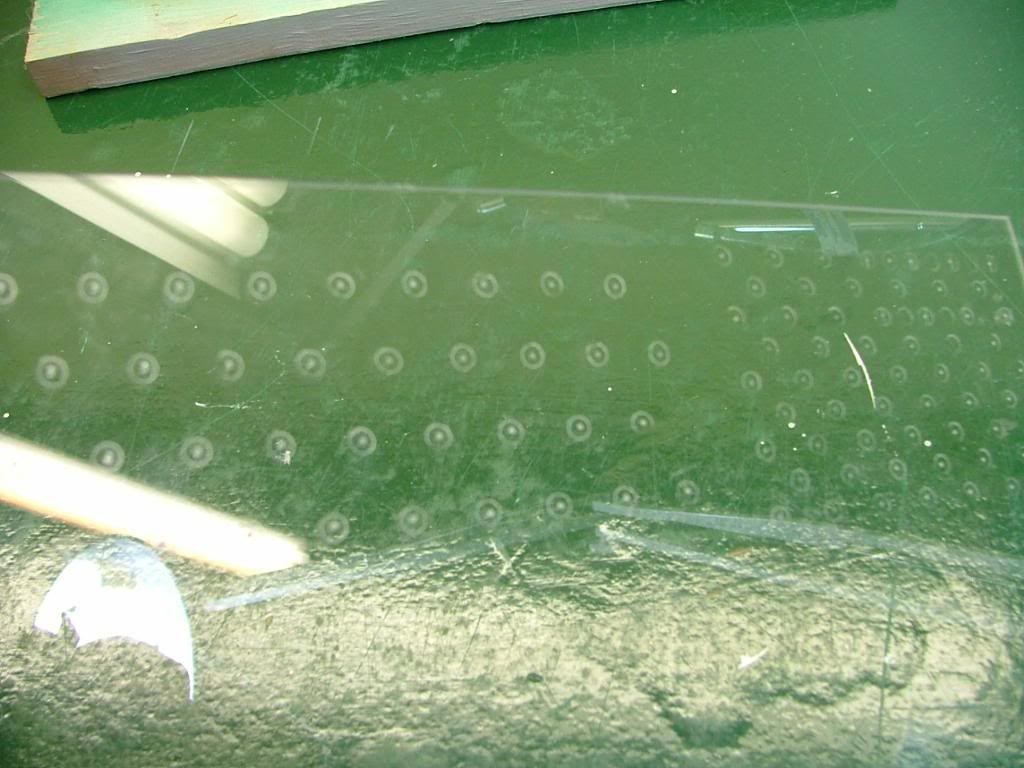
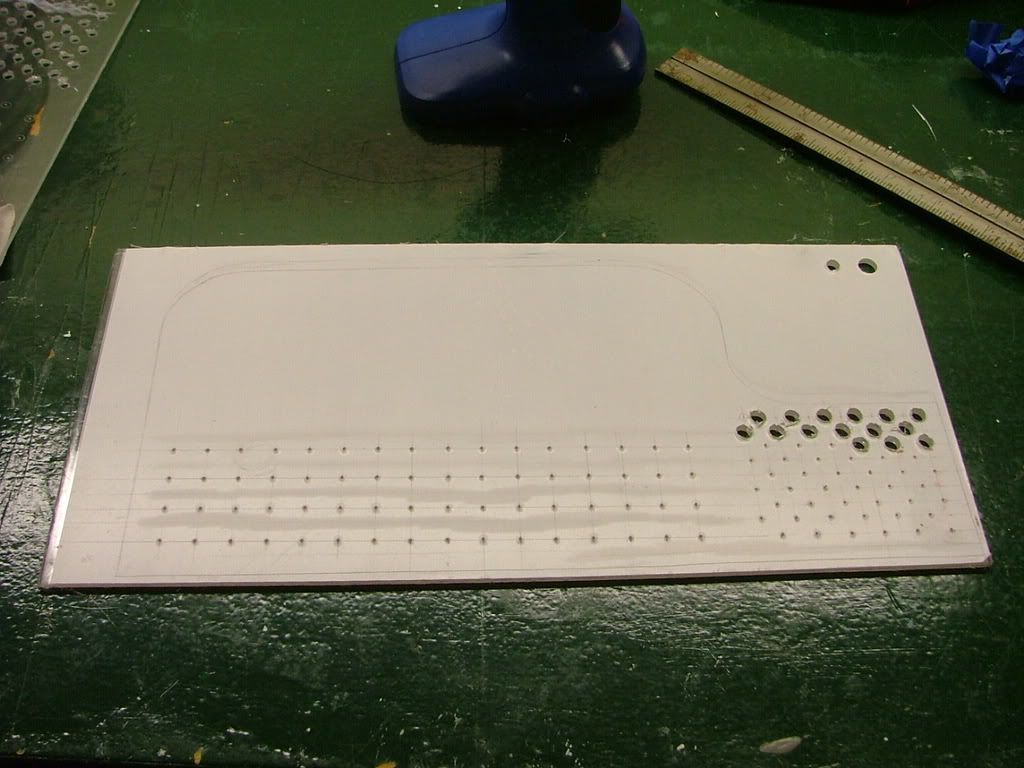
You may wonder why I call the window an âengineering sampleâ, quit simpleâ¦â¦â¦.
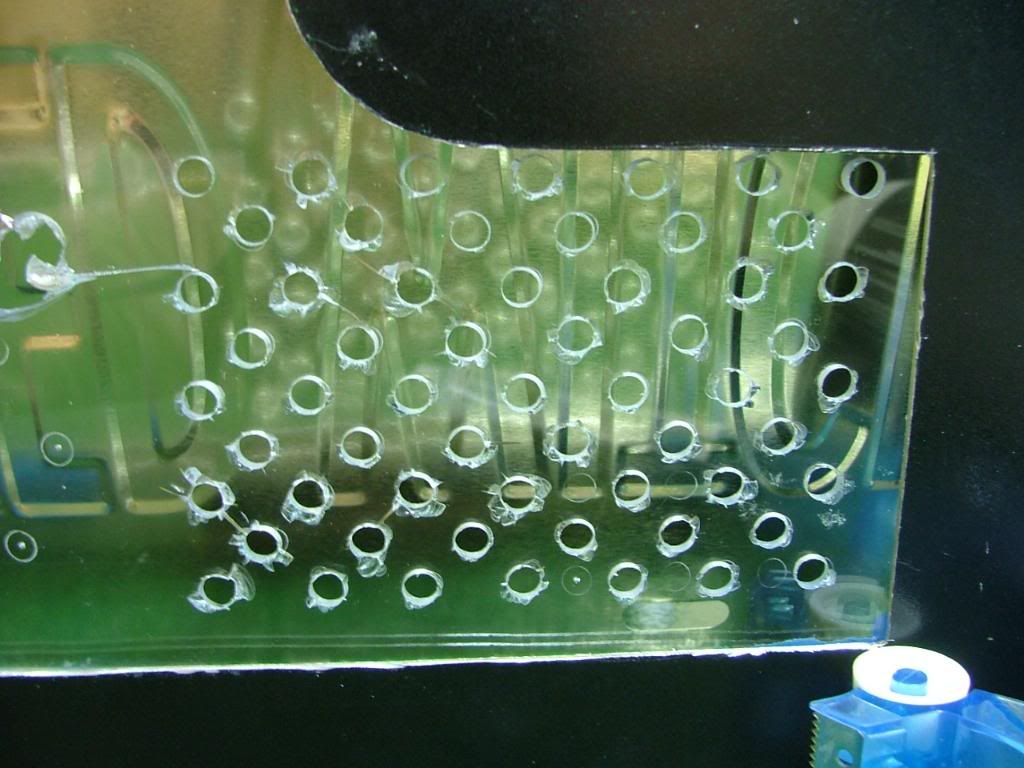  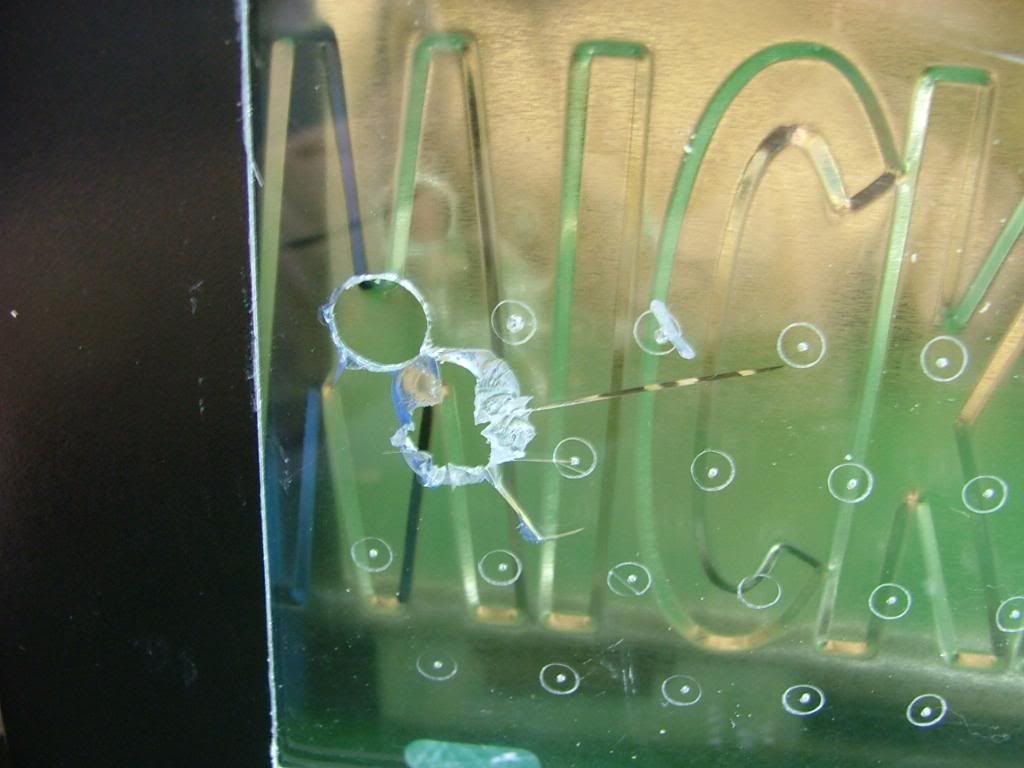
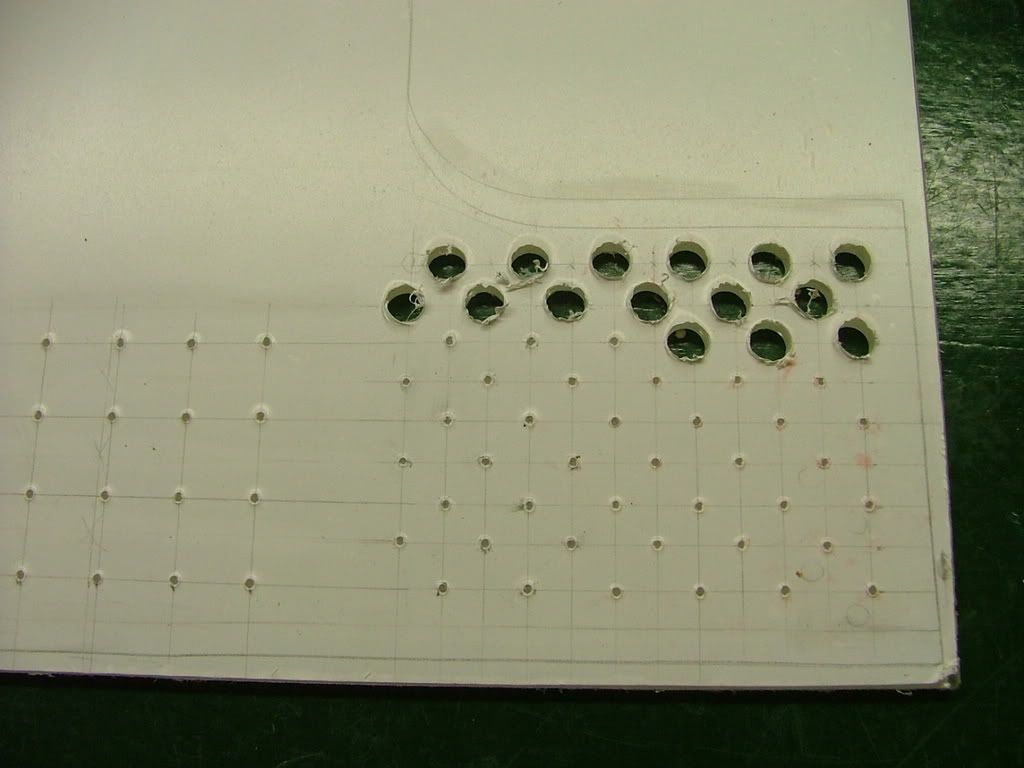
By âexperimentingâ on hole sizes and locations Iâve saved a wee bit of heart break. You can see the material I have on hand is too brittle to drill. What I was able to do shows me the hole spacing is fine, but the pattern for the HDD fan needs to be lowered. Now to find some lexan to work with.
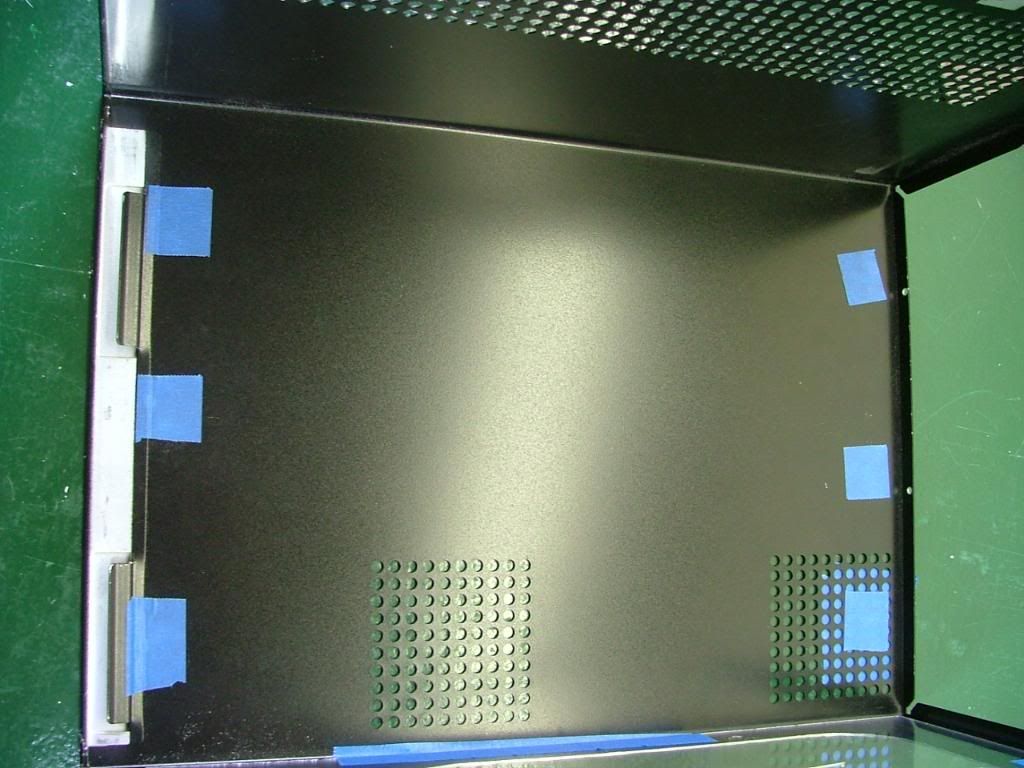
Needing to patch the holes in the top of the cover I drug out the stuff I used when doing the side panels of my original (unfinished and in the attic) Celtic Spirit.
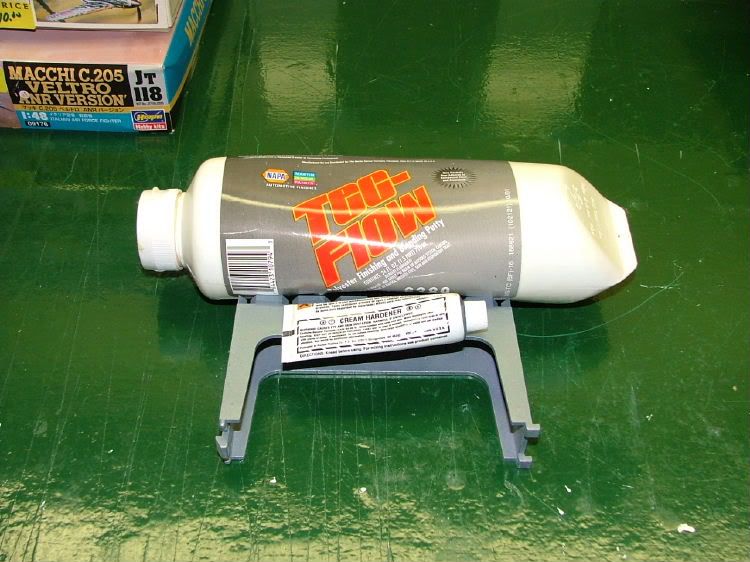
It is easy to use and I just hope not too old! Backed the holes using âpaintersââ tape with the hopes of only needing to sand one side. It turns out I mixed too little catalyst requiring about 2 â 2-1/2 times longer to cure. Then it was sanding time!! Also took the opportunity to smooth out as best I could the edges of the window opening.
 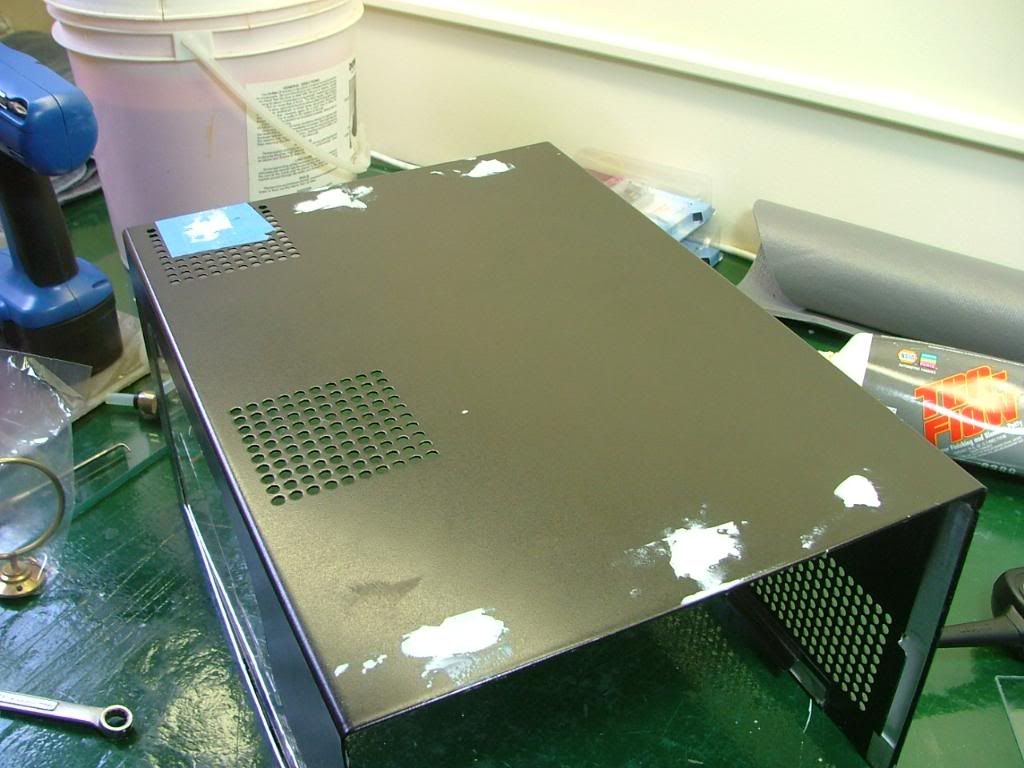 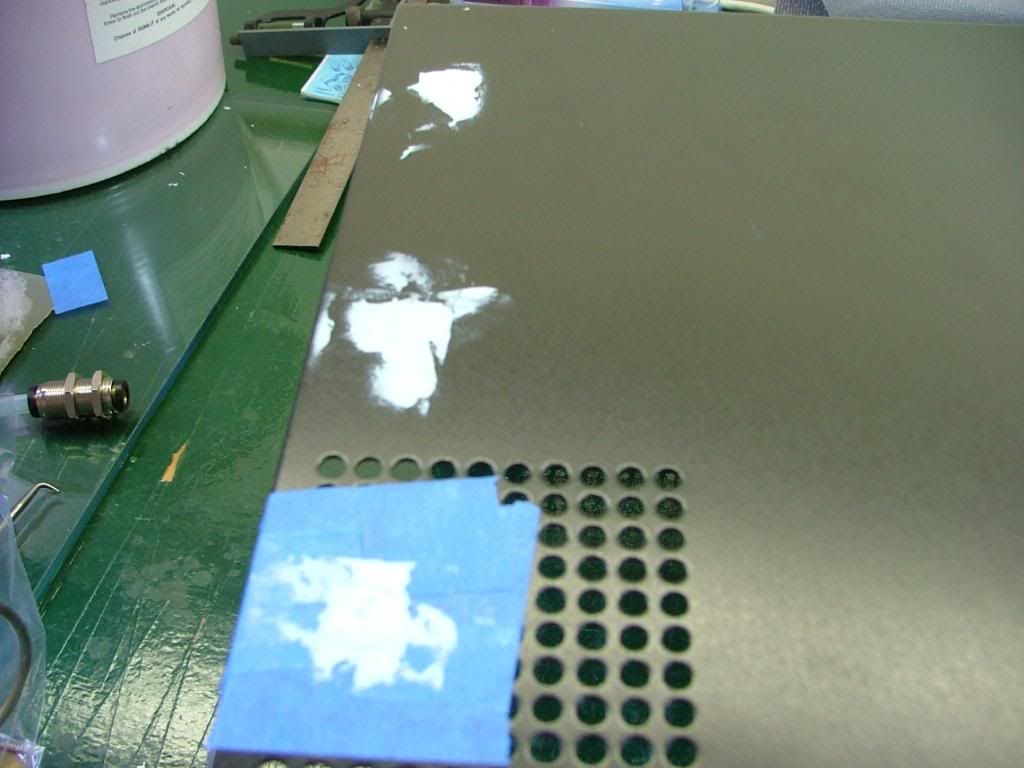 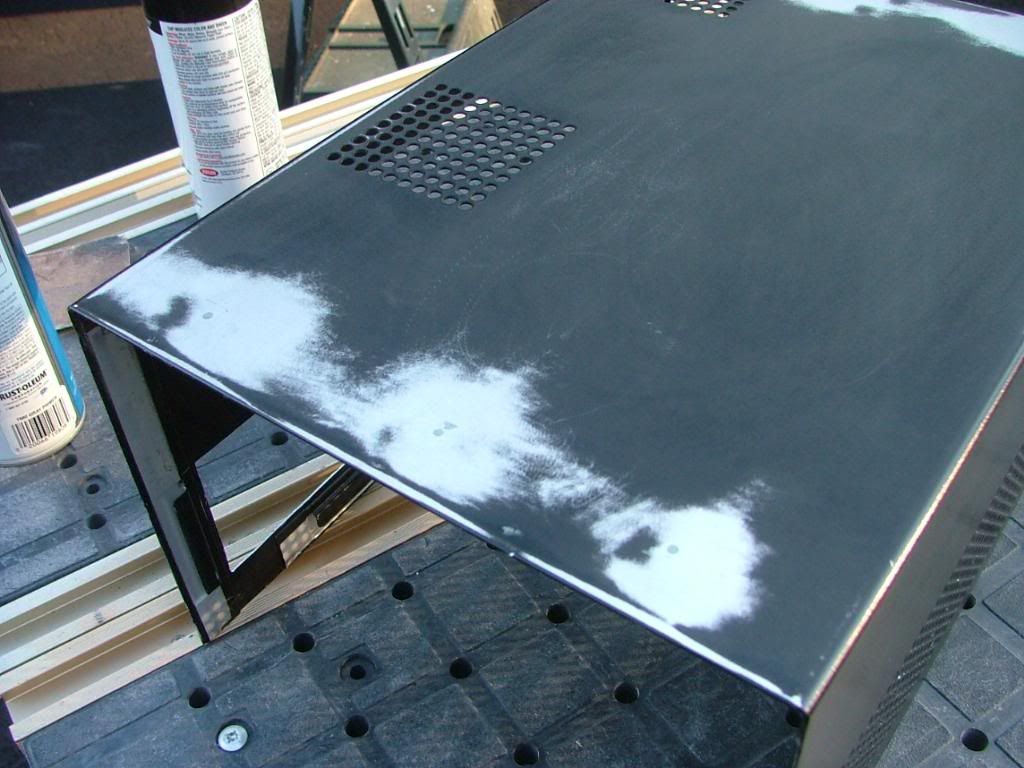 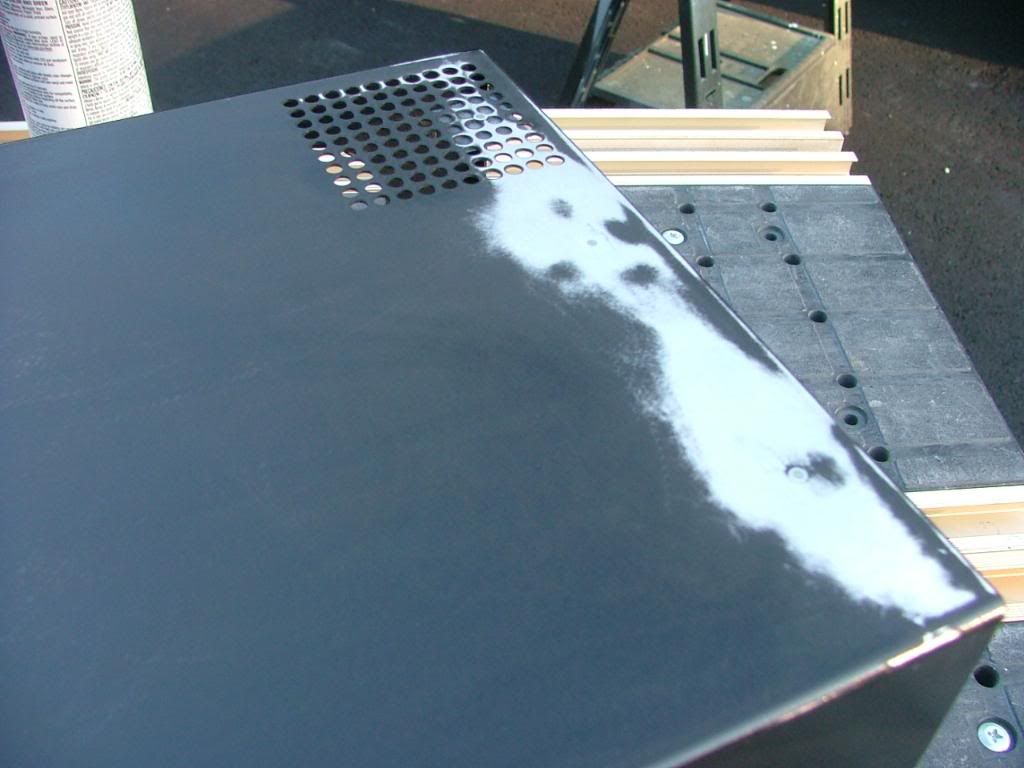
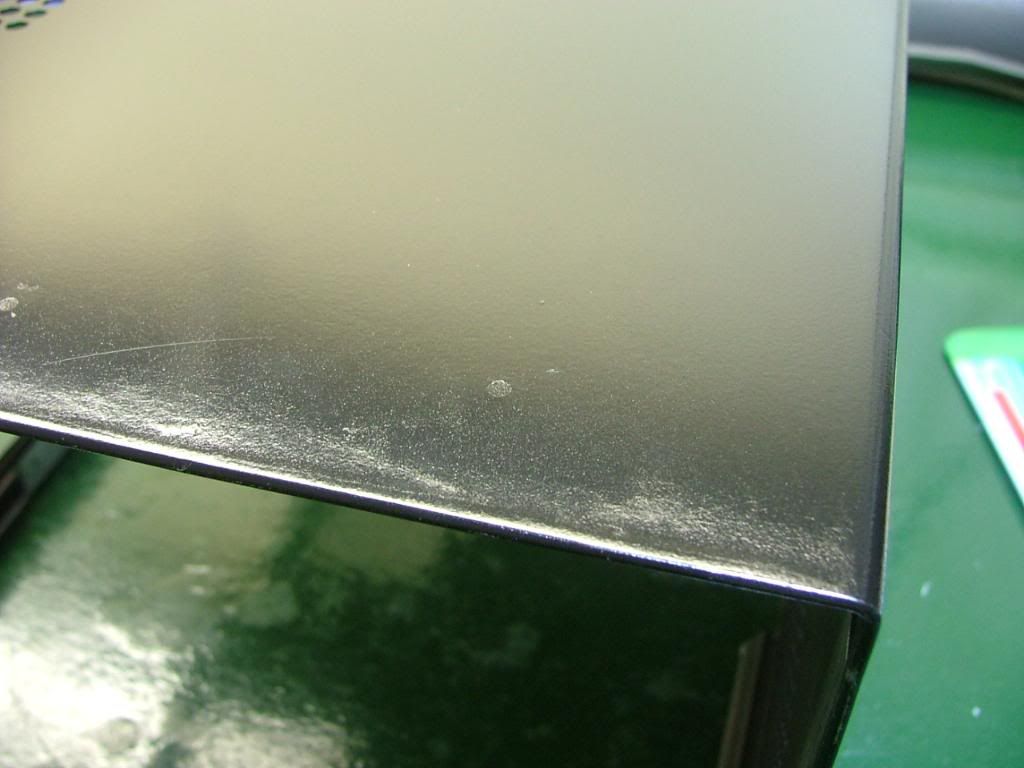
Here we are ready for paintingâ¦â¦after it was âdoneâ it appeared to be fairly reflective. I jokingly referred to the method as âquick and dirtyâ because of doing in a few hours what should be done over several days. However in the last pic youâll see the patched holesâ¦.which if done with primer and sufficient coats of paint one shouldnât see. Letâs just say this isnât one of my better paint jobs and needs to be located in a âdarkâ area of the office!
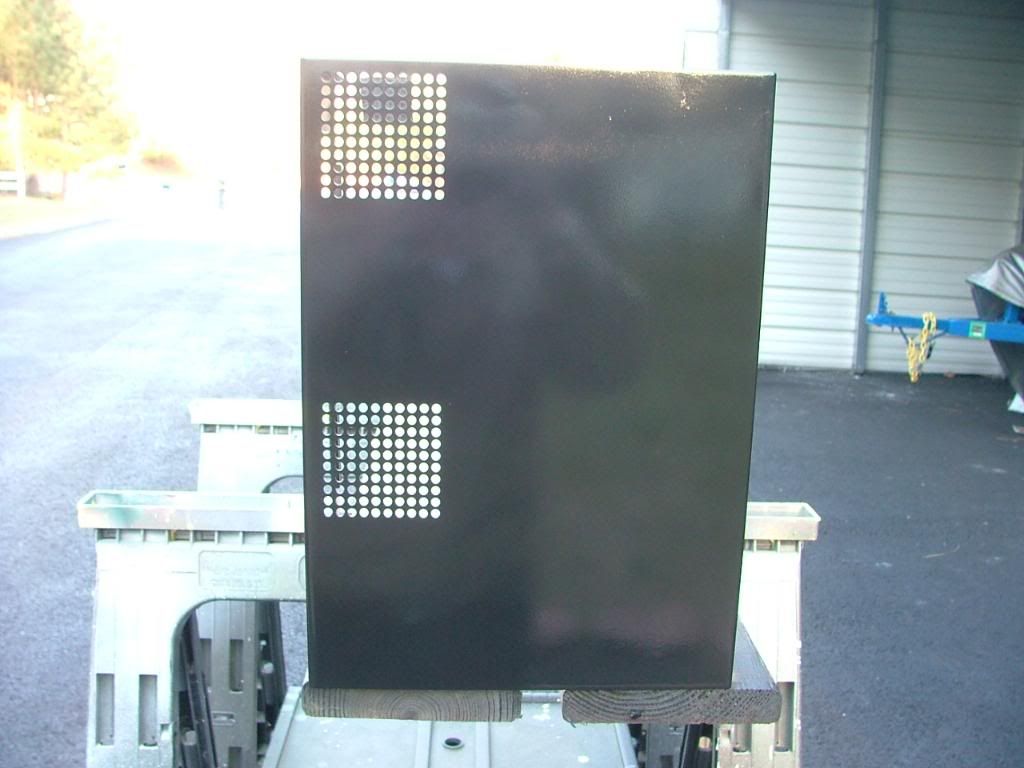    
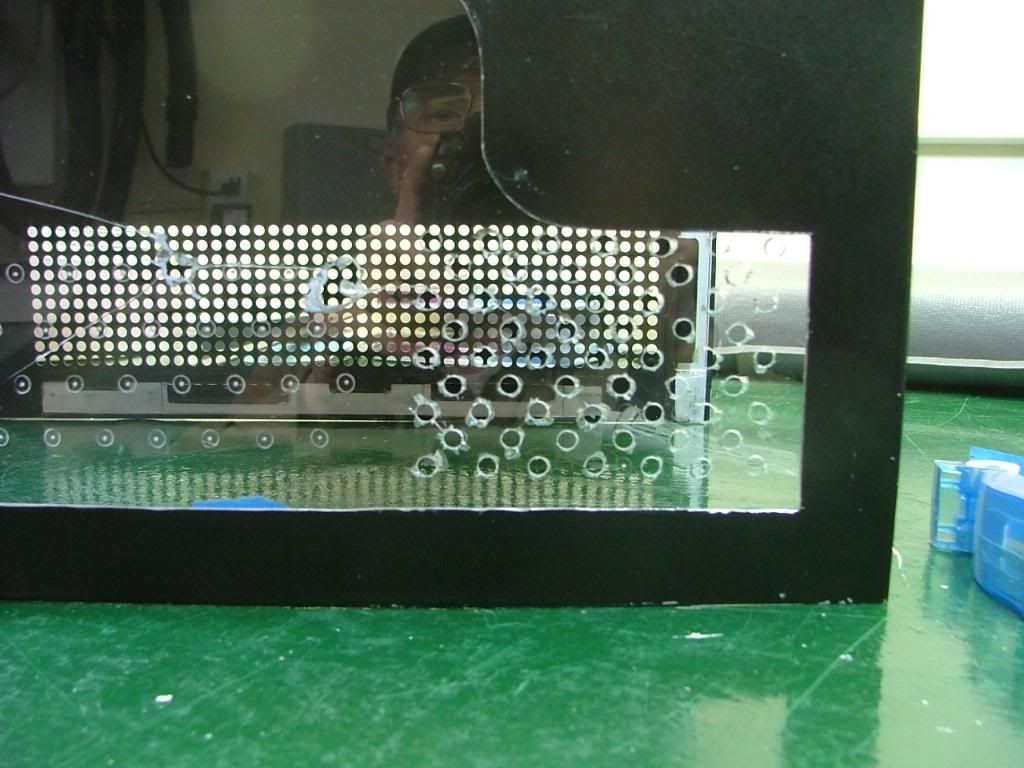
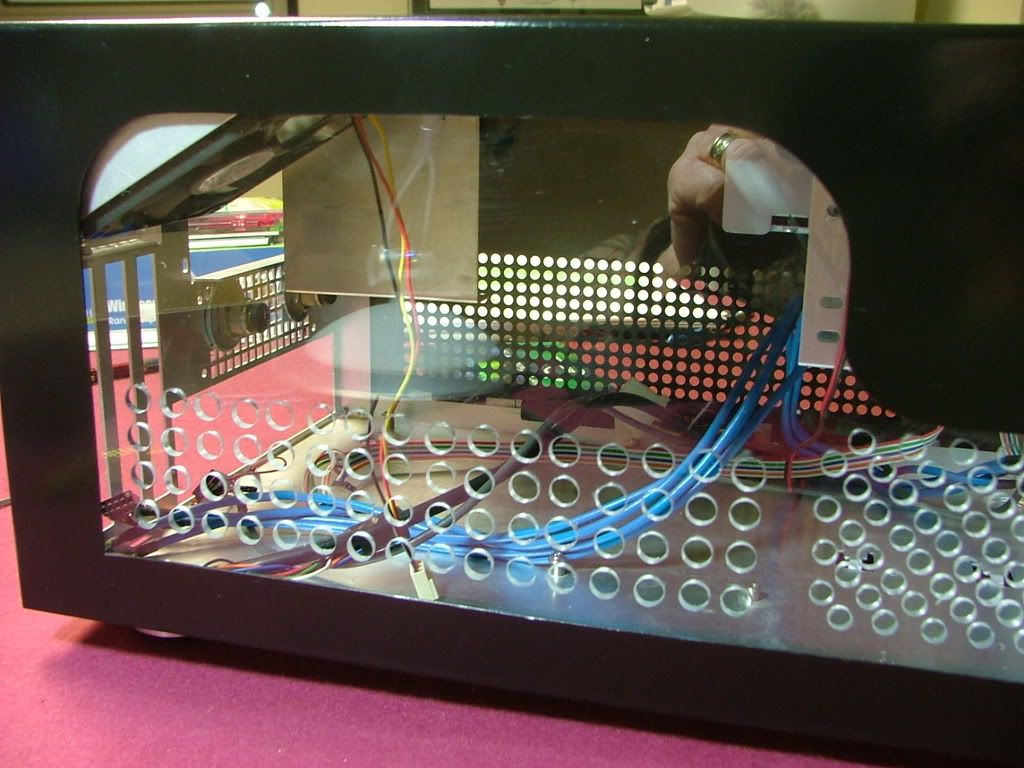
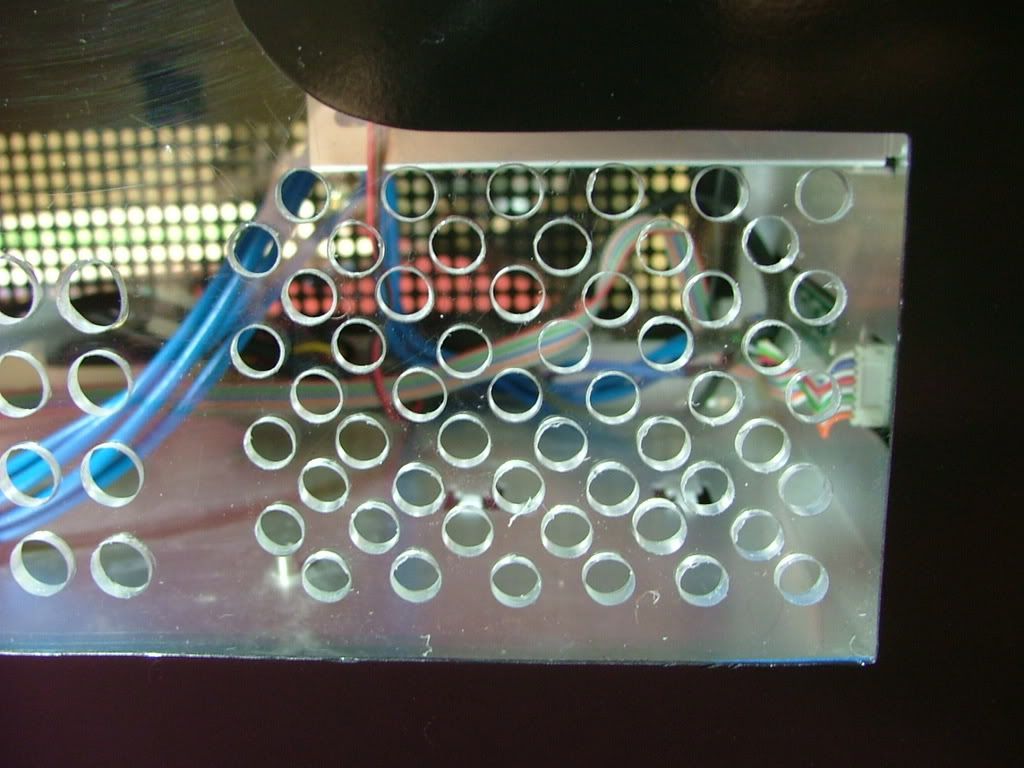
Finally got around to picking up a piece of Lexan for âdrill abilityâ. The first few pictures I took are while laying out the hole patterns and beginning to drill. While it may appear somewhat inconsistent decided on two different size hole and patterns. You may notice the two stray holes up topâ¦â¦that was a âtestâ in an area not seen. If you look closely youâll see where the window edge is.
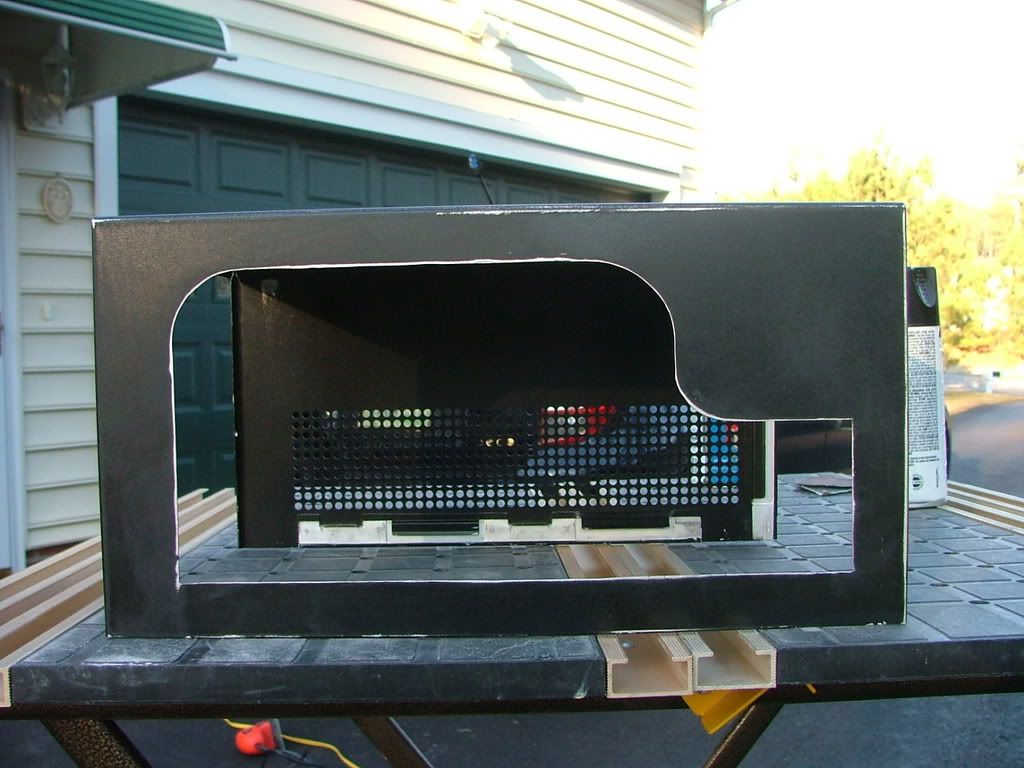
Lexan makes a big difference when it comes to drilling! It was easier by far over the plex but has it own minor issues. I was using a wireless drill at low speeds but it would still grab on occasions. Also I had difficulty in cleaning any âroughâ edges and in the process managed to scratch the surface and will need to spend the time finding and using some âglass polishâ. Here you have it temporarily mounted and in the closer views see some of the needed clean up.
As a safety valve I did manage to pick up a factory windowed cover as I wasnât sure how to do a window on the right side. Wanted to have windows on both sides as the coolant is UV reactive and Iâll be installing a pair of UV laser light fixtures. Also need to go back and do a little âhammer, grind, and file to suitâ on the custom window as it is dragging on the frame and makes it difficult to install and remove the cover. Again I can certainly understand why the windows are mounted on the âoutsideâ with the factory version.
Here you have the factory windows for both sides (stock photos) which you can compare with views of the custom window above.
_________________
As of 02/01/11
DreamCatcher AM3 >> (Down Again) >> SG01 Evo, MSI 785GM-E65, PII X4 955(AQ H2O Cooled), XFX GTX285(EK H2O Cooled), Seagate 7200.10 ST380815AS 80GB, 2 x G.S. F3-12800CL7D-2GBPI, MODU82+ EMD525AWT, XP Home SP2
KestrelFlight >> (Under Construction) >> Zalman Z7+, MSI NF980-G65, PII X4 1055T, 2 x Galaxy 580GTXs, Zalman 32GB SSD, WD V'Raptor 300GB, 2 x WD 1 TB Blacks, G.S. F3-16000CL9D-4GBTD, Zalman ZM1000-HP Plus , Win7
Oz1a v2.0 >> XFX MDA72P7509 750a, PI X2 8870BE, 2 x XFX GTS250, WD 250GB, F2-8500CL5D-2GBPK, Tt TR2 600W, XP Pro SP3 |
|
| Back to top |
|
 |
jedihobbit
Rated XXX
Joined: 22 Mar 2007
Posts: 238
Location: Central Virginia, USA
|
| Posted: Tue, 13 Oct 2009 19:21:12 Post Subject: |
|
|
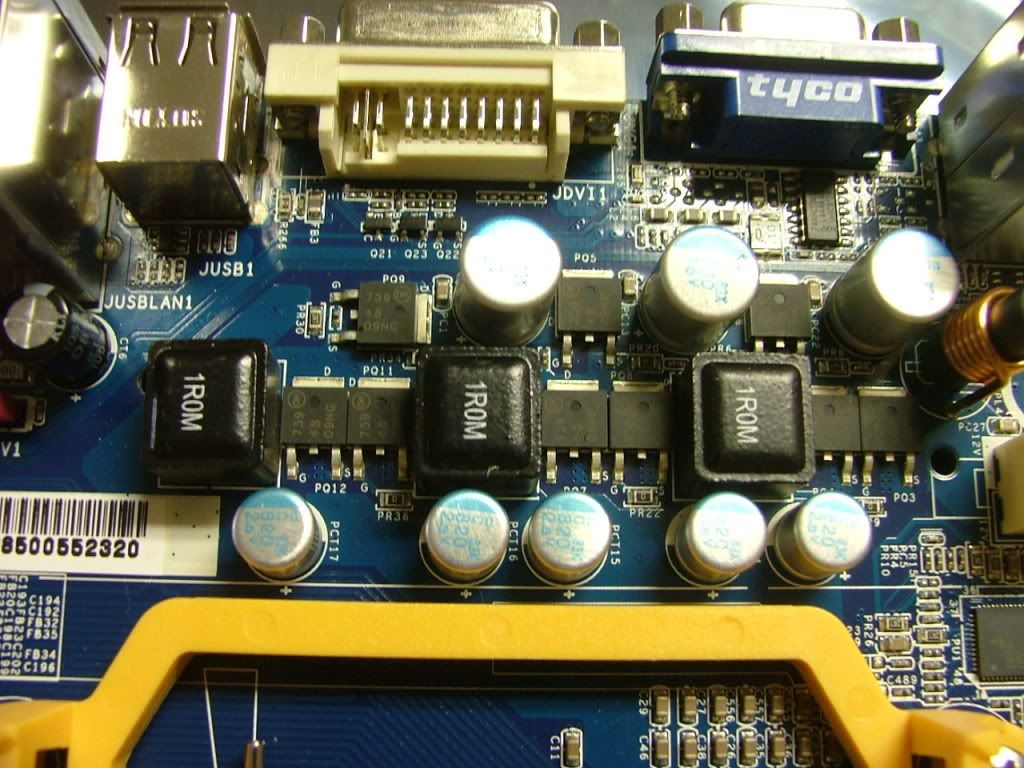
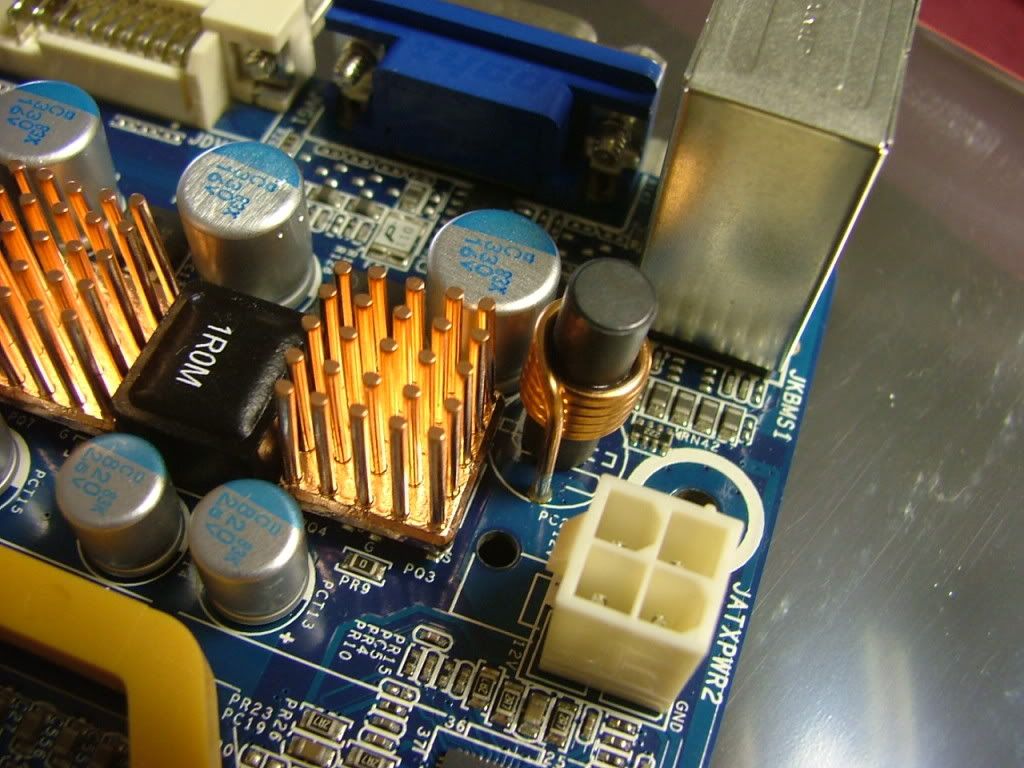
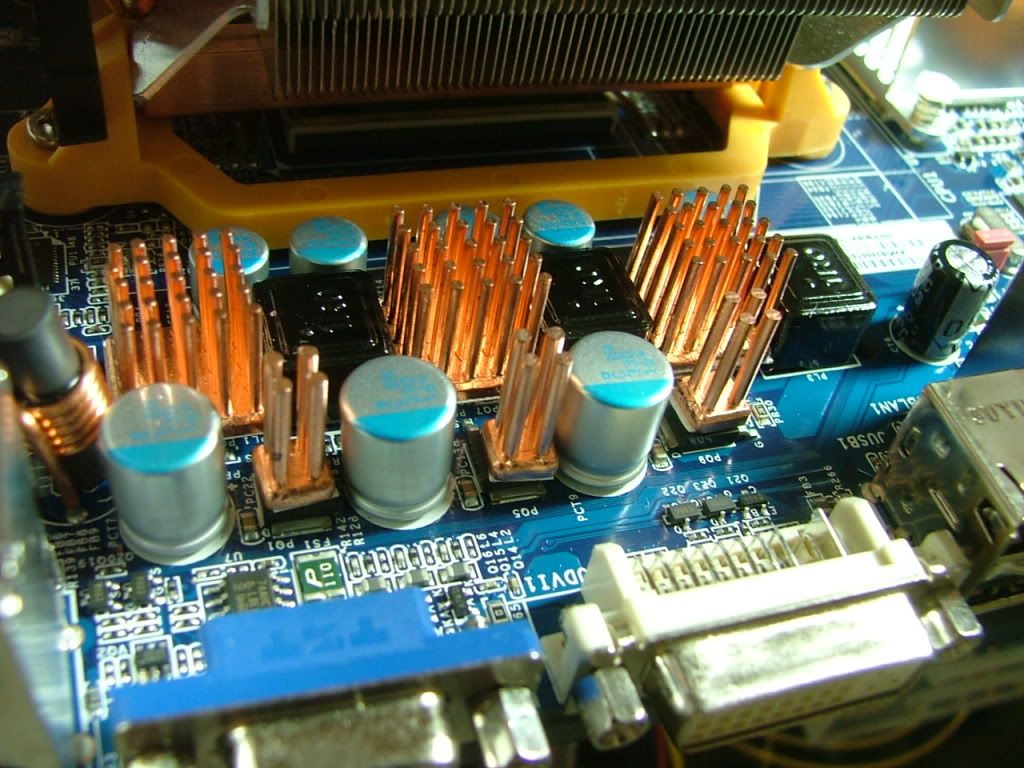
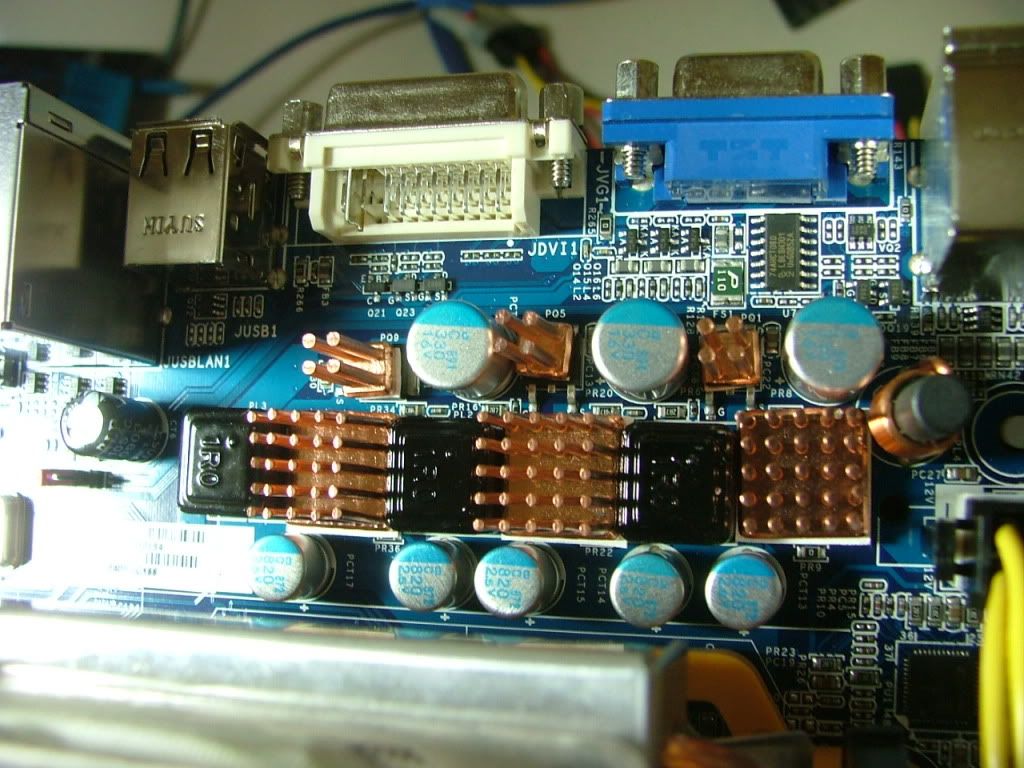
Now on to cooling thingsâ¦..Since the mosfets on this board are kinda laid out rather âuniquelyâ I ended up using the Enzotech BMR-C1s left over from doing the M3A78-CM. These are for video cards and their 14mm square size allowed me to cover 2 chips at a time. I then finished it off with Enzotech MOS-C1s for the âlittleâ guys. When you get to the bottom mobo pictures you see them a wee bit better. While Iâm on the subject, any recommendations on where I could use more of the MOS-C1s as I have a few left over?
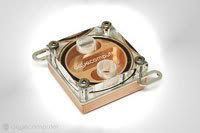
While part of v2.0 worklog, Iâll be using my NB water block mod. In the beginning an Abit NF-M2 nView was to be the mobo and I planned to water cool the NB cooler as that particular boardâs was running hot. I managed to tripped across and purchase an older aqua computer twinplex chip cooler on the cheap

however that turned into a story of itâs own!
After waiting with great expectations the chipset block came and even though it is the "older" version it is new in the box and a purrddy!
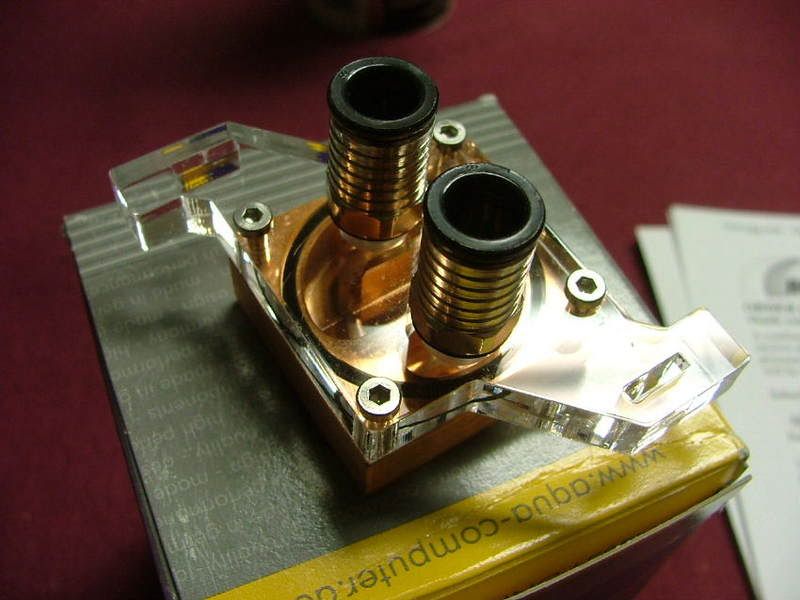  
Only one problem.......... it is for an Intel mobo.   For some reason when the seller sent me the pic (post above) it didn't sink in about the Intel part. Especially when he said he'd include the other bracket. But I still don't have the mounting hardware and I'd need a different plex block to go with the bracket. As I don't feel like taking the dremel to the Intel version! :rolleyes: For some reason when the seller sent me the pic (post above) it didn't sink in about the Intel part. Especially when he said he'd include the other bracket. But I still don't have the mounting hardware and I'd need a different plex block to go with the bracket. As I don't feel like taking the dremel to the Intel version! :rolleyes:
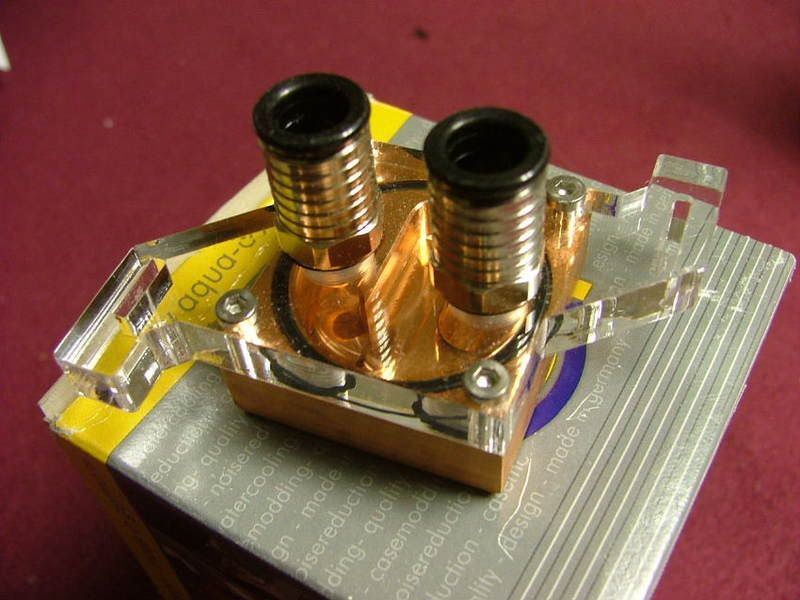
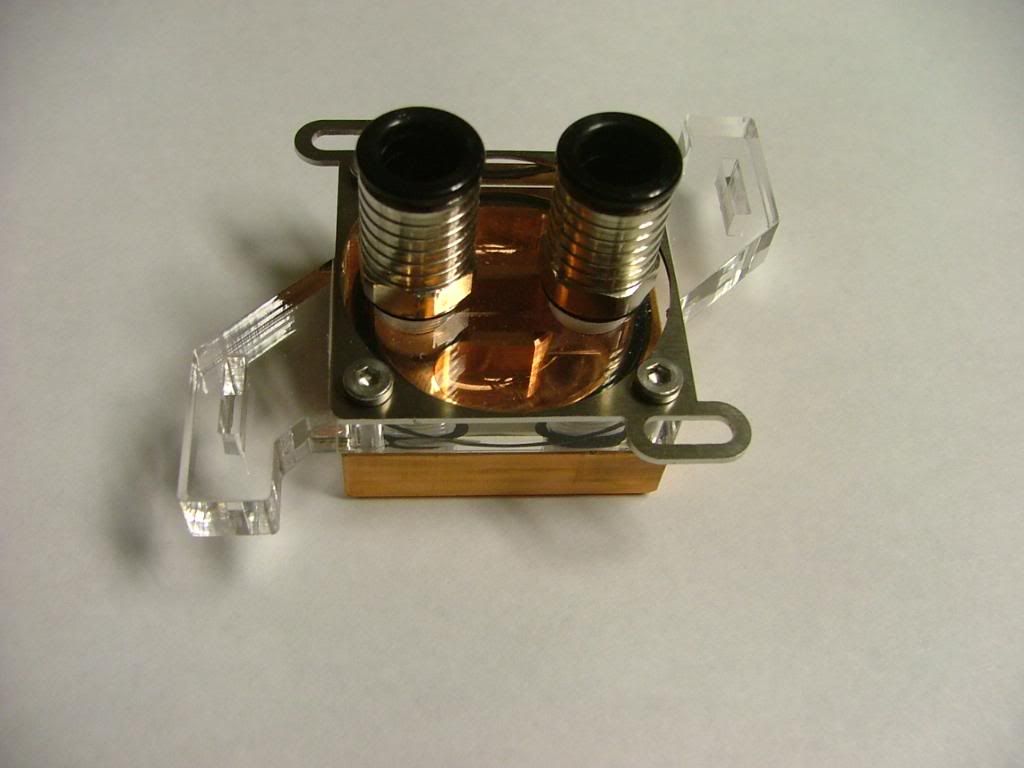
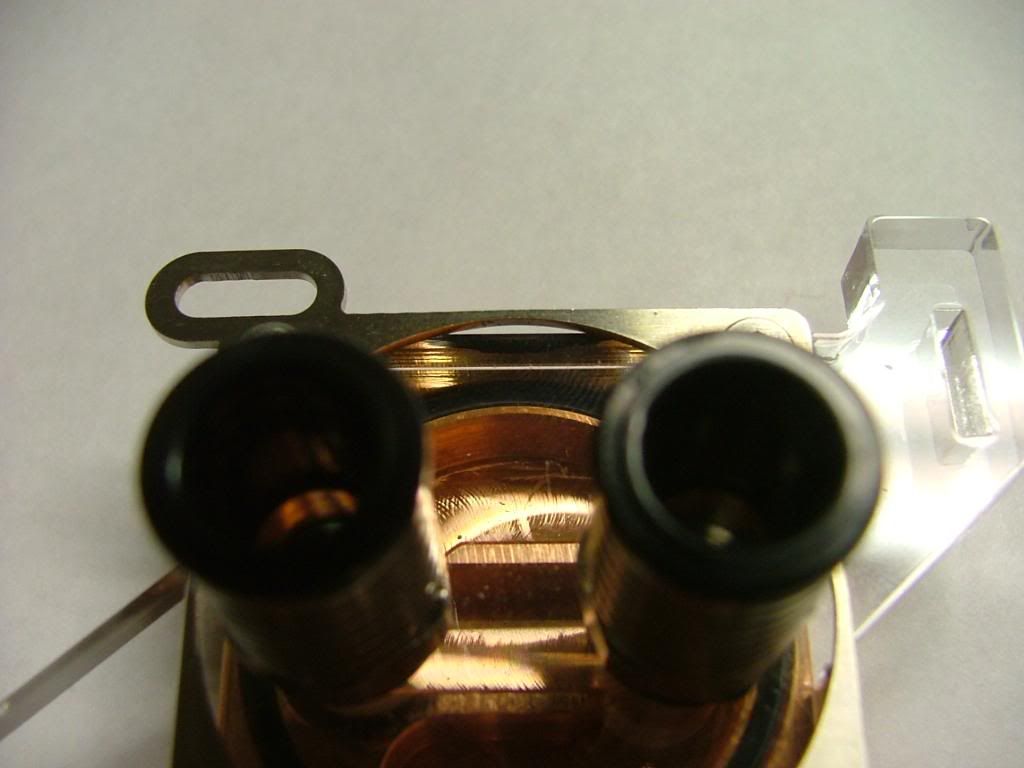
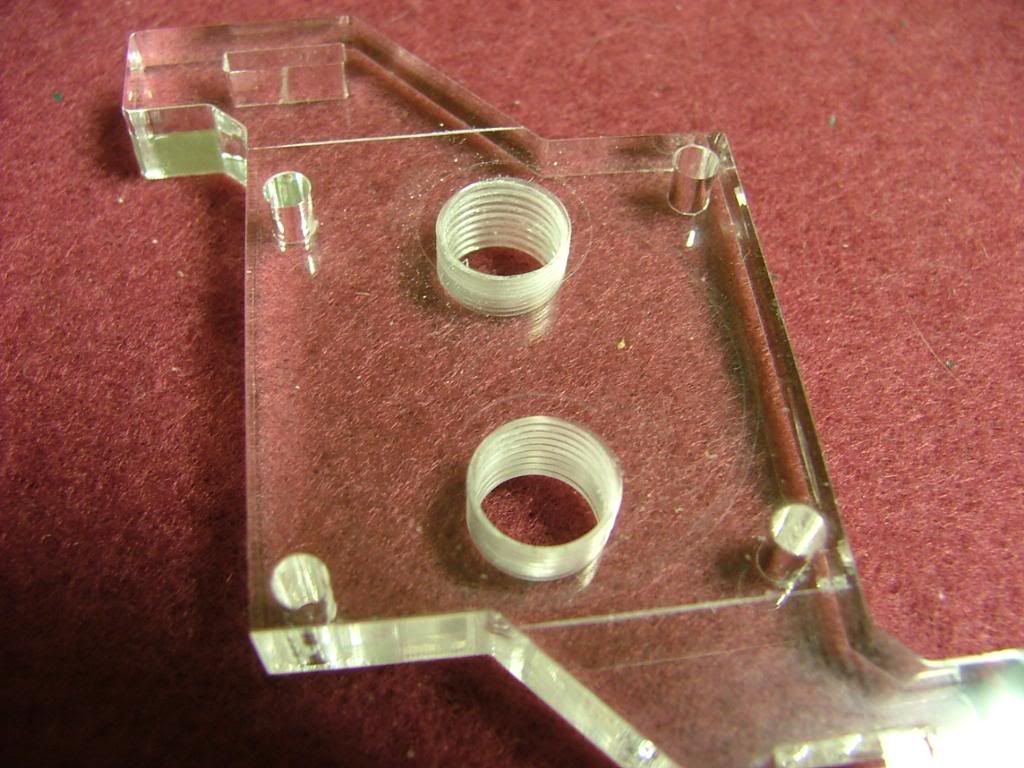
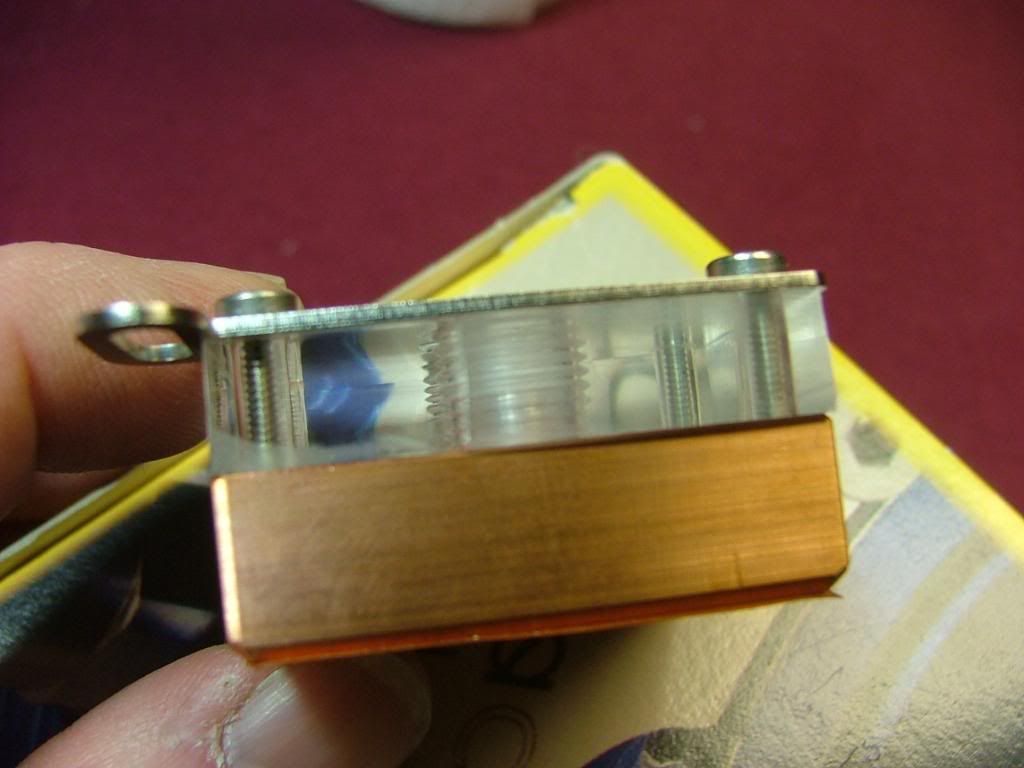
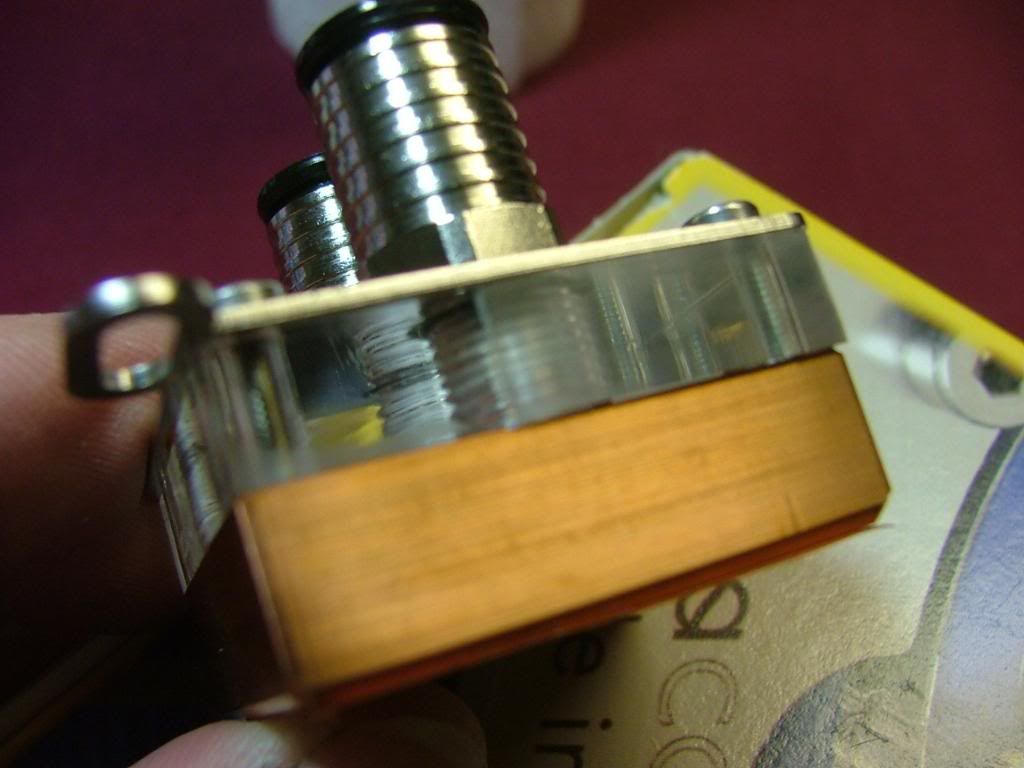
What you have here are pictures that show the progress of the mod for the NB block. A major issue to remember is that fact the plex section of the water block for a non-Intel board needs to be relieved to accept the metal mounting bracket. That is why I couldnât just throw the bracket in place between the copper and the plex. Originally I had thought of just drilling or slotting the mounting holes in the plex âlegsâ but didnât have sufficient material to feel comfortable doing that. The mounting bolts that hold the two halves together are long enough to allow the bracket to be mounted on top.
First off I mounted the bracket to see if there are any issues. You can see a gap that also would no have allowed me to use it in the ânormalâ place. I needed to cut off the legs as they were hitting components on the mobo. So the order is, test fit, mark, cut, file/sand (for looks), and finally together.
  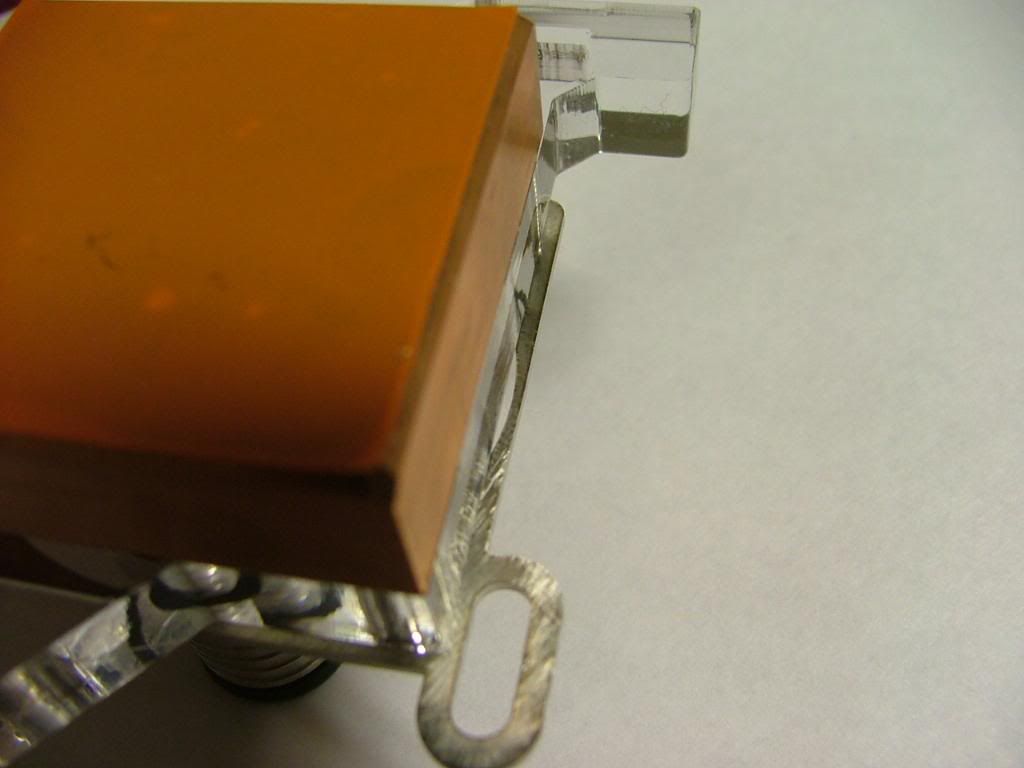 
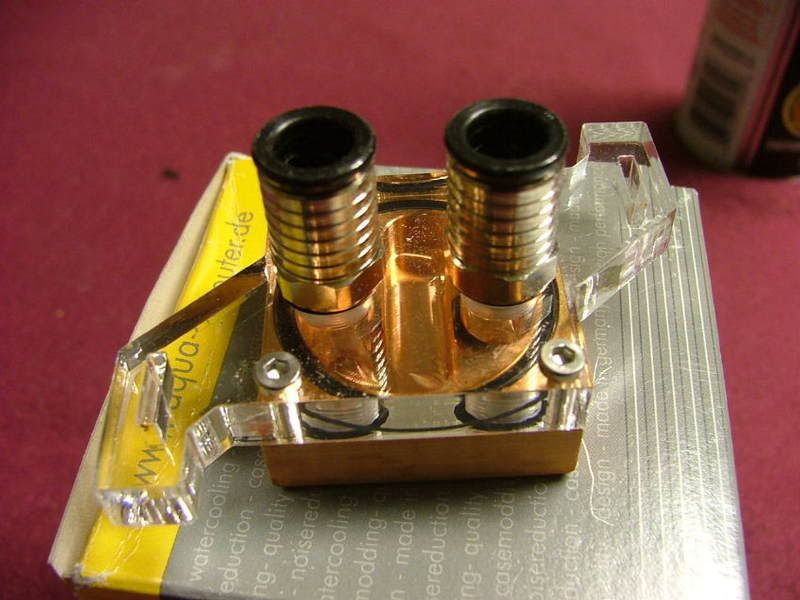
As I didnât want to take a chance of braking through the clearance holes I scribed my cut line a bit âoff edgeâ. Also wanting to have more âhandâ control I made the cuts with a âhack sawâ instead of using the dremel. Here you have it ready to cut, half way done, and finally awaiting the file.
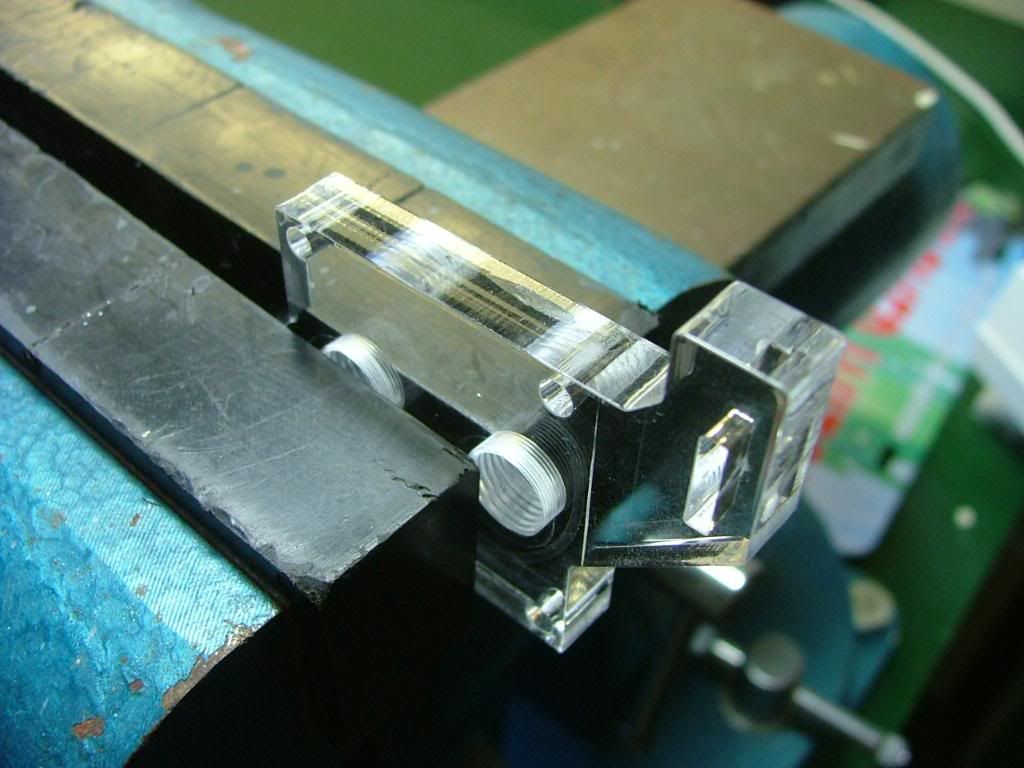 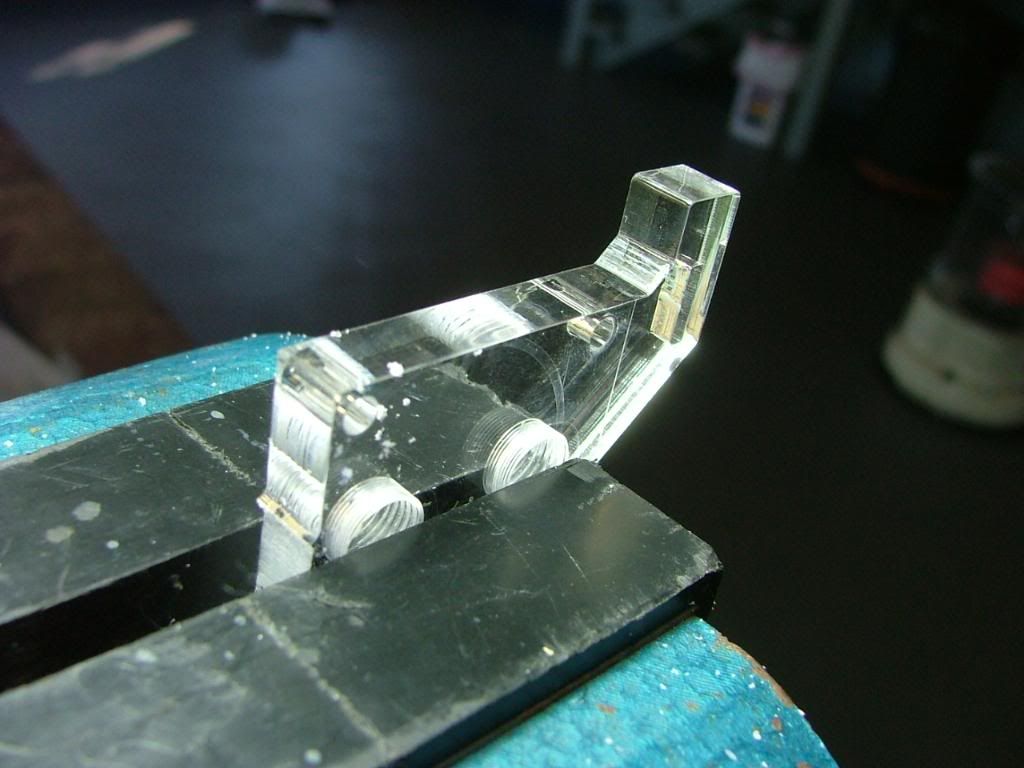 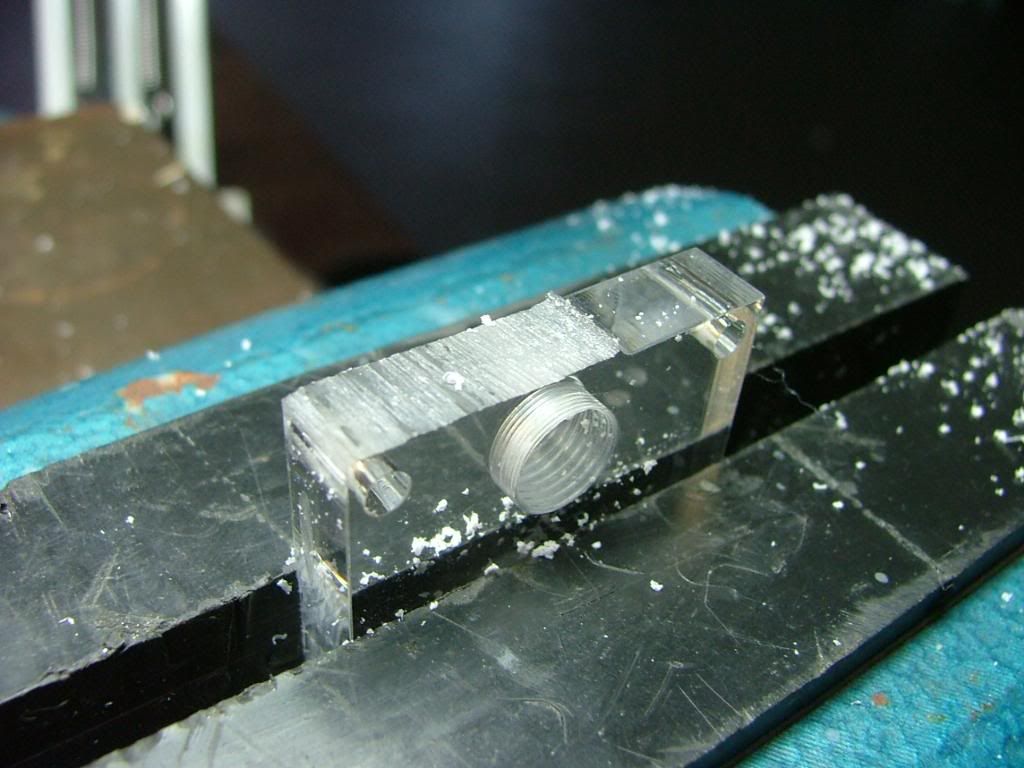
The sawing was a bit ragged and on one side had a bit more material than originally planned. I used two different files and then finally 1000 grit paper. It wasnât a total match but give the amount of time I put into the âpolishingâ (very little) it didnât turn out too bad!
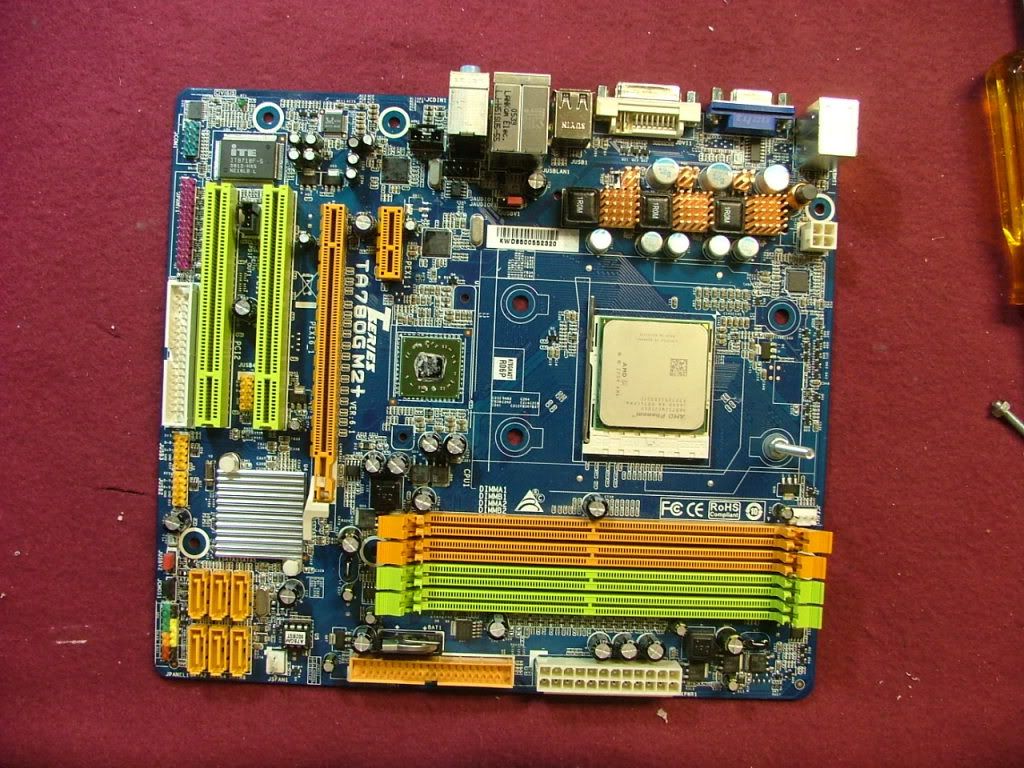
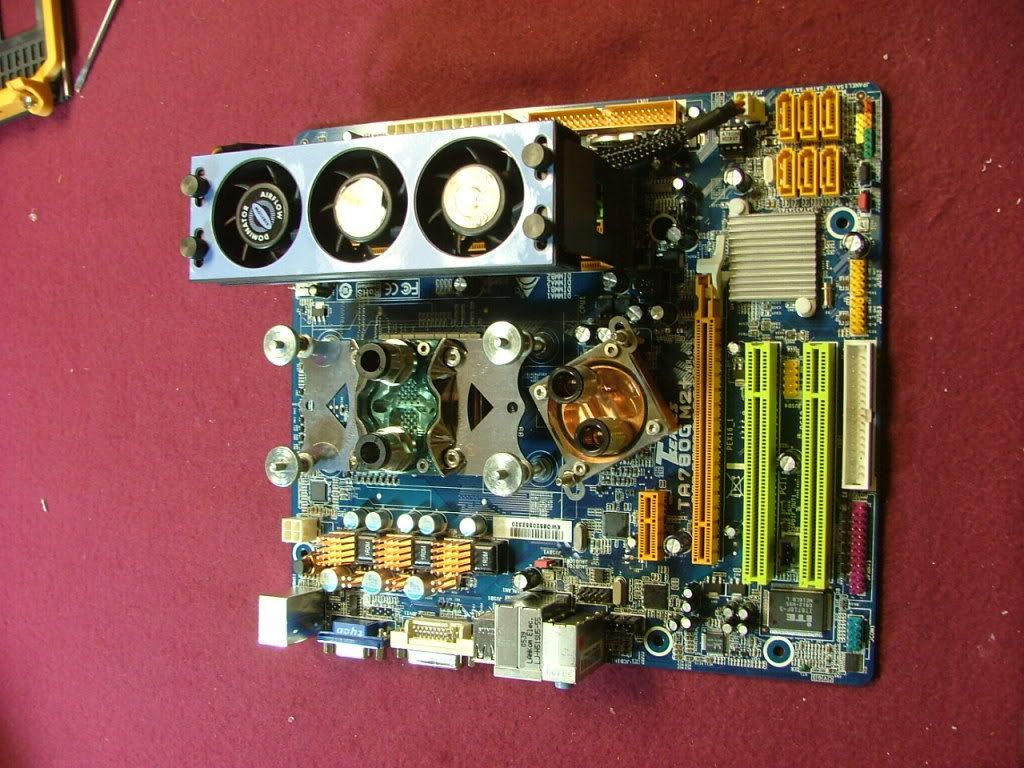
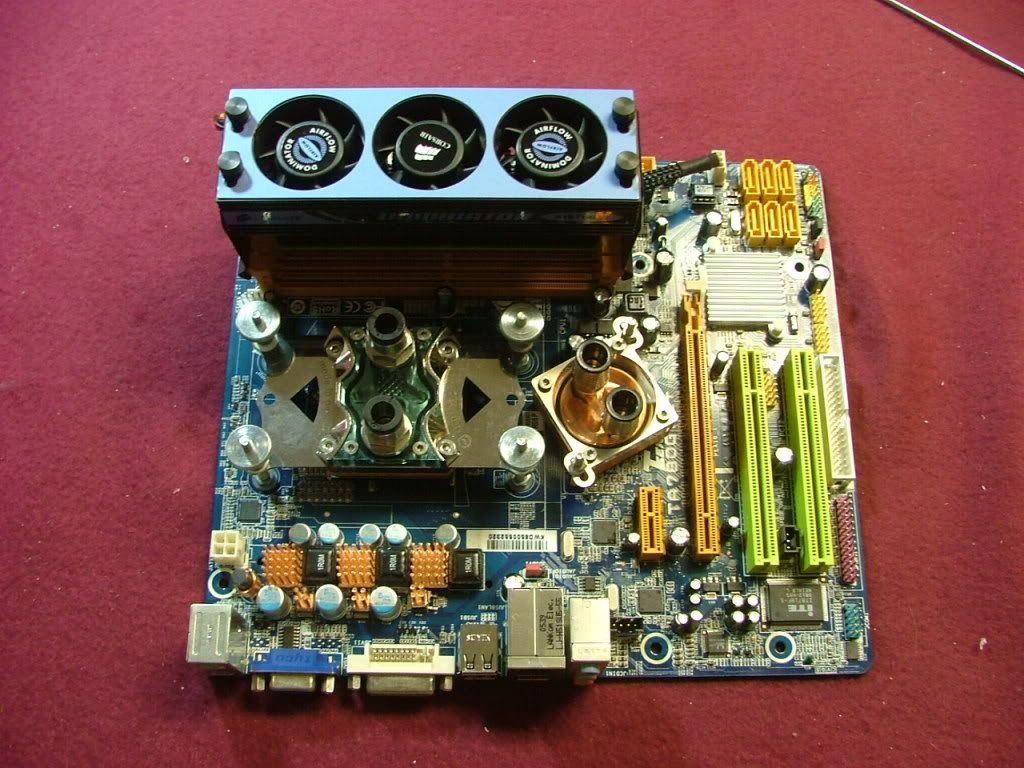
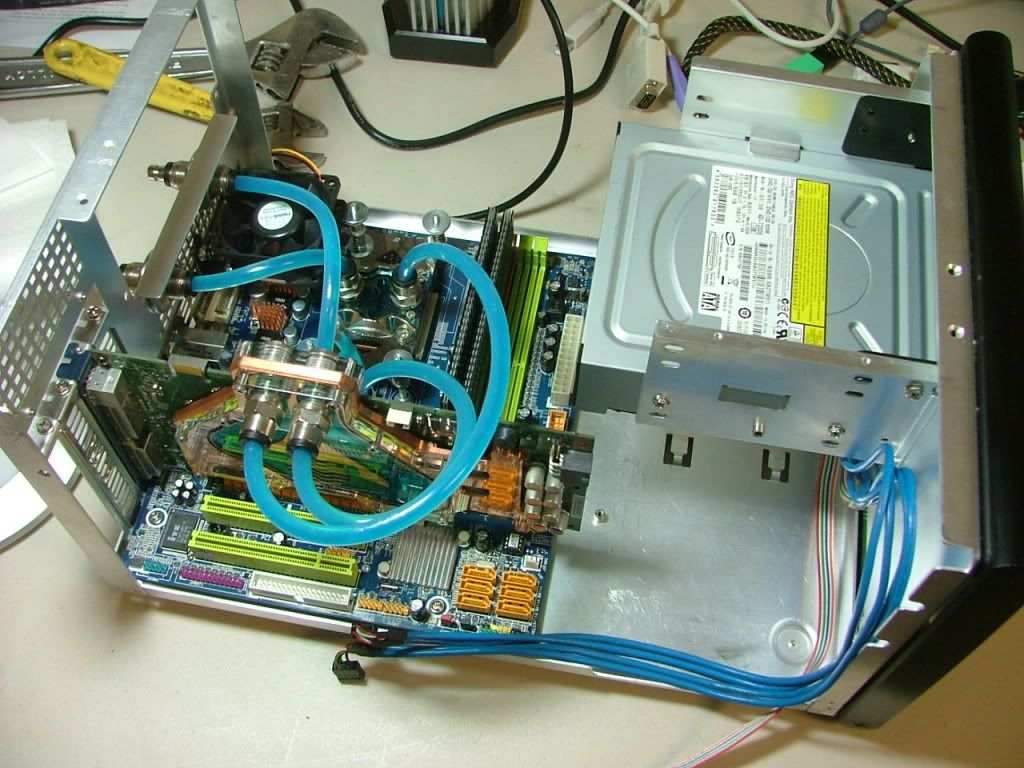
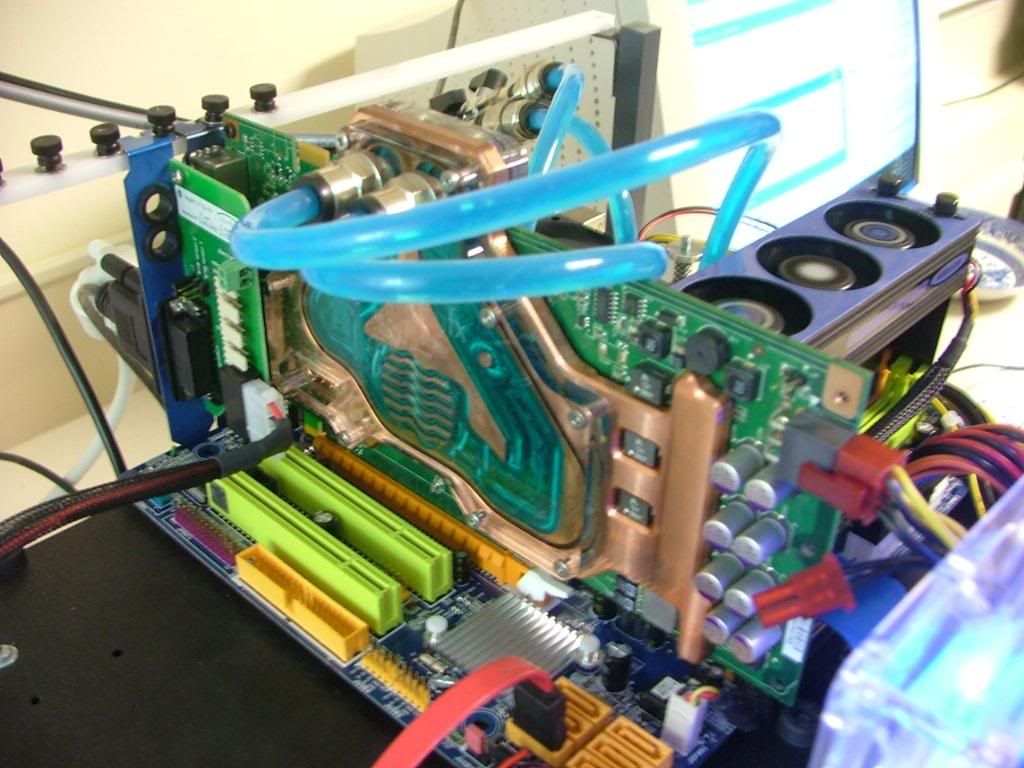
It seems this time the fates smiled on me as the block ended up working with the 780G even though originally setup for the nView. Took off the stock NB cooler and found a messâ¦..not only did it have the pink thermal pad stuff but it looks like someone may have thrown on a bit of thermal paste to boot! All I know is it didnât want to cleanup up too easily. So what you have here is the mounting of the blocksâ¦â¦..
 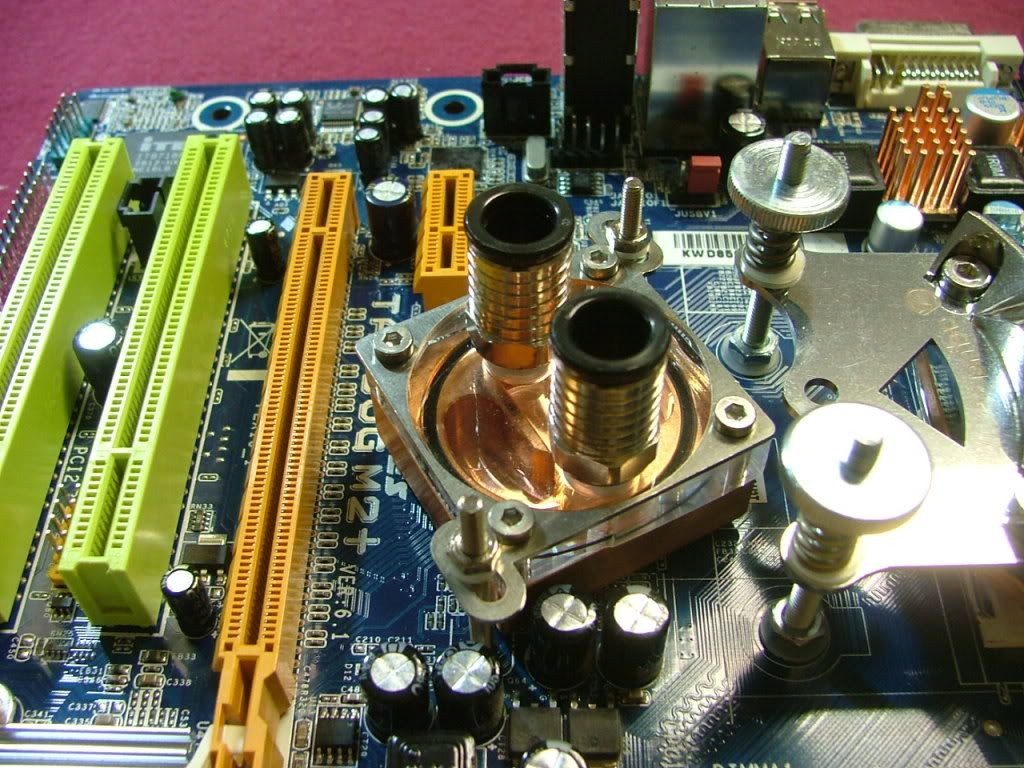 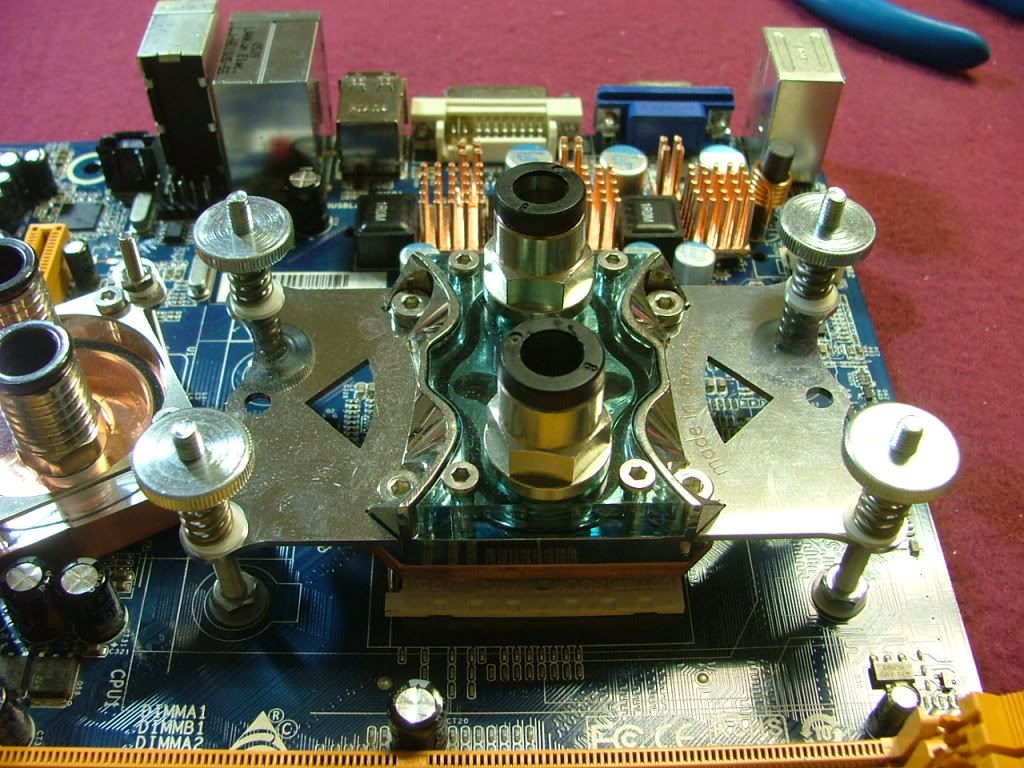
The following shows the blocks, heat sinks, and memory cooling fan in place.
_________________
As of 02/01/11
DreamCatcher AM3 >> (Down Again) >> SG01 Evo, MSI 785GM-E65, PII X4 955(AQ H2O Cooled), XFX GTX285(EK H2O Cooled), Seagate 7200.10 ST380815AS 80GB, 2 x G.S. F3-12800CL7D-2GBPI, MODU82+ EMD525AWT, XP Home SP2
KestrelFlight >> (Under Construction) >> Zalman Z7+, MSI NF980-G65, PII X4 1055T, 2 x Galaxy 580GTXs, Zalman 32GB SSD, WD V'Raptor 300GB, 2 x WD 1 TB Blacks, G.S. F3-16000CL9D-4GBTD, Zalman ZM1000-HP Plus , Win7
Oz1a v2.0 >> XFX MDA72P7509 750a, PI X2 8870BE, 2 x XFX GTS250, WD 250GB, F2-8500CL5D-2GBPK, Tt TR2 600W, XP Pro SP3 |
|
| Back to top |
|
|
jedihobbit
Rated XXX
Joined: 22 Mar 2007
Posts: 238
Location: Central Virginia, USA
|
| Posted: Tue, 13 Oct 2009 19:24:06 Post Subject: |
|
|
Early March âtil Early Summer
Story behind the GPU.....
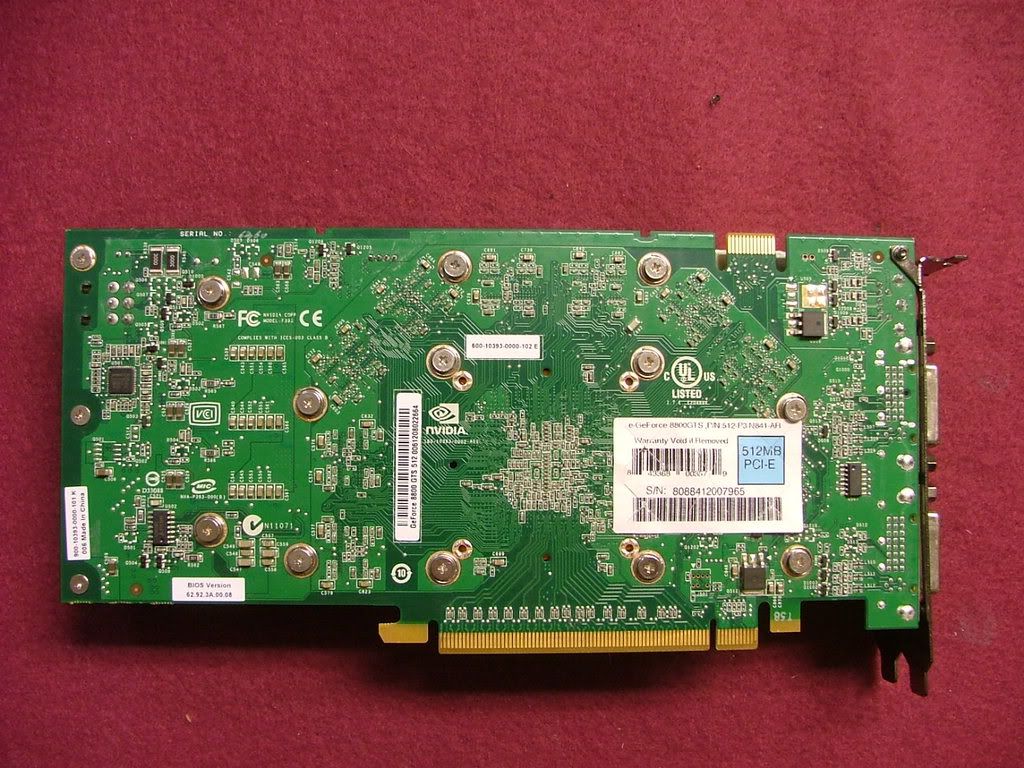
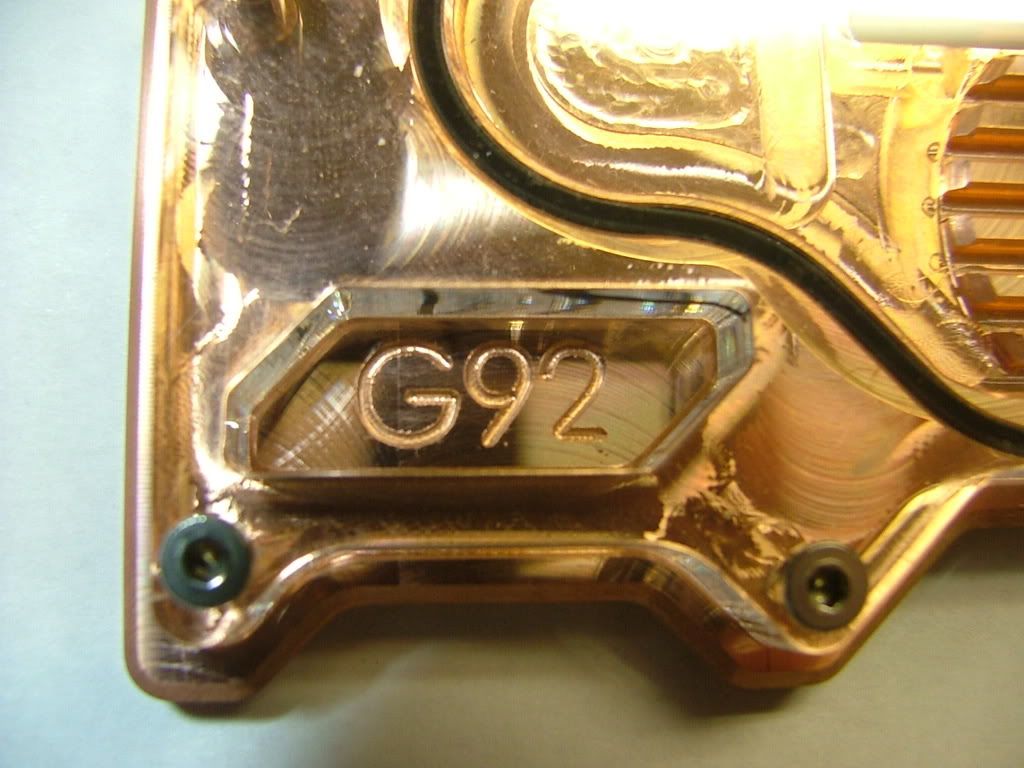
In the beginning the original GPU was an Evga 8800GT SC, but I wanted to max the folding abilities so tracked down a G92 variant of the GTS. The big concern was if the water block would match and went on a wing and a prayer!
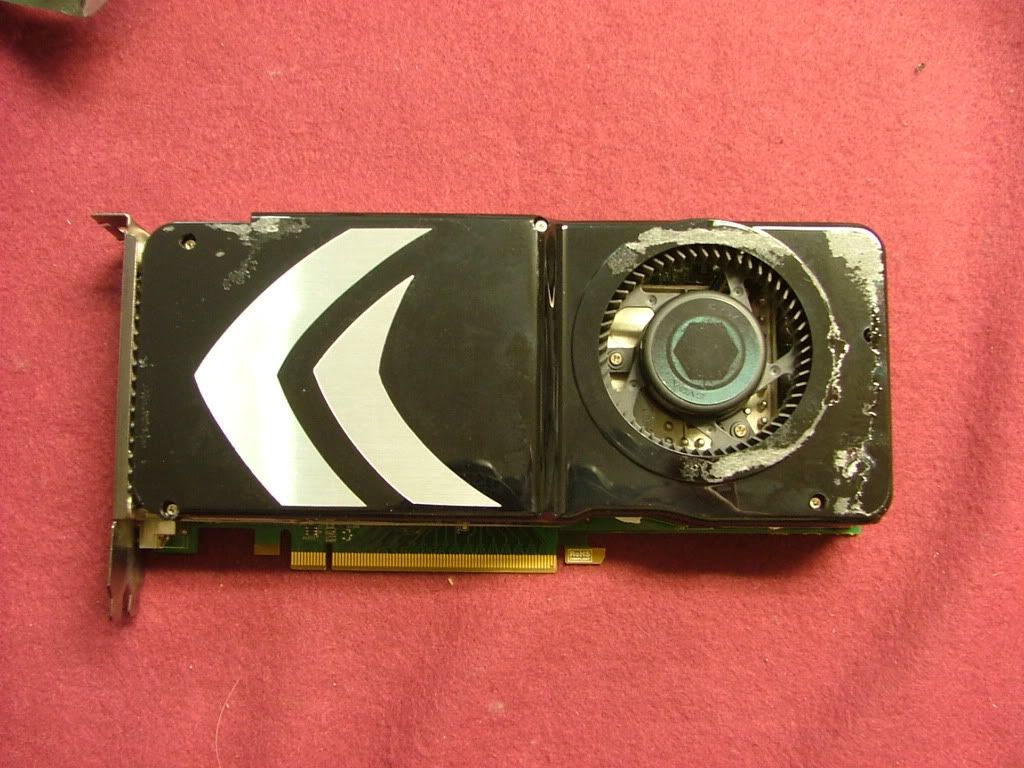
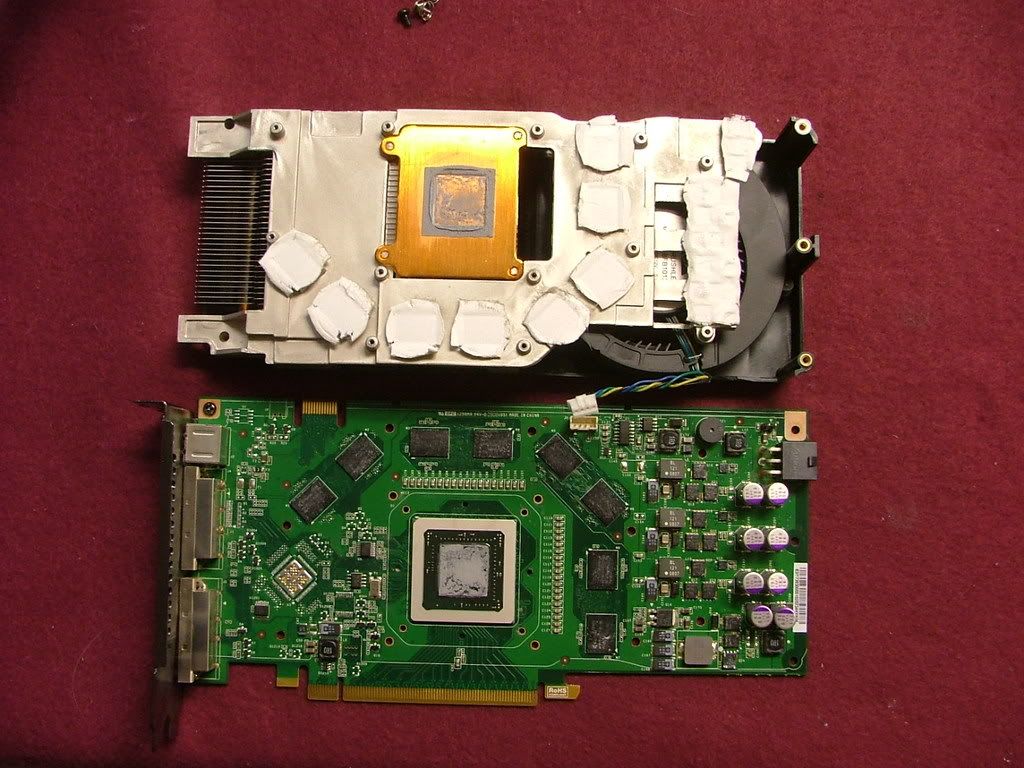
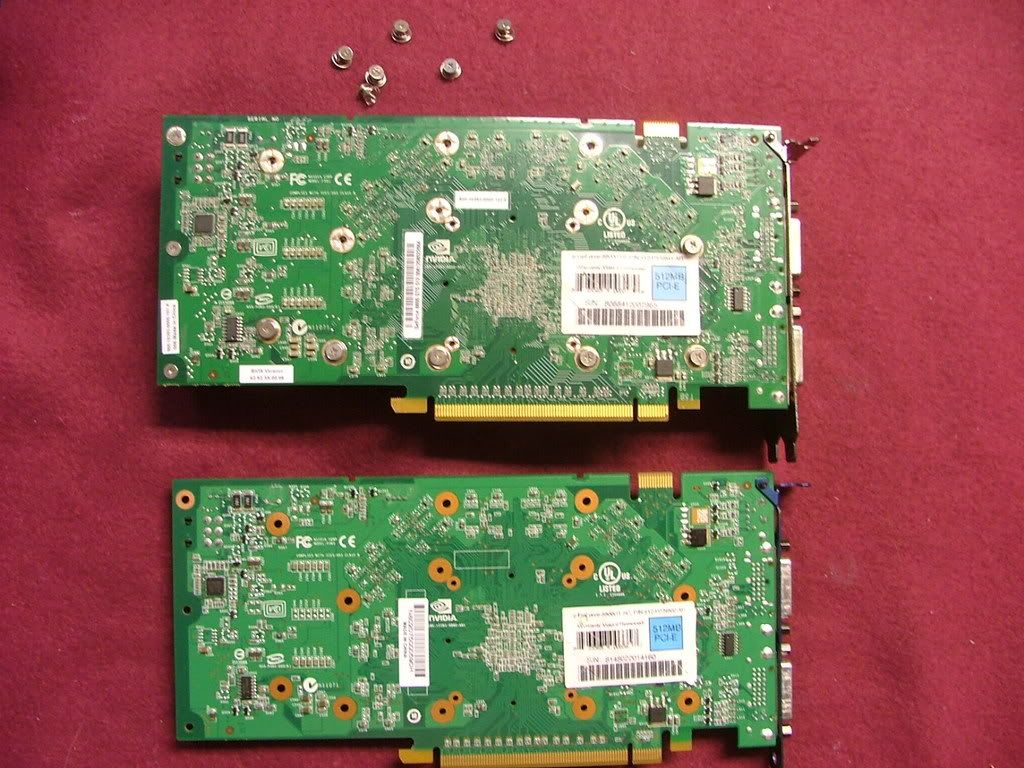
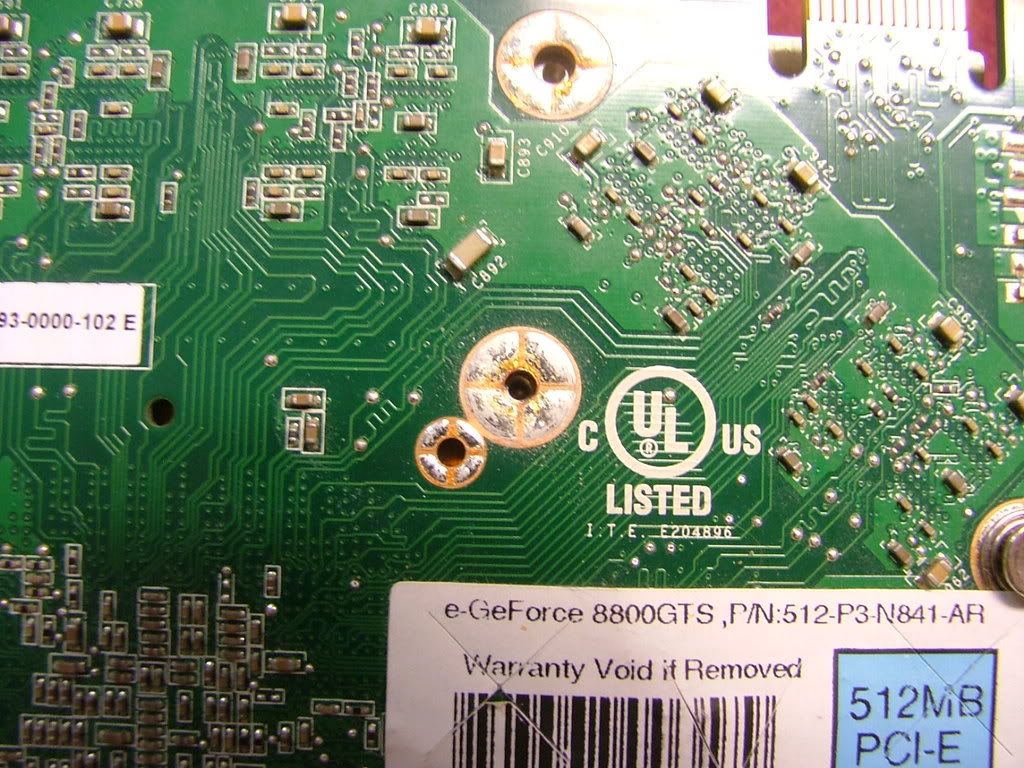
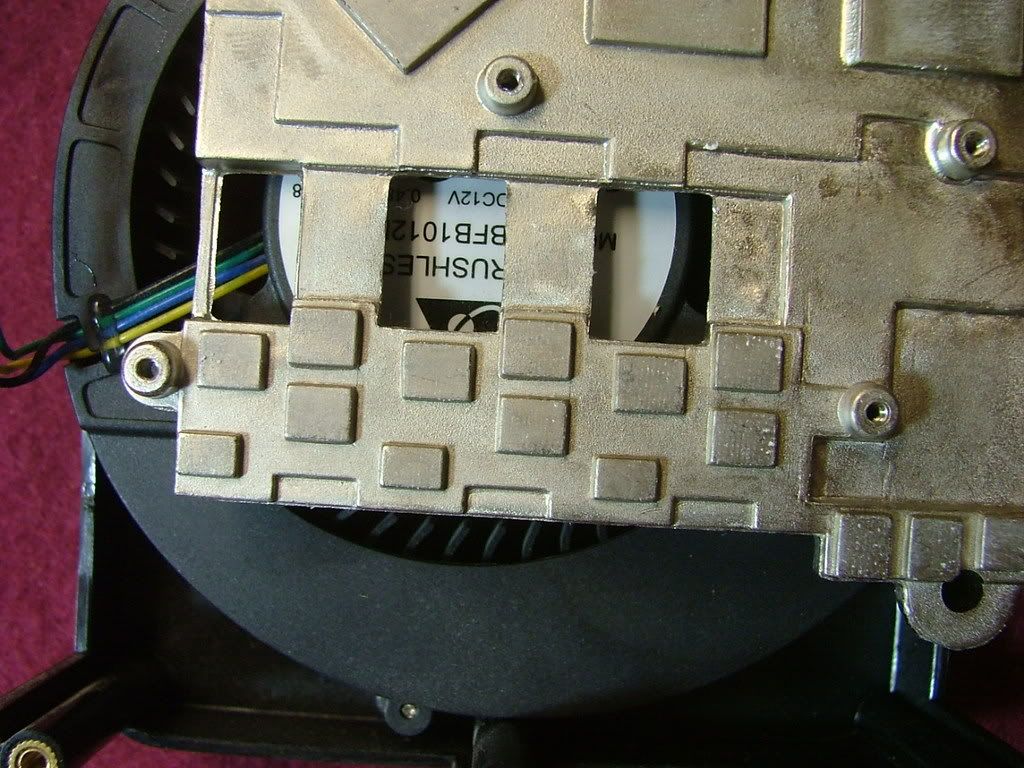
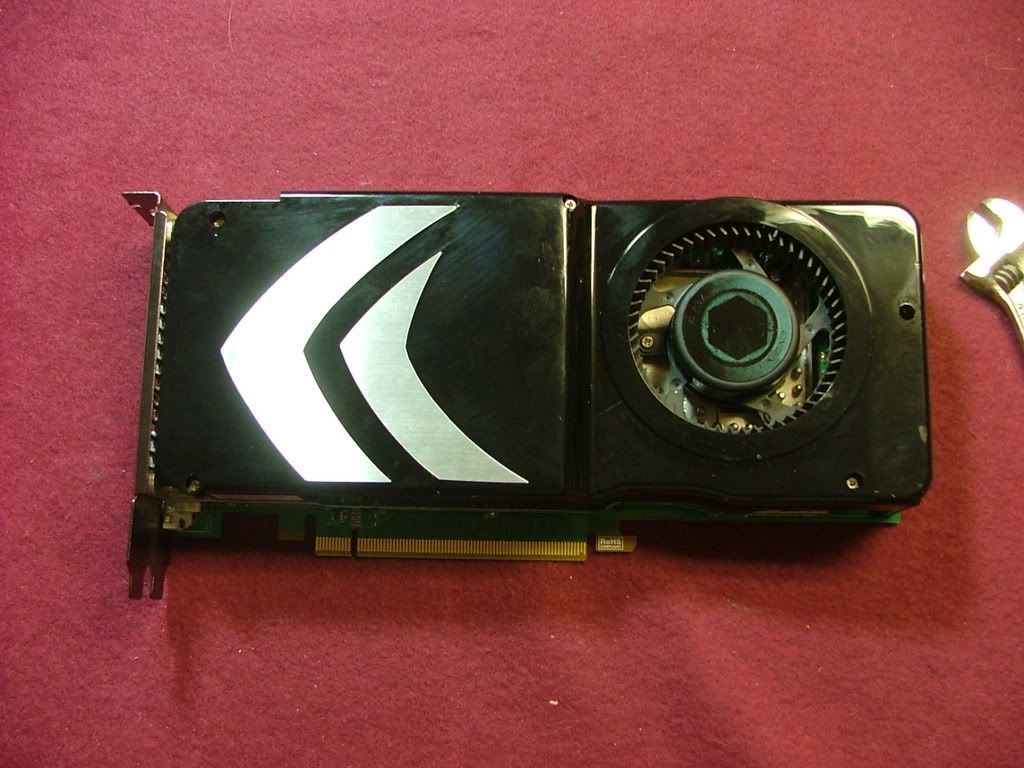
We start out by looking at the GTS I acquiredâ¦â¦front, back side (lots of screws!!), and cover sticker removed. Nothing like âcustomâ coolers! Then you have it with the cooler removedâ¦â¦â¦.
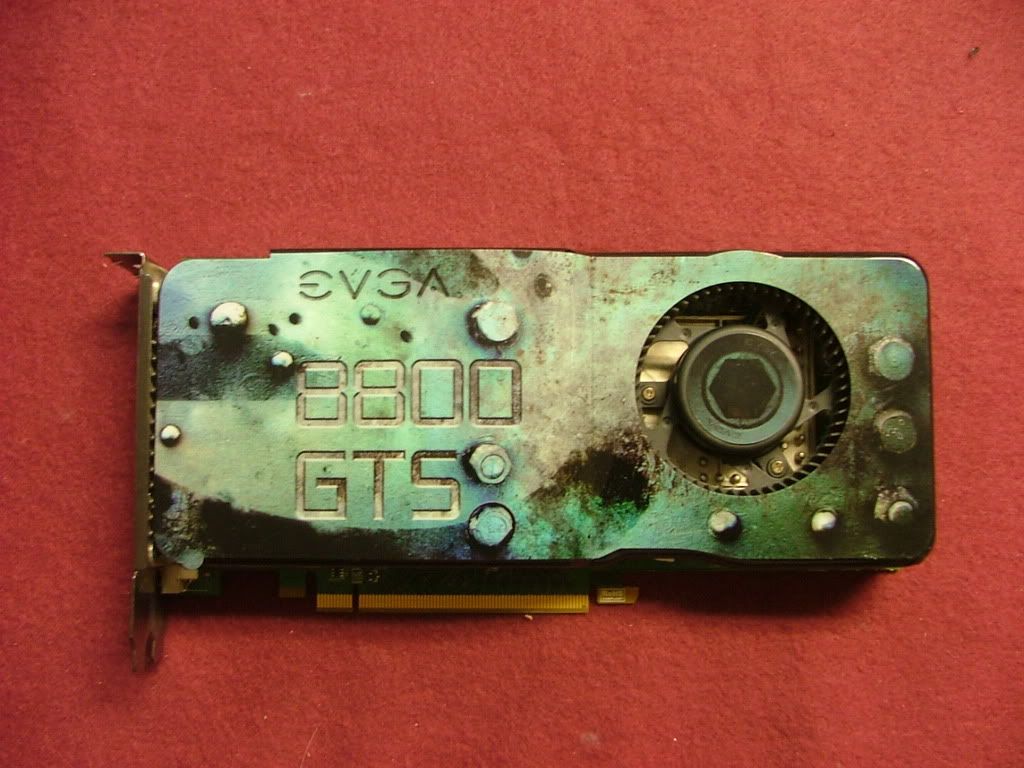   
And guess what? There isnât that much of a difference! Here you have the back side with the GT on the bottom and then from the front sideâ¦â¦.can you see the âobviousâ difference? A minor concern I have/had with this particular card is the fact the area under the screws seemed corroded.
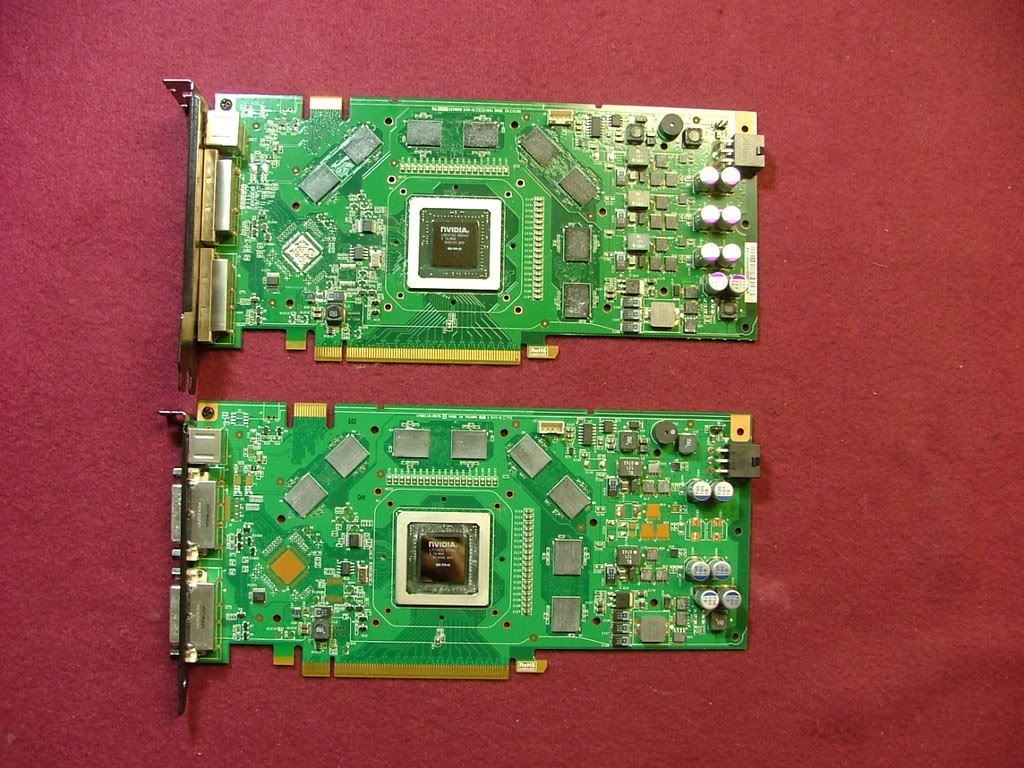  
For me the major physical dif, from what I see, is in the VR area with more and larger chips for the GTSâ¦..
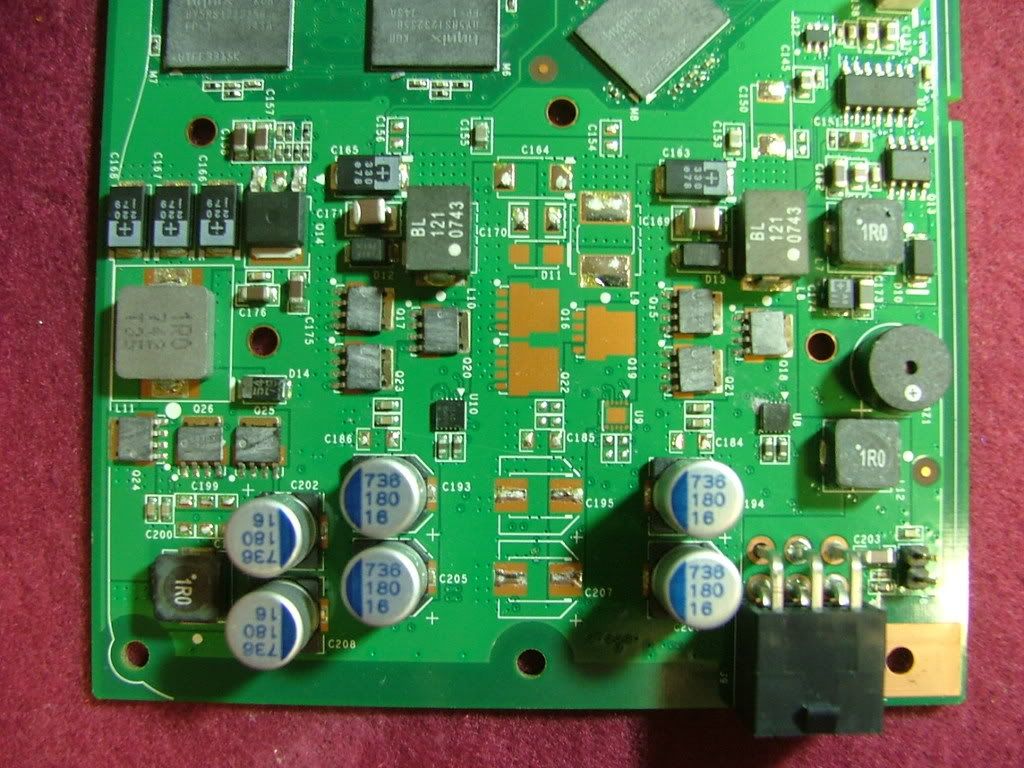 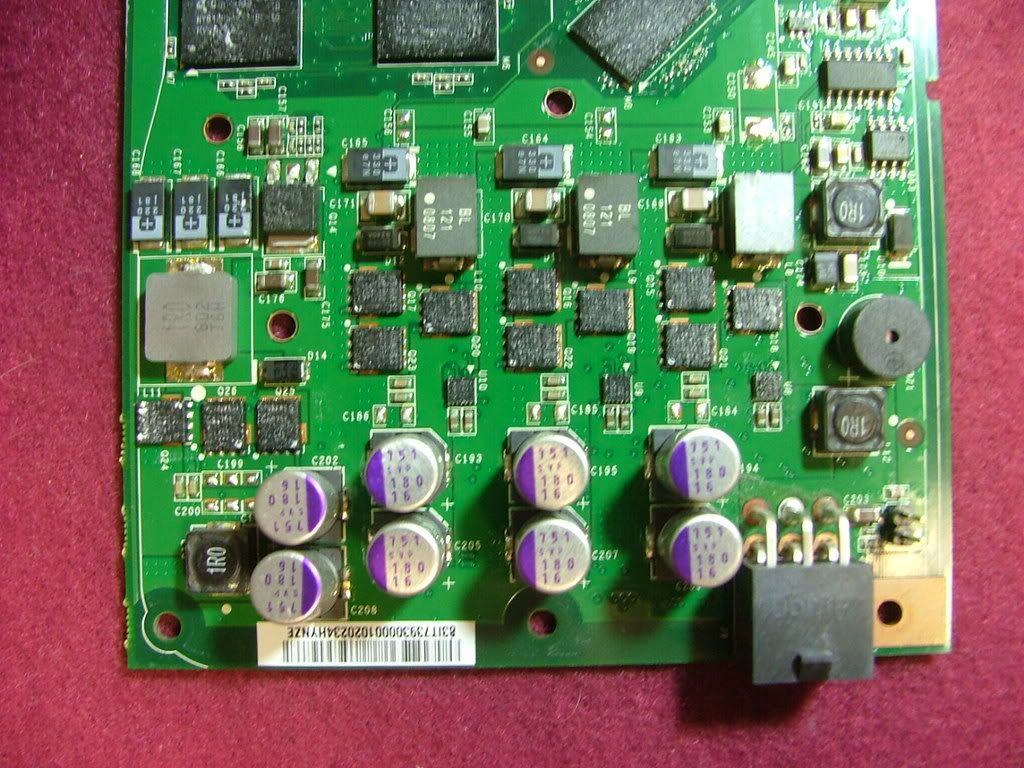
In looking at the backside of the GTS cooler it appears a lot of thought went into the casting as unlike a lot of gpu coolers both the memory and VR chips have âindividualâ contact surfaces as opposed to relying on just a large flat area with âhope it makes contactâ.
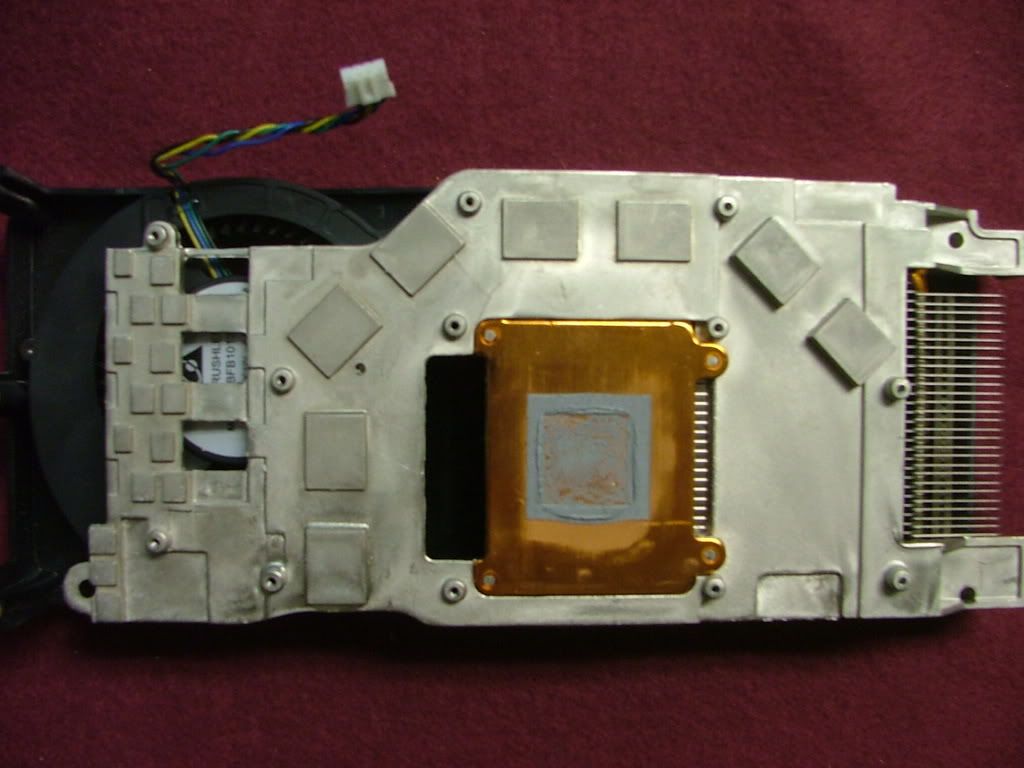 
And of course half the question is answered as here we have the GTS cooler mounted on the GT. In running GPU folding it appears the GT is actually a few degrees cooler than when it had its own cooler mounted.
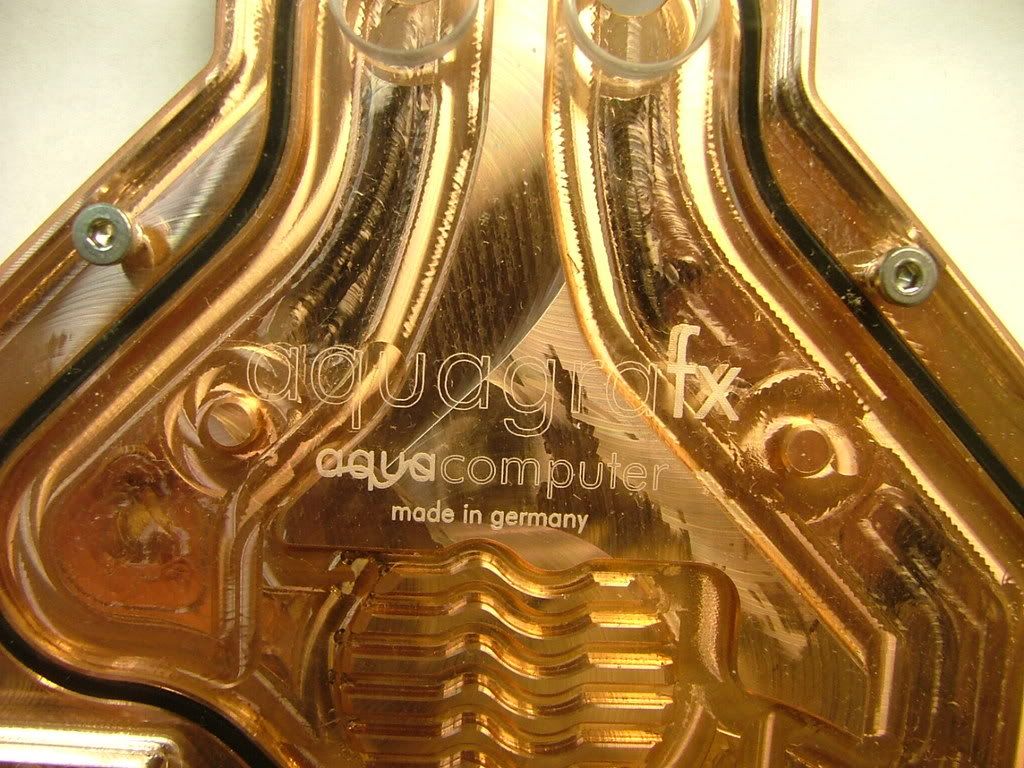
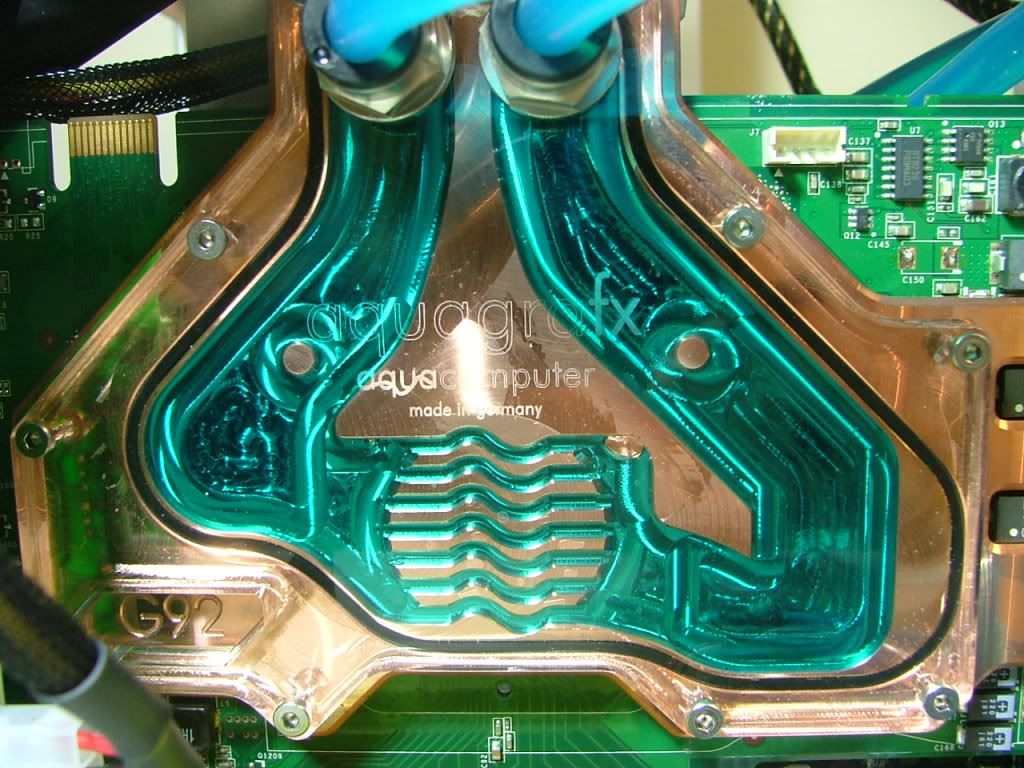
So on to the water cooling block!! I ordered the version with the clear plex cover as I wanted to see the coolant in the block. Sadly how much one can see the gpu block will have a major impact on wither DC v3 is in the SOG 01 or 03! Love the look of the brass and there will be no trouble to see who made it and what it is forâ¦â¦.then attached.
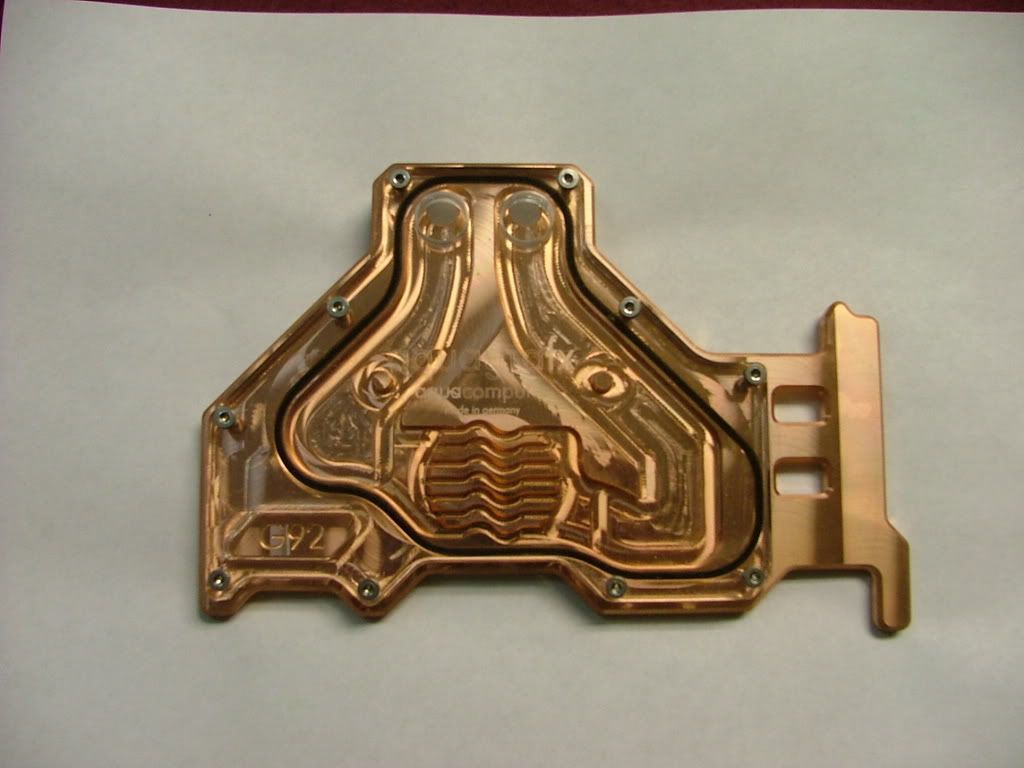 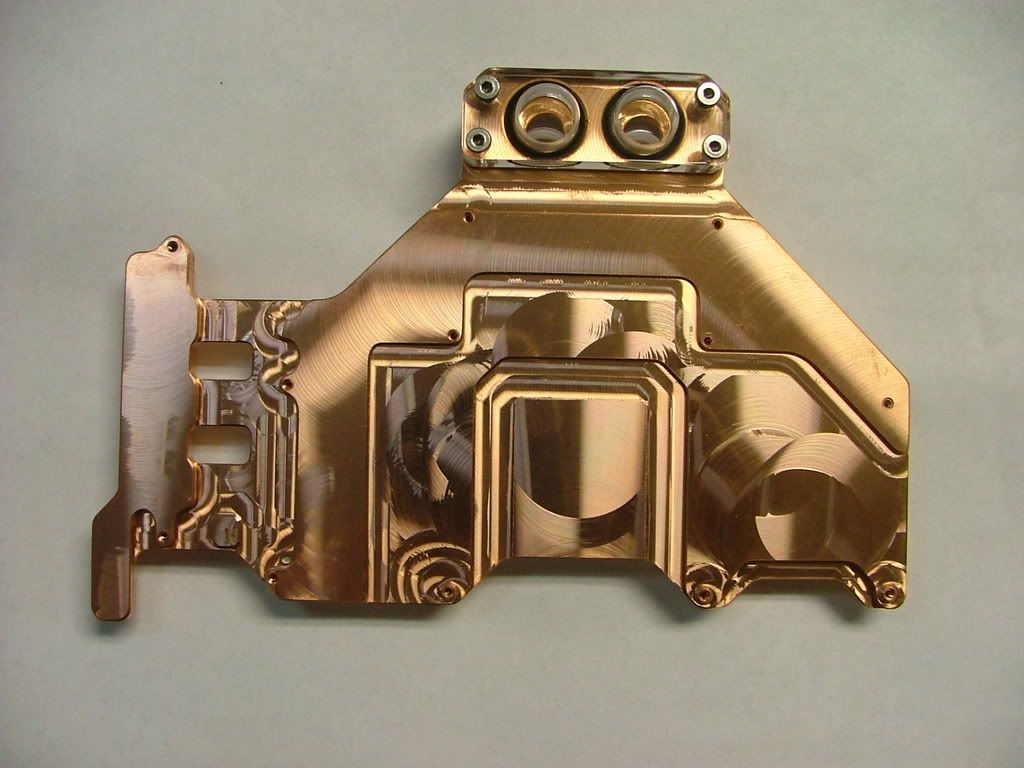   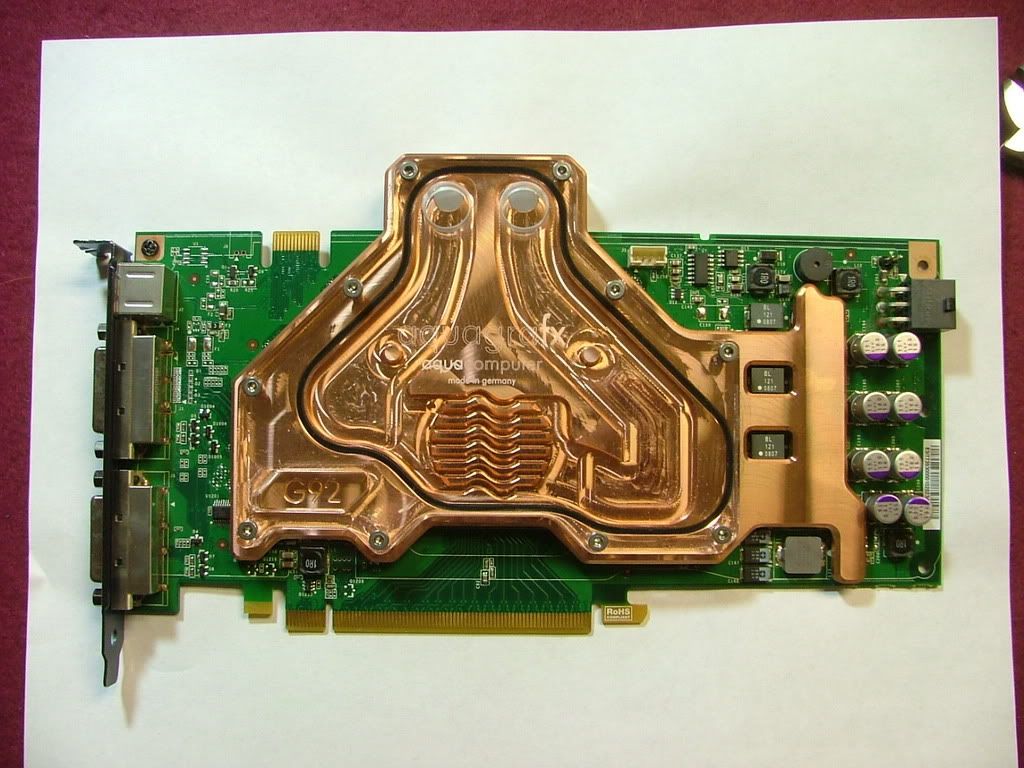
In doing a dummy assembly using my dead NF-M2 mobo and the gpu I will not be able to exit out the back of the block as I originally wanted to. Itâll have to go around the end of the card like it did with the Twinplex water block
_________________
As of 02/01/11
DreamCatcher AM3 >> (Down Again) >> SG01 Evo, MSI 785GM-E65, PII X4 955(AQ H2O Cooled), XFX GTX285(EK H2O Cooled), Seagate 7200.10 ST380815AS 80GB, 2 x G.S. F3-12800CL7D-2GBPI, MODU82+ EMD525AWT, XP Home SP2
KestrelFlight >> (Under Construction) >> Zalman Z7+, MSI NF980-G65, PII X4 1055T, 2 x Galaxy 580GTXs, Zalman 32GB SSD, WD V'Raptor 300GB, 2 x WD 1 TB Blacks, G.S. F3-16000CL9D-4GBTD, Zalman ZM1000-HP Plus , Win7
Oz1a v2.0 >> XFX MDA72P7509 750a, PI X2 8870BE, 2 x XFX GTS250, WD 250GB, F2-8500CL5D-2GBPK, Tt TR2 600W, XP Pro SP3 |
|
| Back to top |
|
|
jedihobbit
Rated XXX
Joined: 22 Mar 2007
Posts: 238
Location: Central Virginia, USA
|
| Posted: Tue, 13 Oct 2009 19:25:55 Post Subject: |
|
|
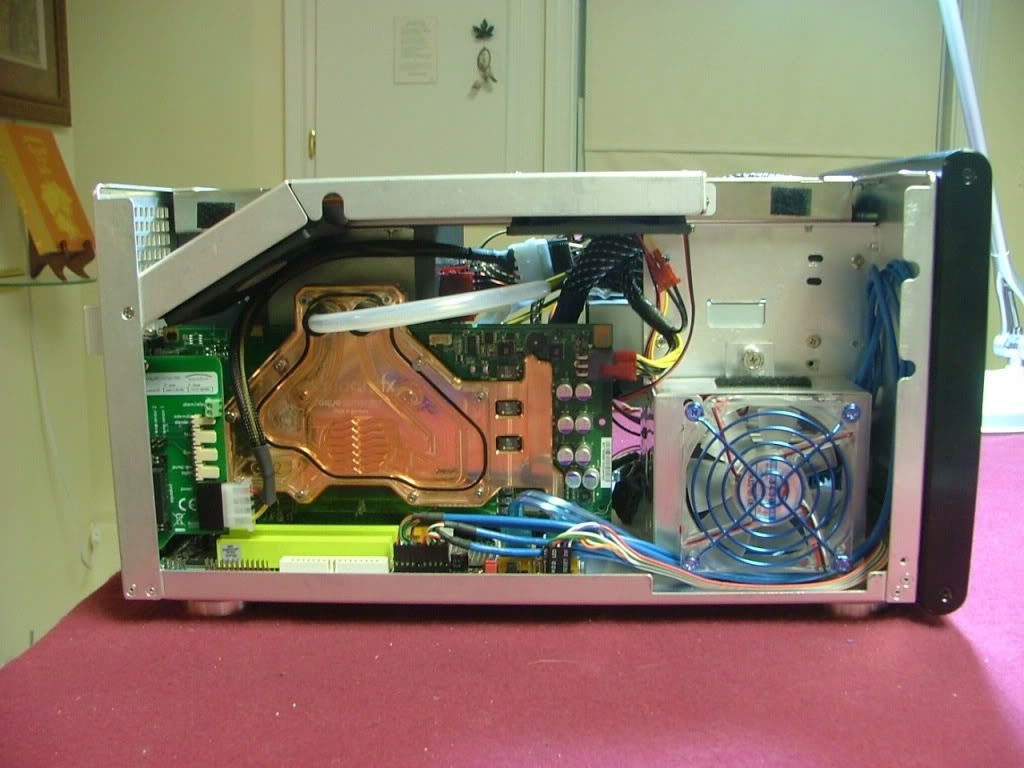
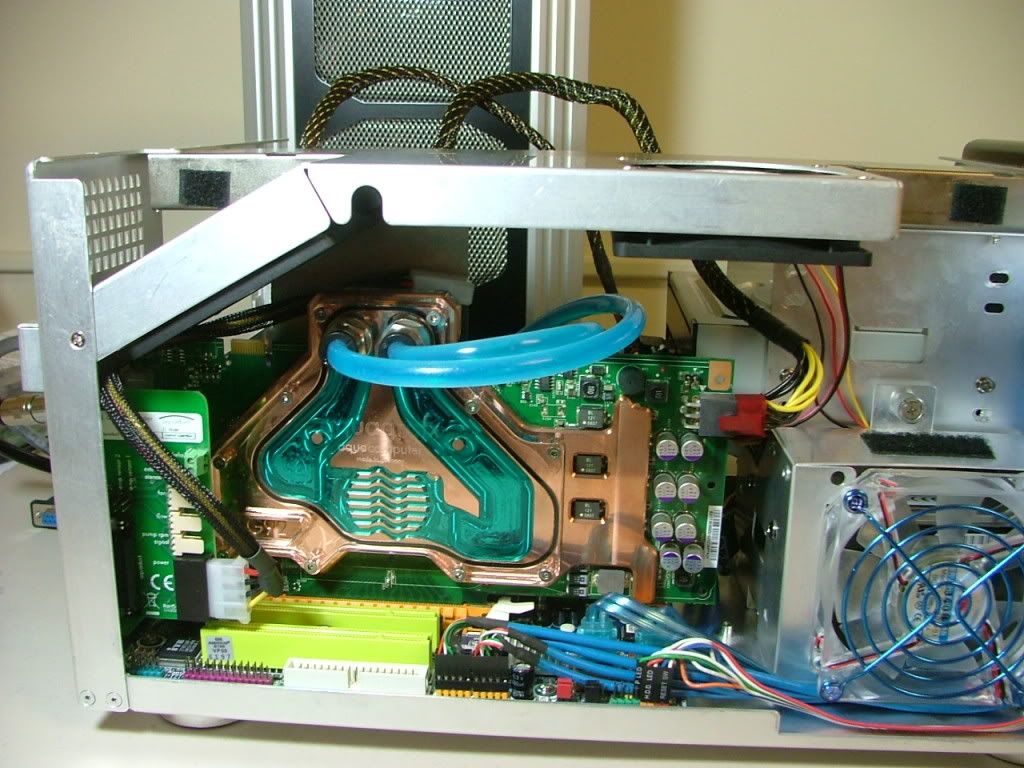
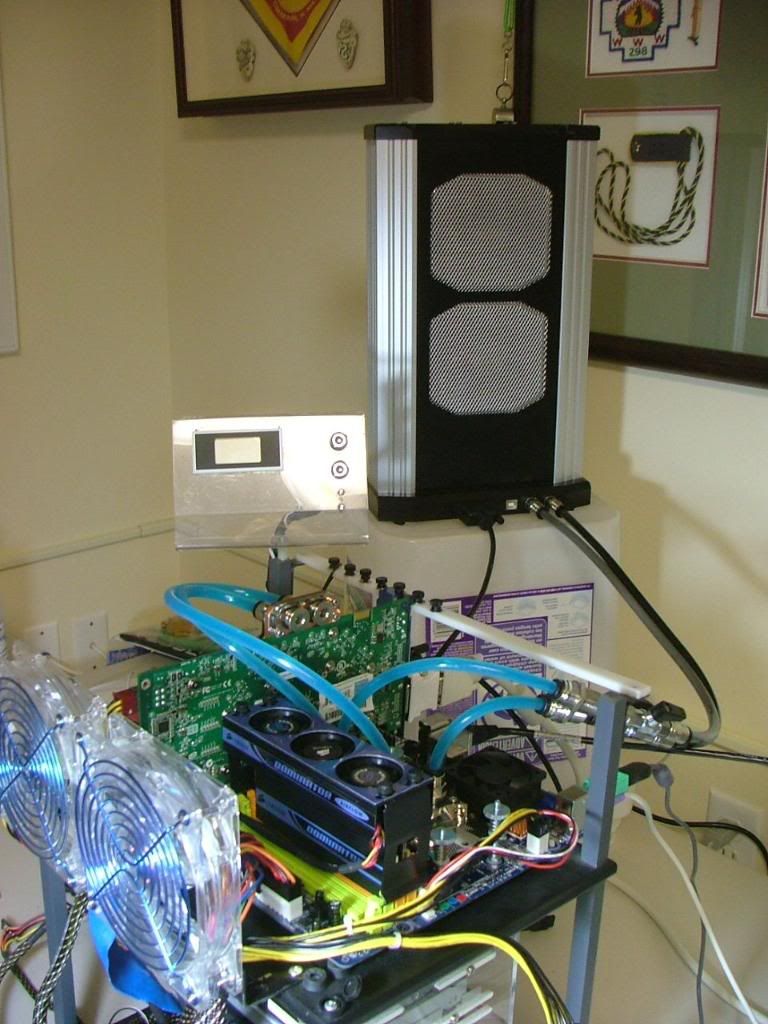
Just realized I forgot to mention the primary starting point for the watercooling systemâ¦â¦..Iâm using Aqua Computerâs Aquaduct 240 PRO Mark II as that starting point. This will place the âbigâ stuff outside, avoid clutter in an already small case, and simplify a lot of issues
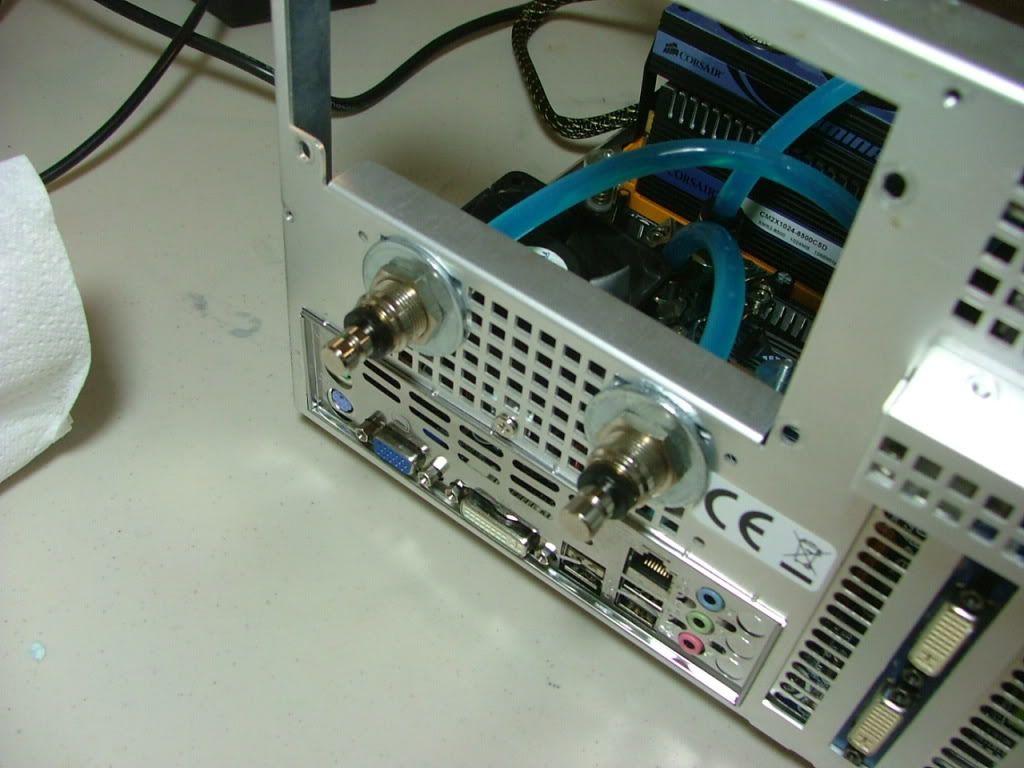
Okay so I mounted the mobo into the SG01 to start figuring out the plumbing. Once the hardware was kinda in place it is amazing what happens to the âpre-planningâ for the layout! Thought I was going to need 90 degree fitting for the NB coolerâ¦.wrong! If anything theyâll be needed for the GPU cooler, especially if I decide to go out the back of the unit. The following series of pics will show my attempts to get the tubing to fit without crimping. While in the Ultra MX6 I had room over the CPU / NB area that is lost to the PSU in the SG01.
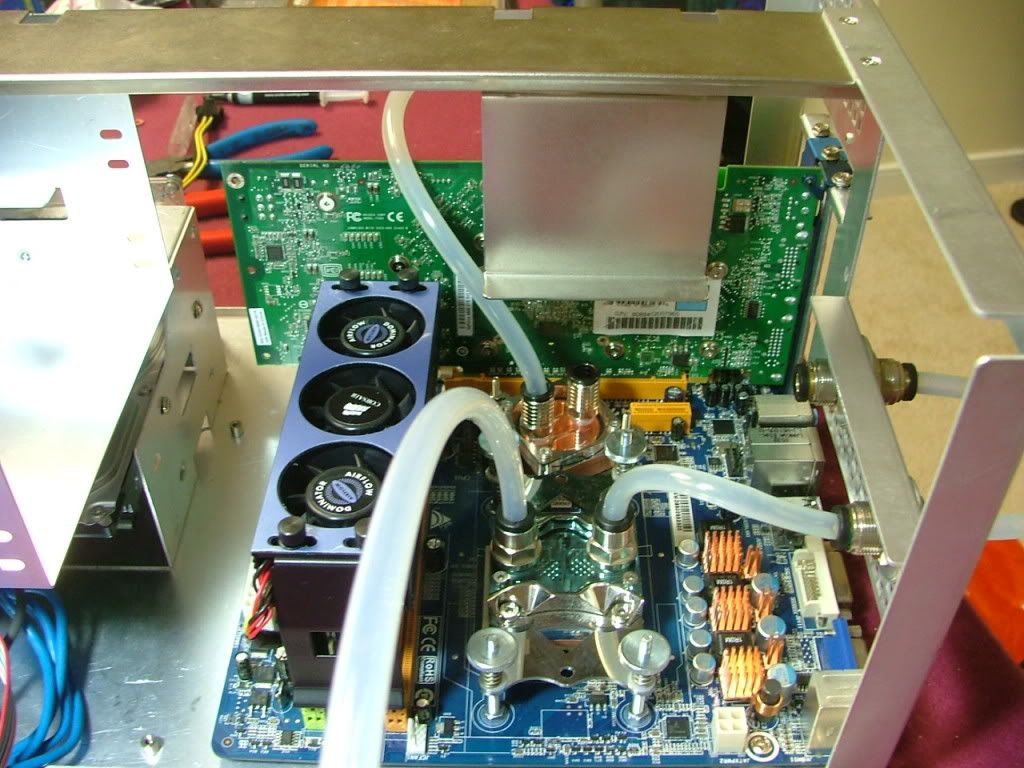    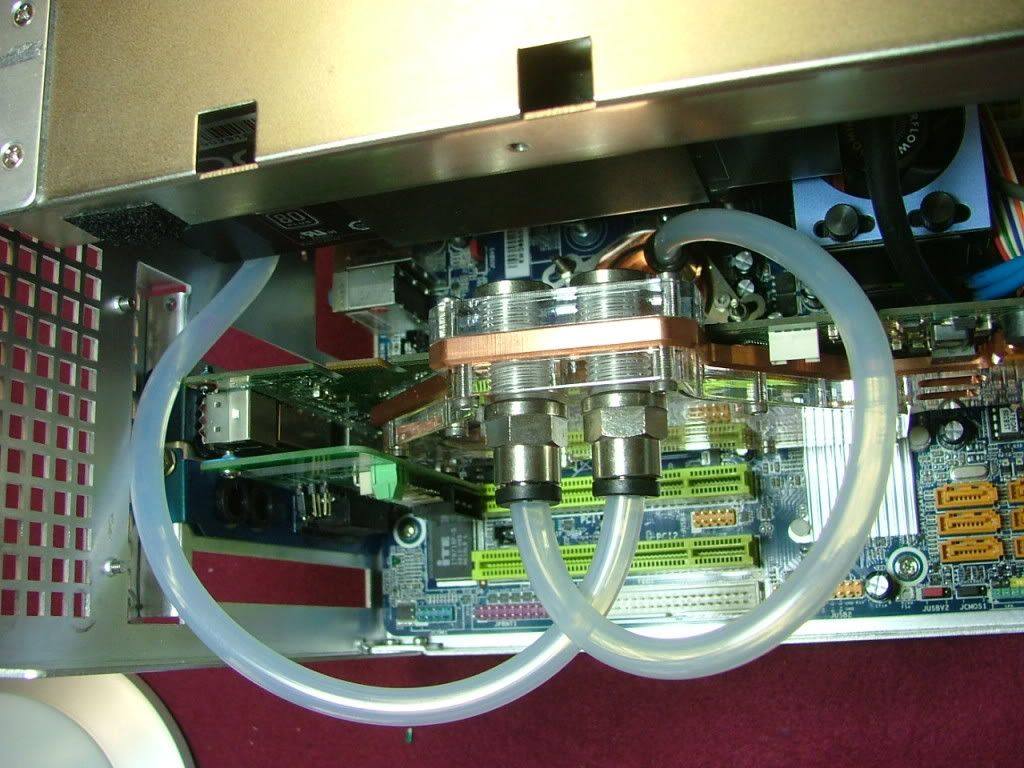 
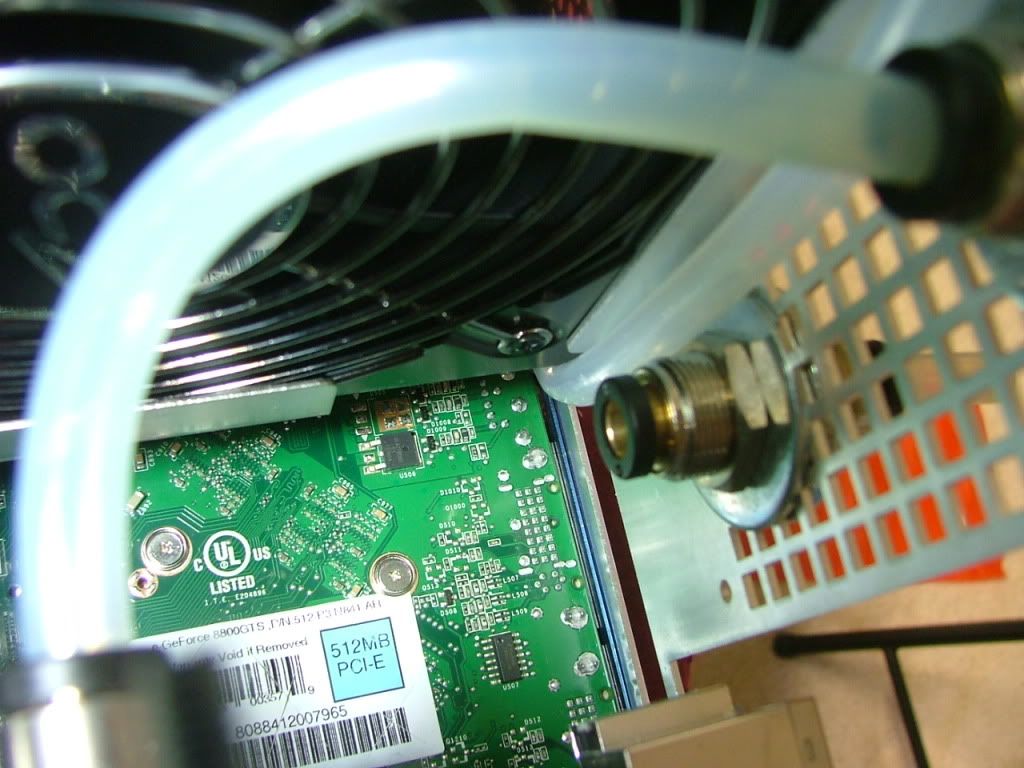
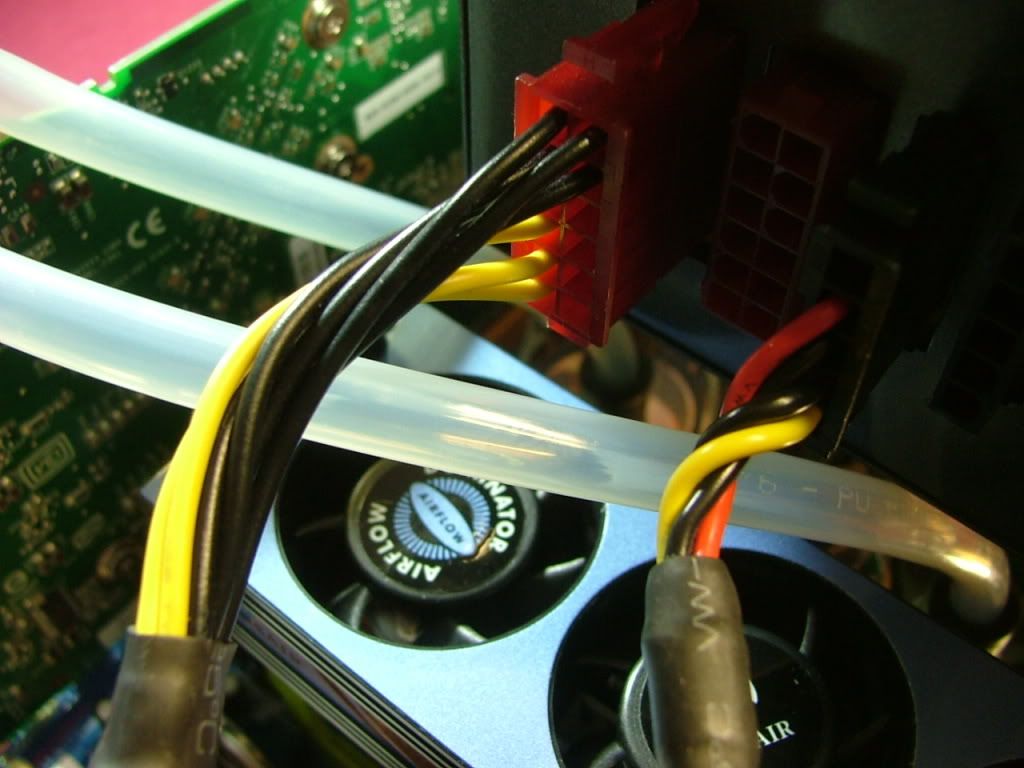
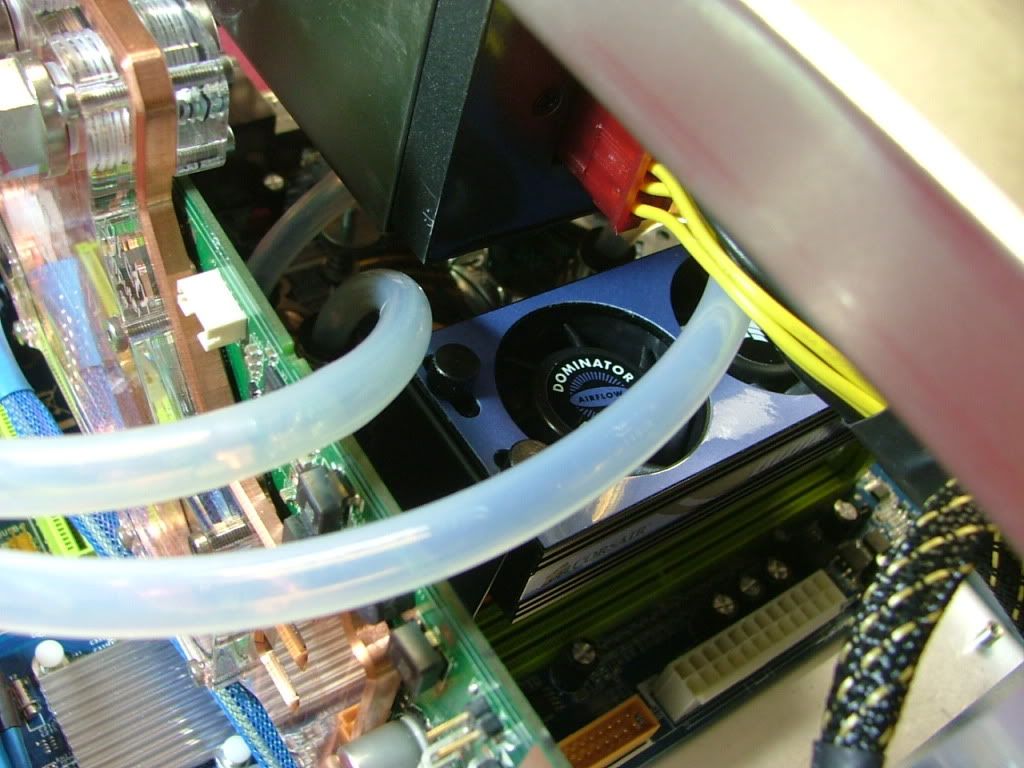
One area of concern is a potential area where the tubing may become âcrimpedâ. In the pics above that would be to the left or top of the pictures showing the GPU. It is where the tube goes over the GPU and under the PSU. Here are a couple of close ups showing the âtopâ and the âbottomâ.
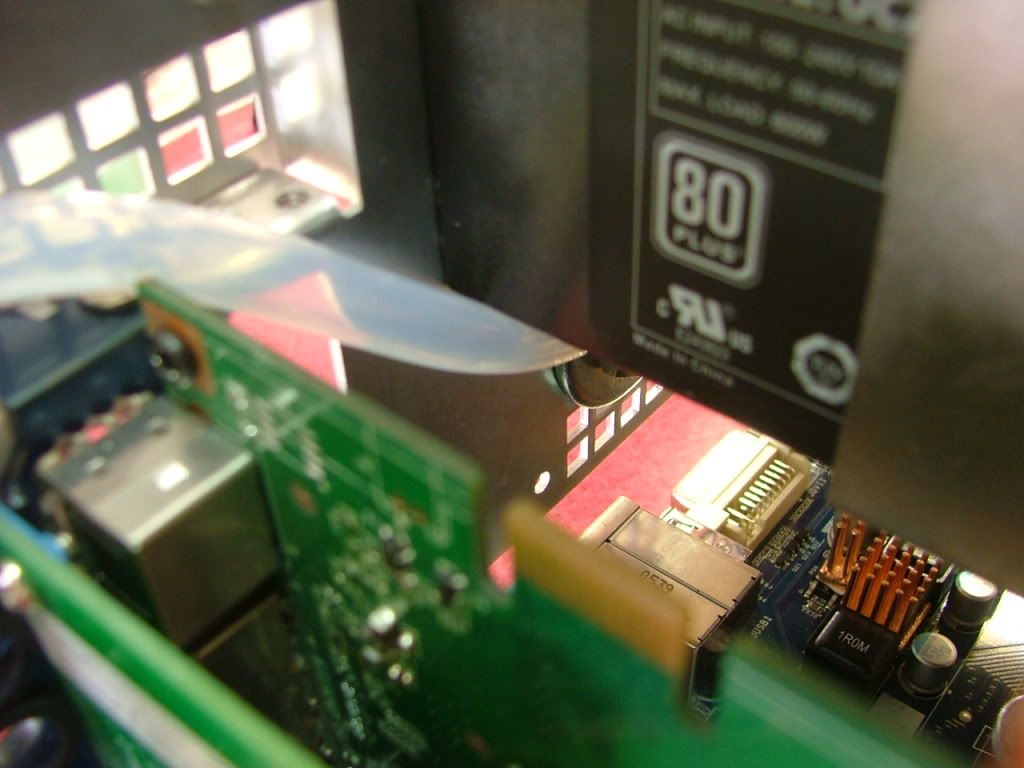 
And the last mechanical fit issue is between the PSU and one of the mounting screws for the memory fan coolerâ¦.it may work itself out after everything is buttoned up.
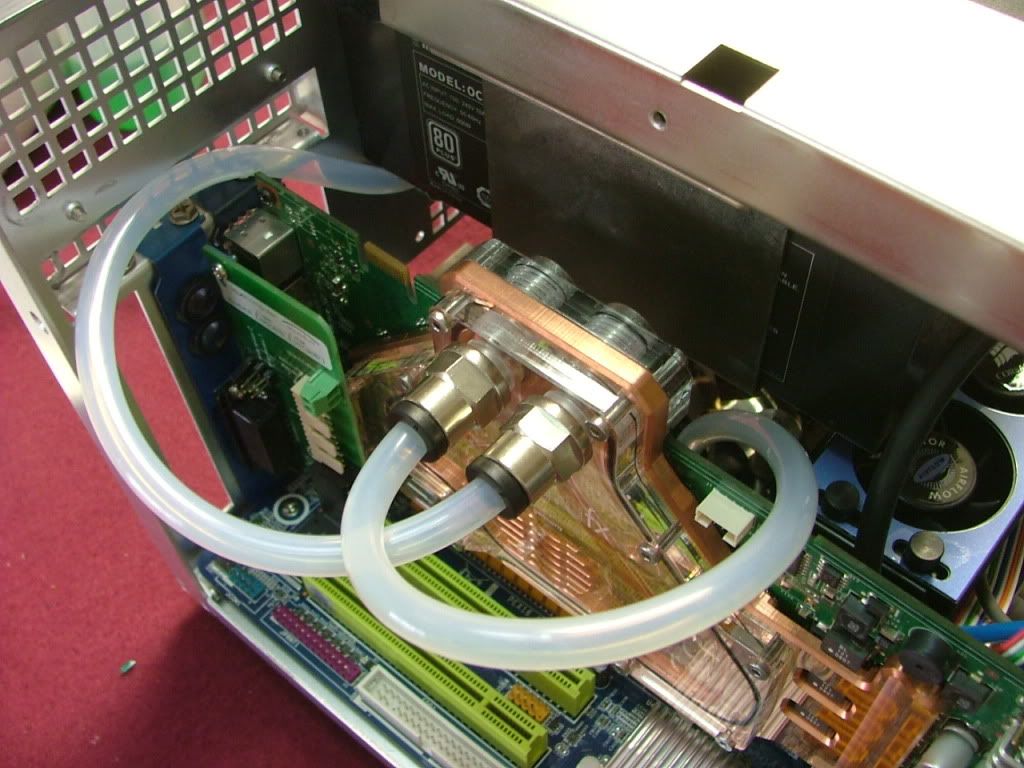
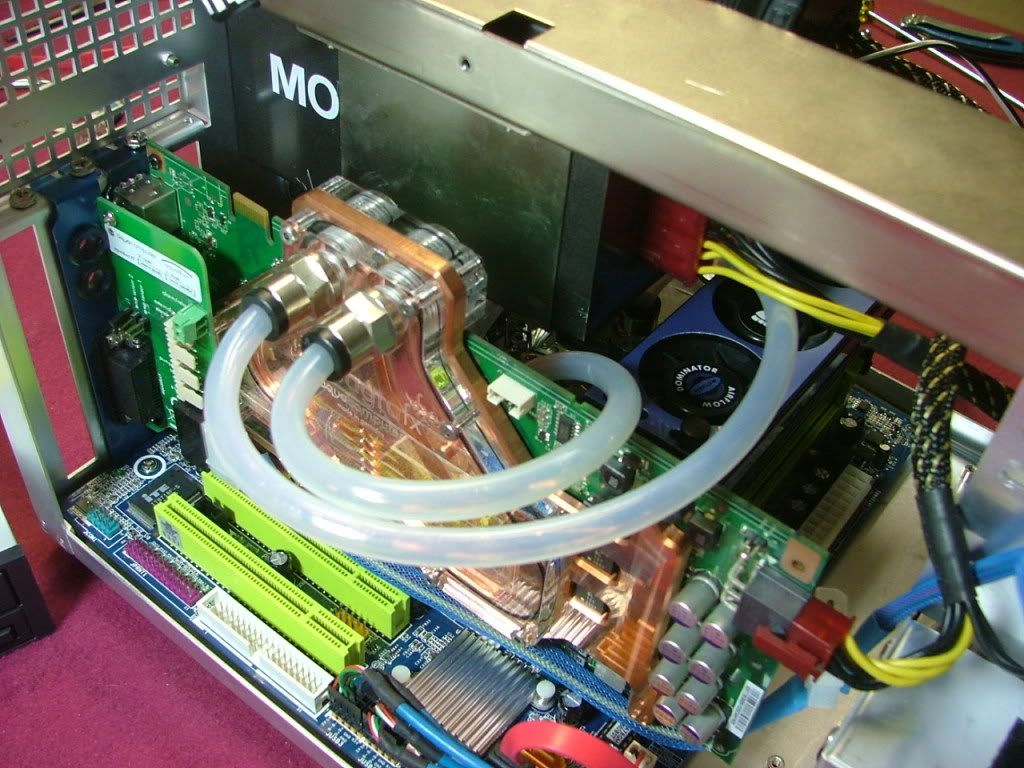
Finally had another chance to play a little with it. Originally the plan had been for case in to be to the right as view from the front with return to the left. However no matter what I tried I could not get the tubing from the NB cooler to connect to the pass through without crimping. So did the easy way out and reversed it. Here are a couple of views showing how the preliminary plumbing will beâ¦minus the PSU.
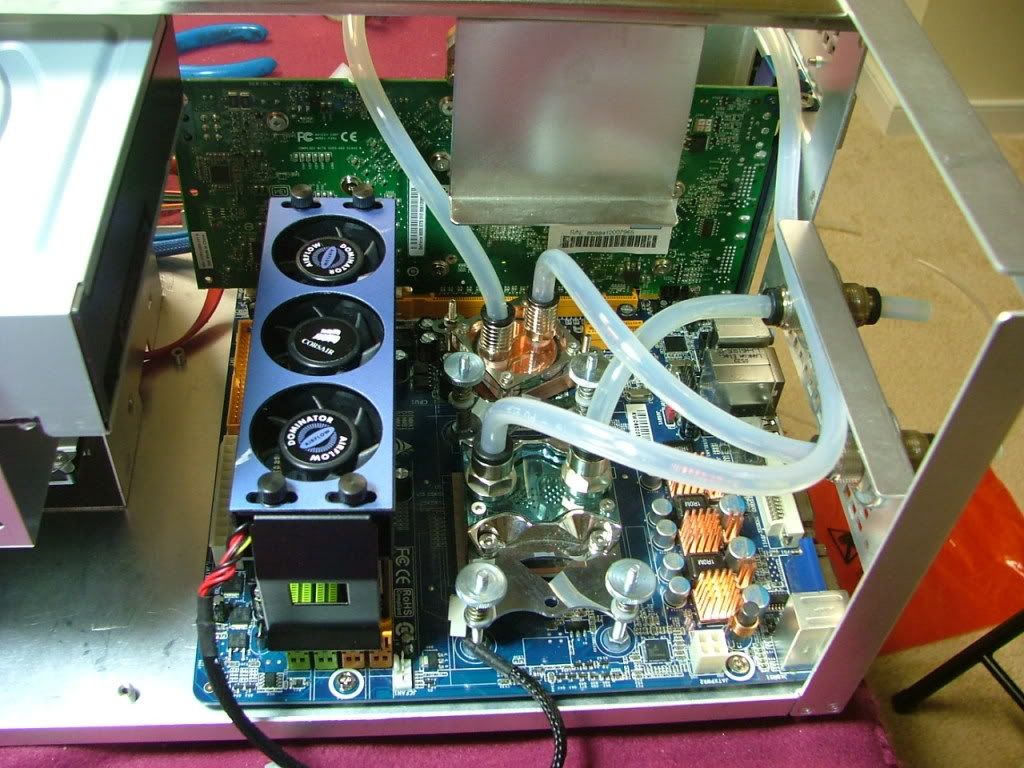 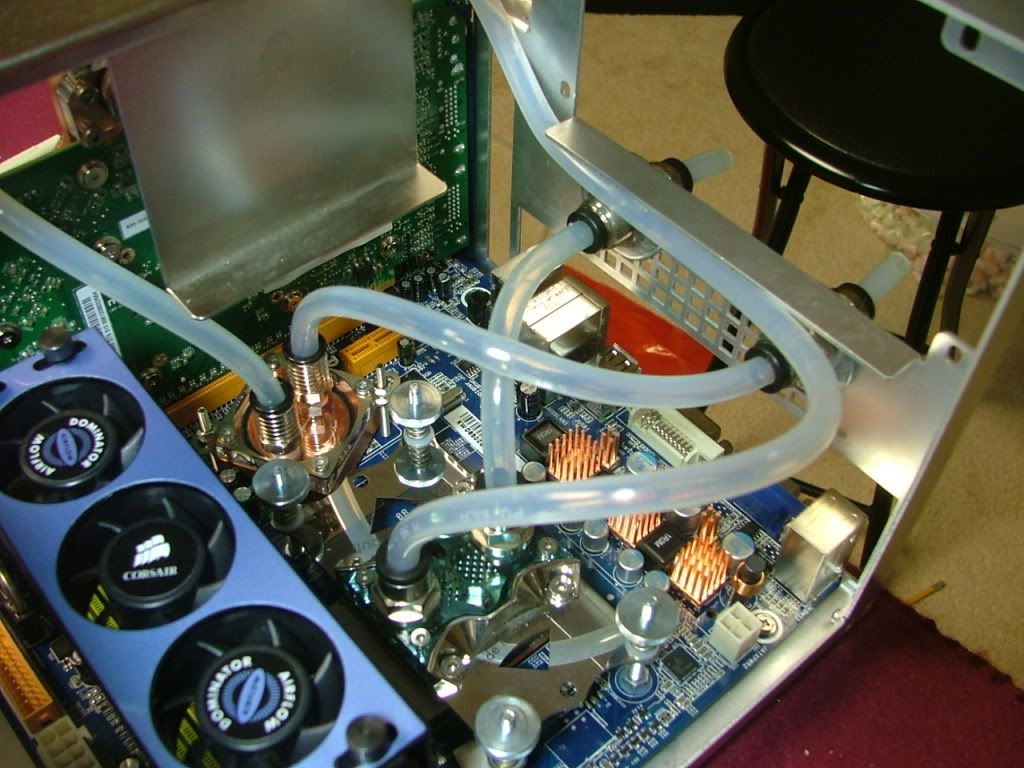
The only real question / concern is the section that goes under the PSU and up over the GPU. Here is a view of that section without the PSU in place. Remember that the PSU edge will extend about ¼ - 3/8â ( 6 â 10mm roughly) further than the edge of the angle. You can somewhat reference the edge by the mounting hole.
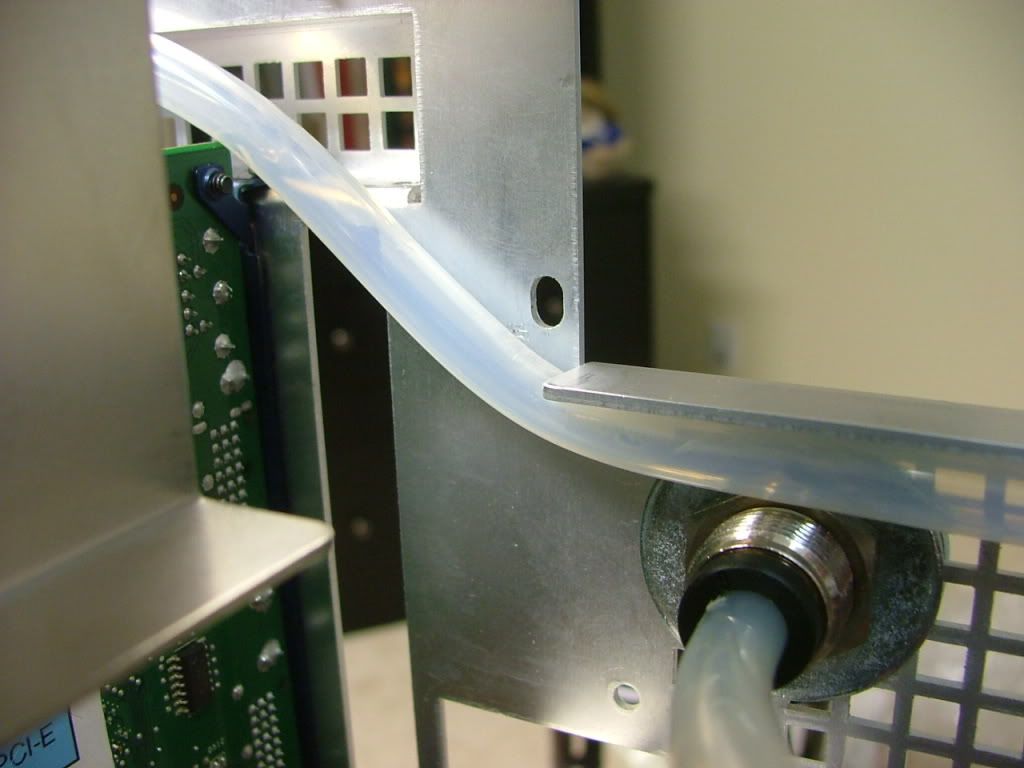
Iâve noticed that with use the tubing usually will âsoftenâ enough to assume the shape eventually. My concern is will the âsofteningâ process weaken the sidewall and cause a crimp?
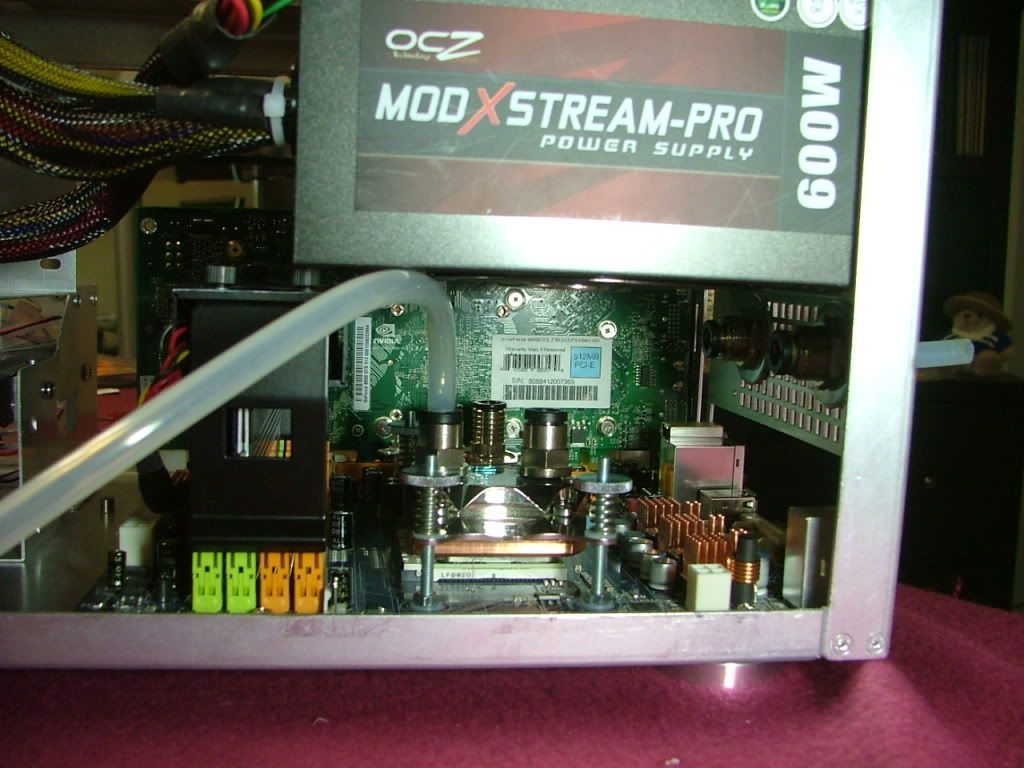
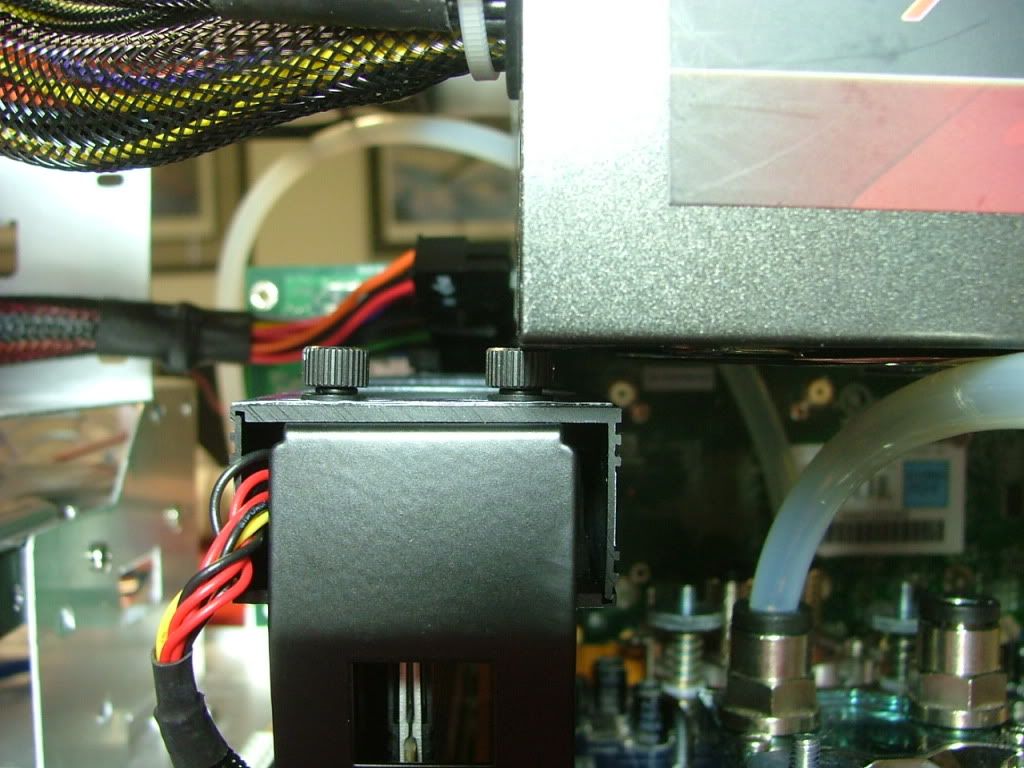
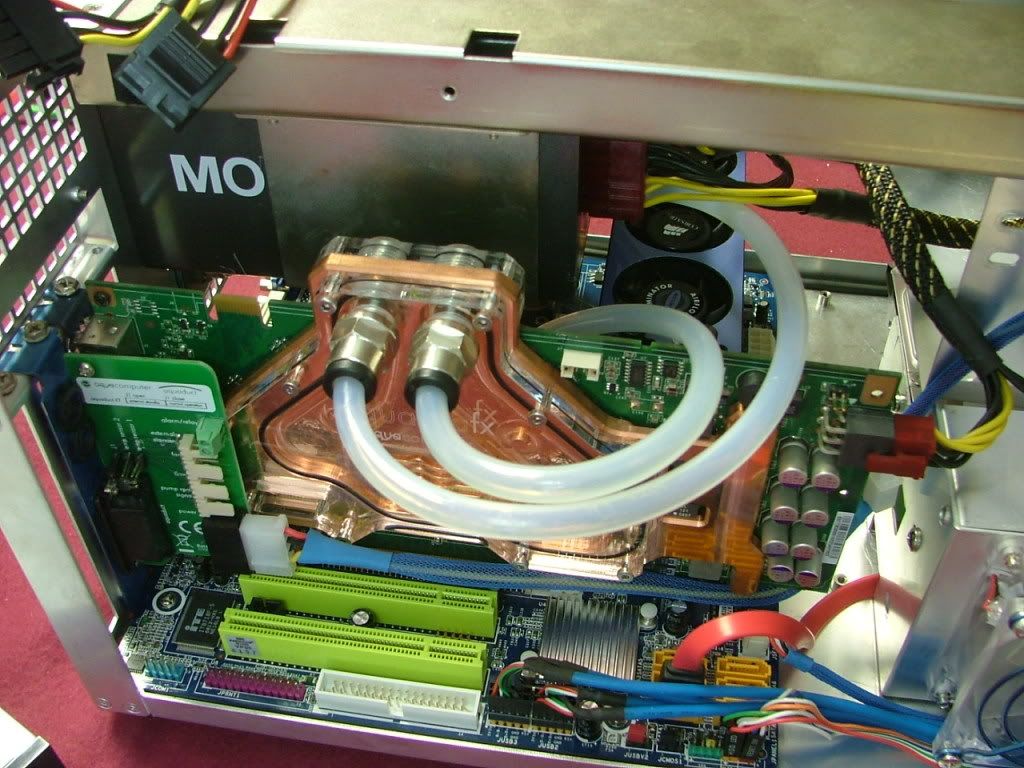
Oddly enough think Iâve resolved my crimping concernsâ¦..all I had to do was use the correct PSU!! My initial fitting was done with the OCZ that ended up in YsSMN v3.0 as the Enermax MODU 82+ was powering the tech station. As it turns out the OCZ is a wee bit over an inch longer, so Iâll let the pictures do the talking.
First off here is the OCZ again, then the Enermaxâ¦â¦..
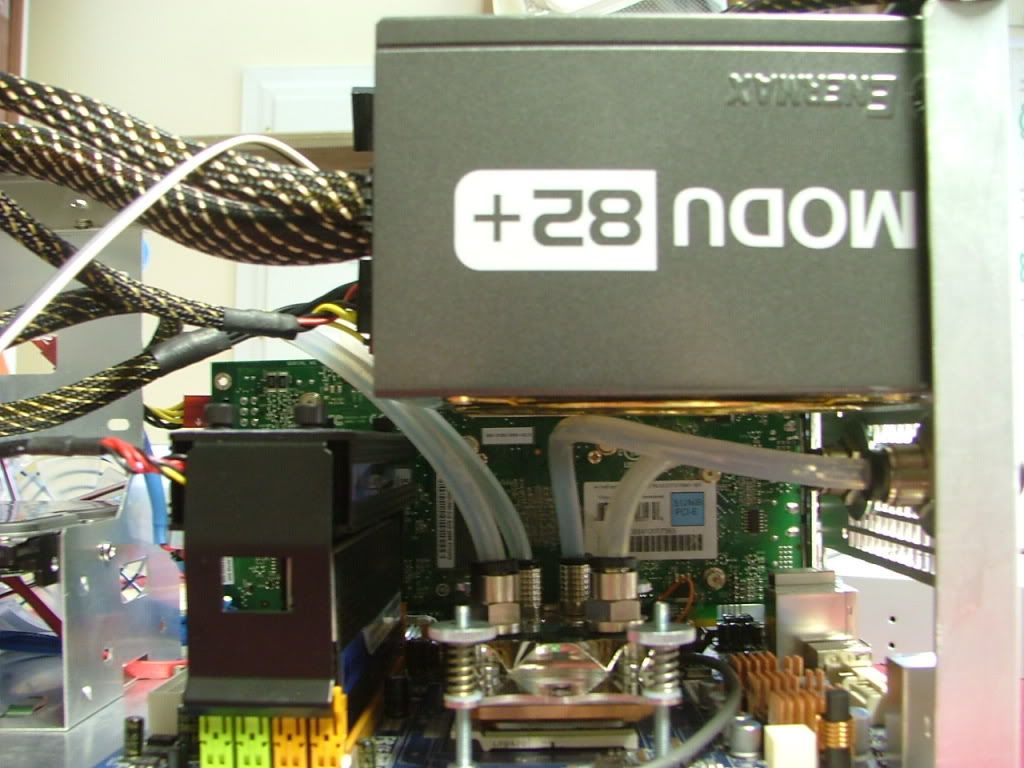
â¦â¦â¦.giving me room between the memory cooler. So here is where the tubing ended up
_________________
As of 02/01/11
DreamCatcher AM3 >> (Down Again) >> SG01 Evo, MSI 785GM-E65, PII X4 955(AQ H2O Cooled), XFX GTX285(EK H2O Cooled), Seagate 7200.10 ST380815AS 80GB, 2 x G.S. F3-12800CL7D-2GBPI, MODU82+ EMD525AWT, XP Home SP2
KestrelFlight >> (Under Construction) >> Zalman Z7+, MSI NF980-G65, PII X4 1055T, 2 x Galaxy 580GTXs, Zalman 32GB SSD, WD V'Raptor 300GB, 2 x WD 1 TB Blacks, G.S. F3-16000CL9D-4GBTD, Zalman ZM1000-HP Plus , Win7
Oz1a v2.0 >> XFX MDA72P7509 750a, PI X2 8870BE, 2 x XFX GTS250, WD 250GB, F2-8500CL5D-2GBPK, Tt TR2 600W, XP Pro SP3 |
|
| Back to top |
|
|
jedihobbit
Rated XXX
Joined: 22 Mar 2007
Posts: 238
Location: Central Virginia, USA
|
| Posted: Tue, 13 Oct 2009 23:20:51 Post Subject: |
|
|
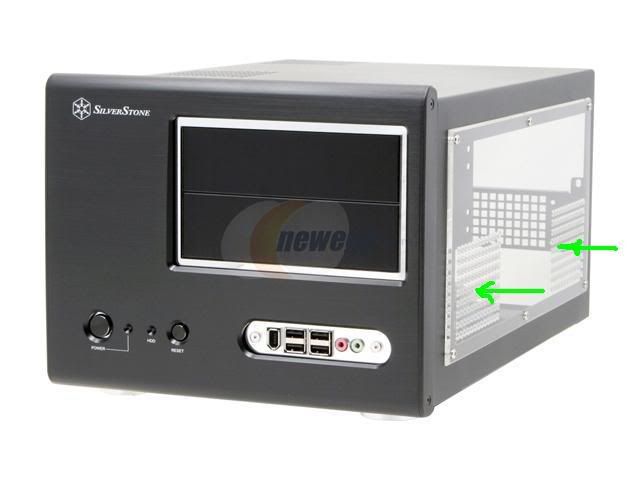
Okay have an air movement question..........
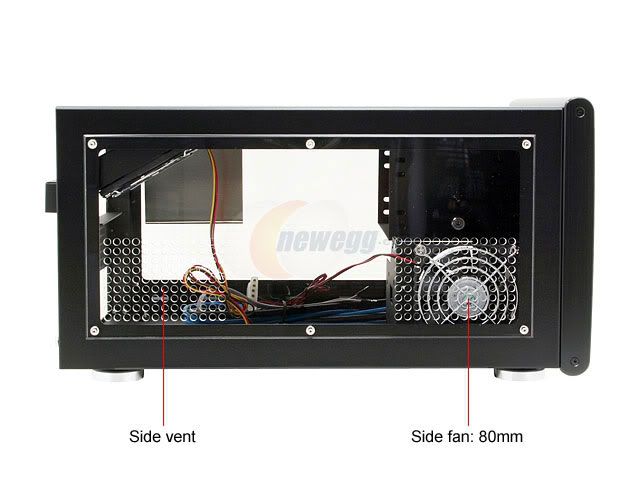
The SG01 has two fans on the left side over the gpu area. As of right now they are both set to "exhaust" the air. Also on the left side is the fan to cool the HDD which is currently set to "intake". That leaves absolutely nothing for the area to the right of the GPU. This 2/3s of the case currently does not have a fan of any sort as the CPU & NB are water cooled and the mosfets are passive.
Now, should I make the HDD fan also âexhaustâ so as to try and create some kind of âcross flowâ air pattern? Meaning that the left side would be totally exit hopefully pulling the air through the holds on the right side?
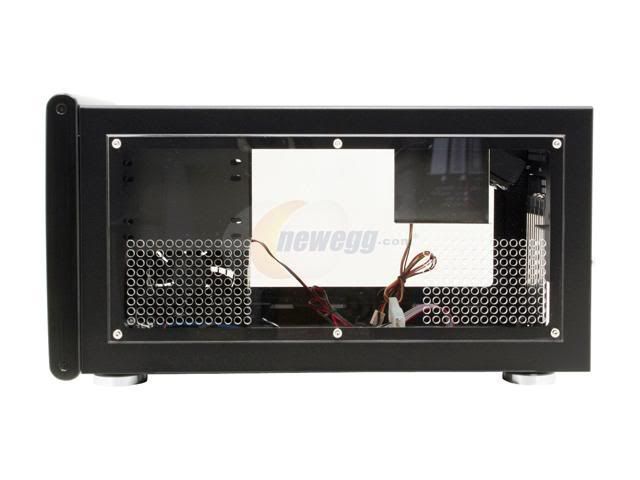
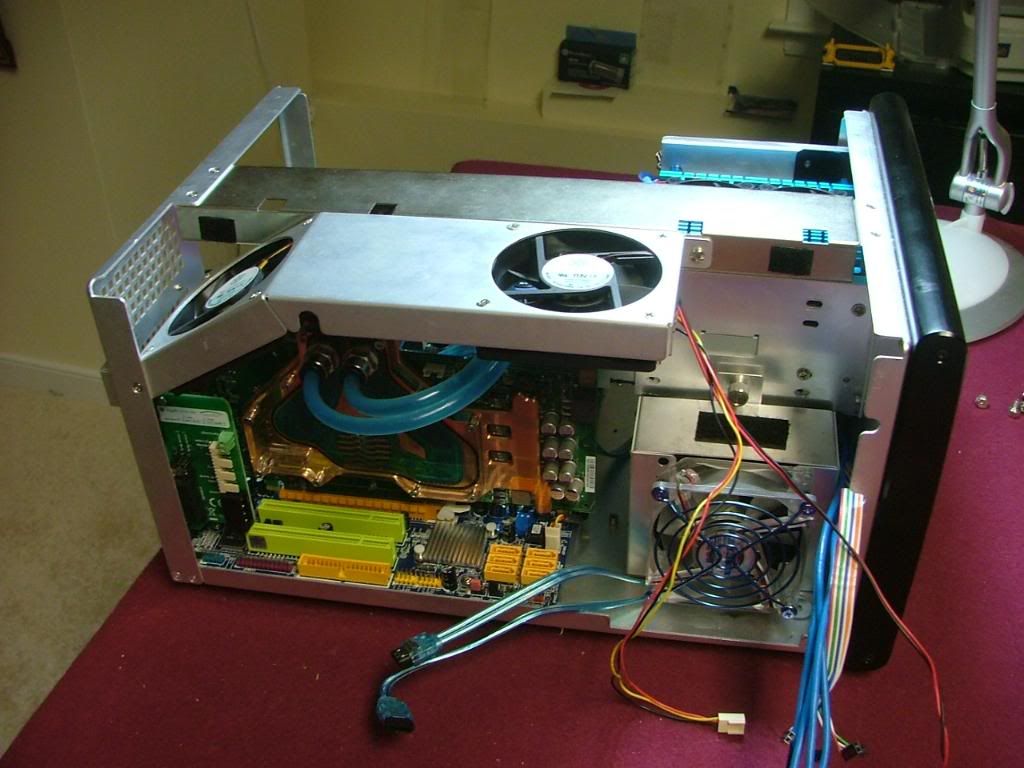
Here are some quick and dirties (Paint & factory pics)......... Red = exhaust and Green = intake, also note that this shows the factory windowed version. Same idea if I use my modded "non-windowed" cover, it is just that on the right side the holes go all away across.
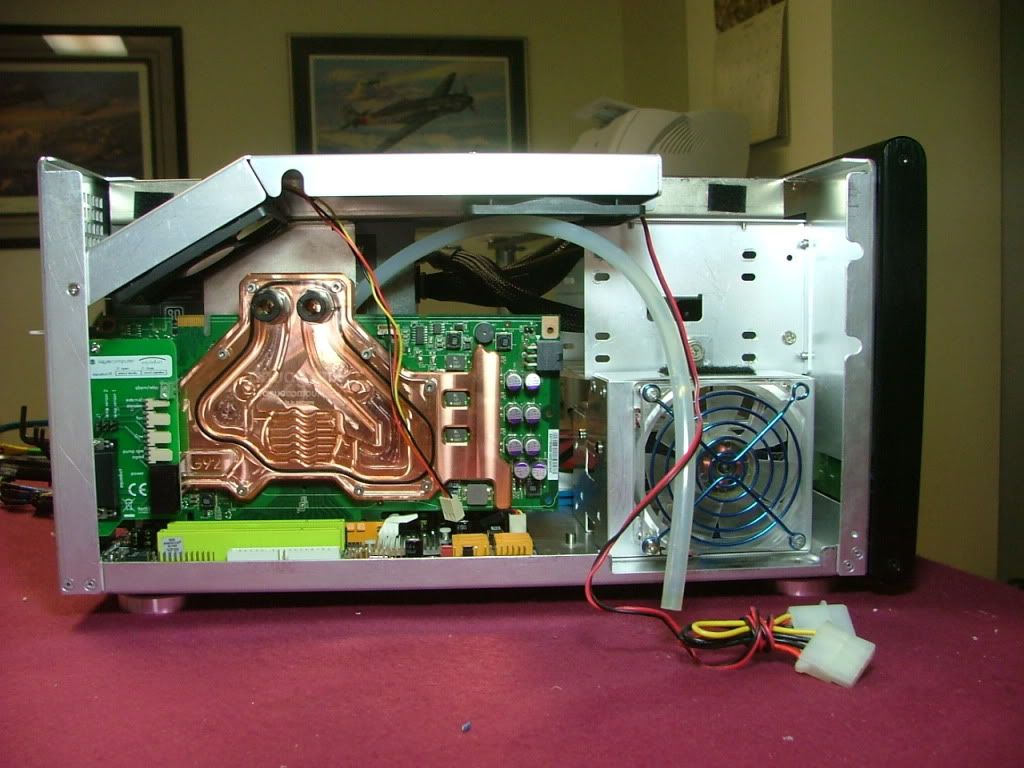
First the left side to show the fan for the HDD. Currently it is set up to draw air in to the HDD. Proposing to turn it around to blow air out from inside the case
Then here are the two 3/4 views to show the "airflow". The fans in the top can be reversed if either is wanted for intake.
Finally managed to spend some time on this! Two big delays was waiting on the I/O backplate to arrive and resolve the issue of the mobo audio header to case front panel cable pin outs. Ended up with a 50 â 50 solutionâ¦â¦.found a source for the backplate and gave up on the audio. As far as the windowed cover that is still âin progressâ but wanted to at least get the system running so that went to the back burner.
Again a concern is the lack of air flow inside the case (as mentioned above), so after some thought and input will try the following:
1. Make all fans on the left side of the case exhaust with hopes it will cause some kind of air movement through the case. Adding a fan or fans will be limited by how much (or little) space I have. Also I believe one of the reasons for water cooling was to delete fan noise.
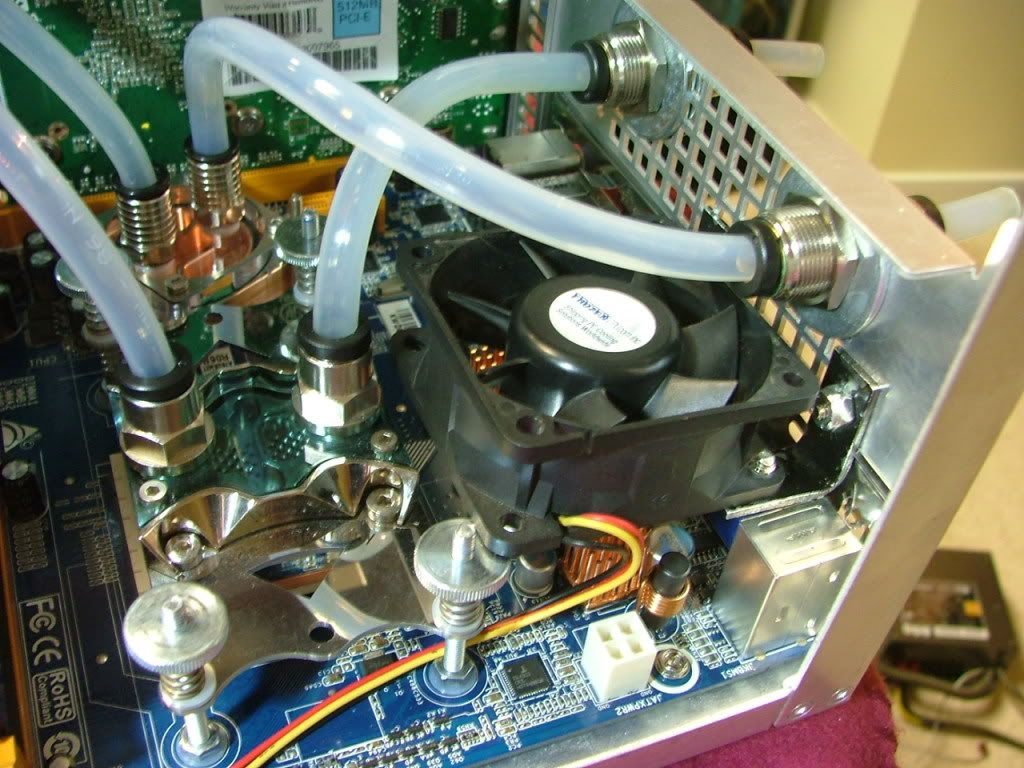
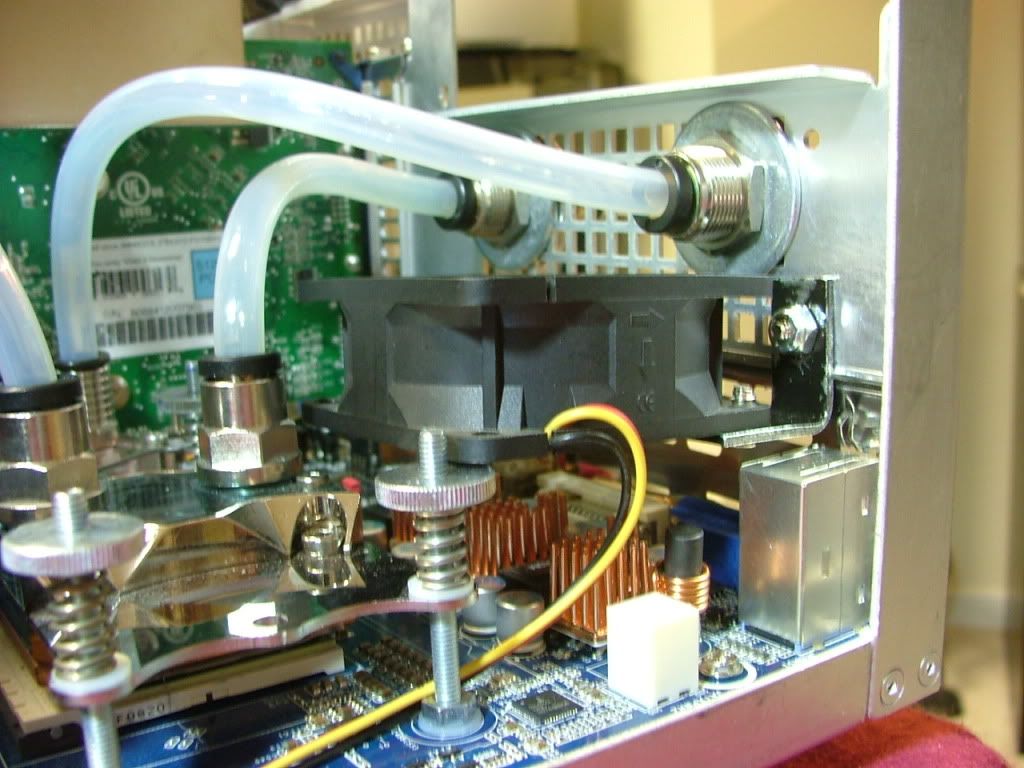
2. Mount a cooling fan for the mosfet passive coolers
On the mosfet part of the deal I rounded up ye old trusty 60mm that I initially had cooling the NB cooler on the Abit NF-M2 nView / Opty 1210 mobo assembly. I then grabbed the two brackets that were mounting the 120mm fan on the Tech Station that went into YsSMN v3.0.
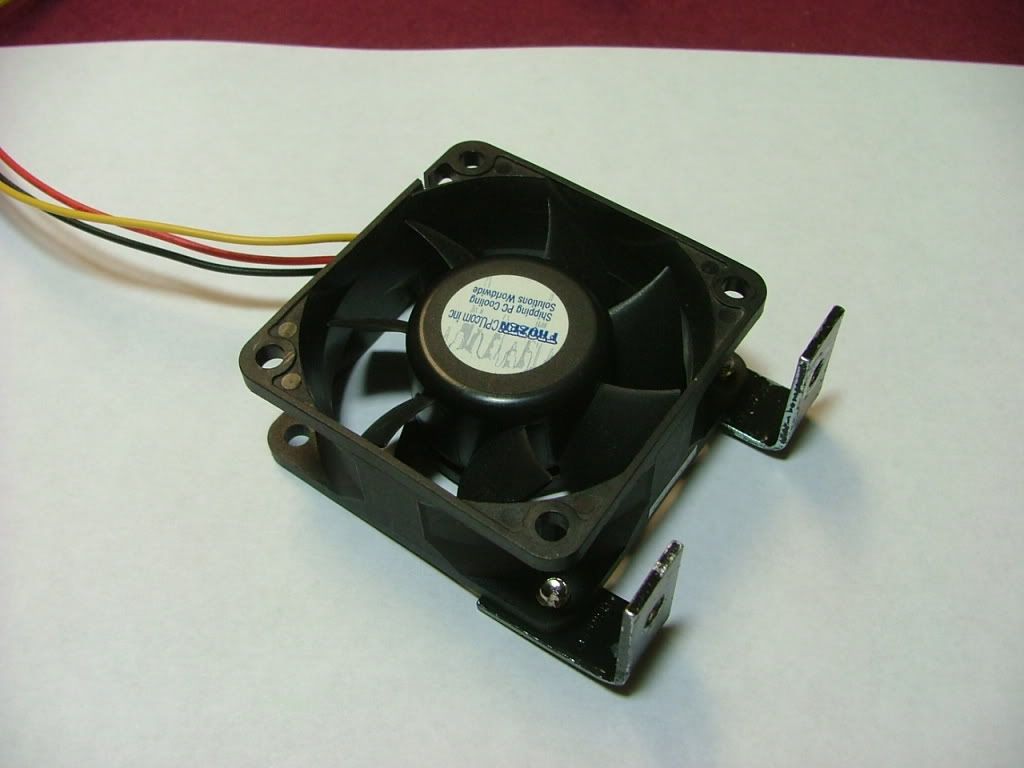
By mounting the brackets on the âbottomâ I was able to lower it in the case to
1. Not be too close to the PSU
2. Match a couple of holes in the chassis and miss the water cooling pass throughs
3. I think of something later!
Another thing addressed was how to power the shear number of 3-pin fans as this mobo only has 1 fan header excluding the cpu. Managed to track down a neat unit the Sunbeam Multi Fan Power Port # MFPP. Here you can see it in the initial setting up period
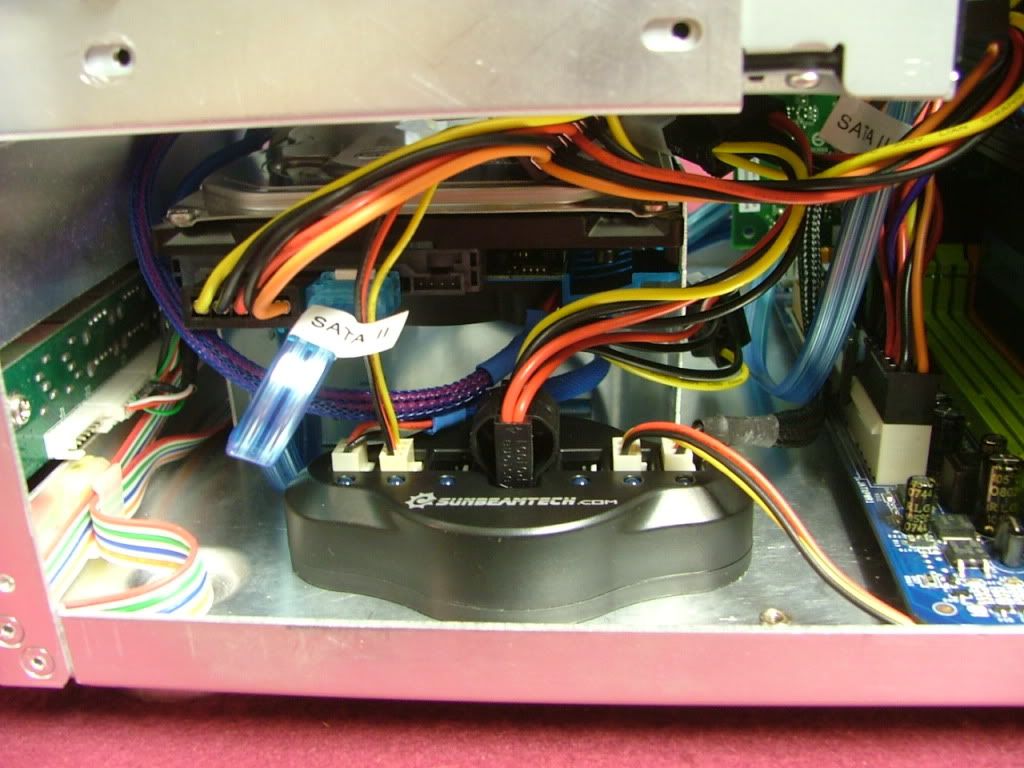
In setting up the modular cables Iâve split the power up as follows:
1. SATA cable powers the HDD & Optical drive
2. One Molex cable powers just the Aqua Computer power card / water pump and fans.
3. Second Molex cable powers all other fans and âextrasâ
4. Then of course the PCI-e video power cable.
5. This left me with two spare power plugs.
Also I ended up moving the optical drive down to the bottom 5.25â bay as I used the upper one for all of the excess PSU cable âlengthsâ.
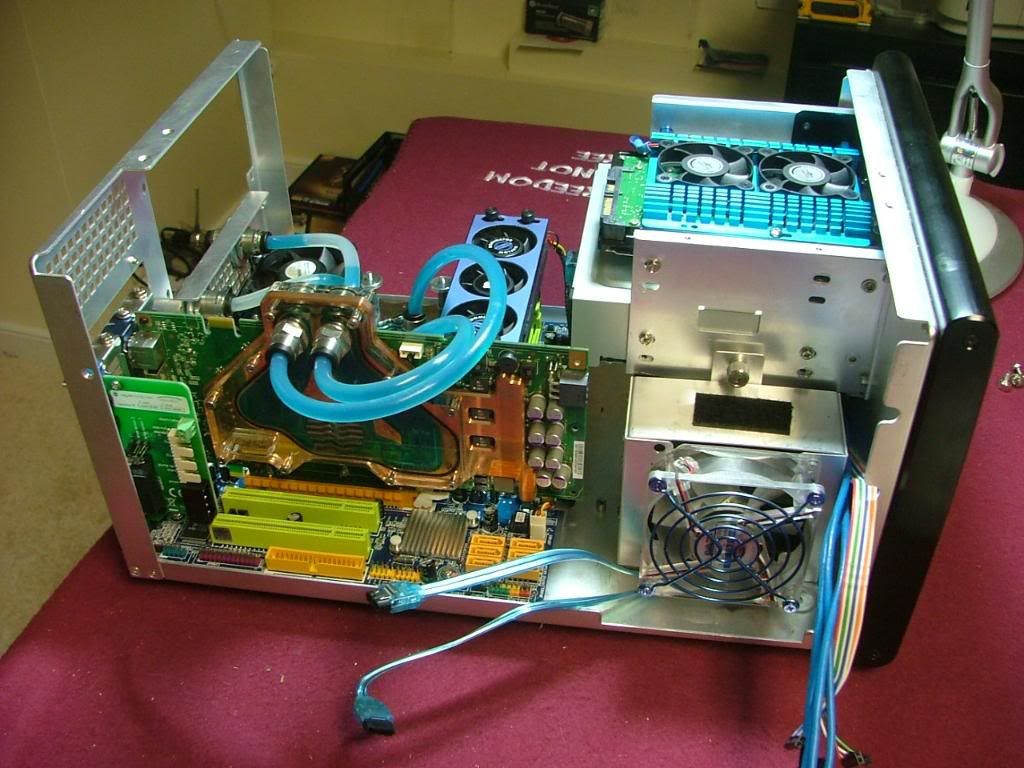
So here we have it all together waiting to be leak tested.
  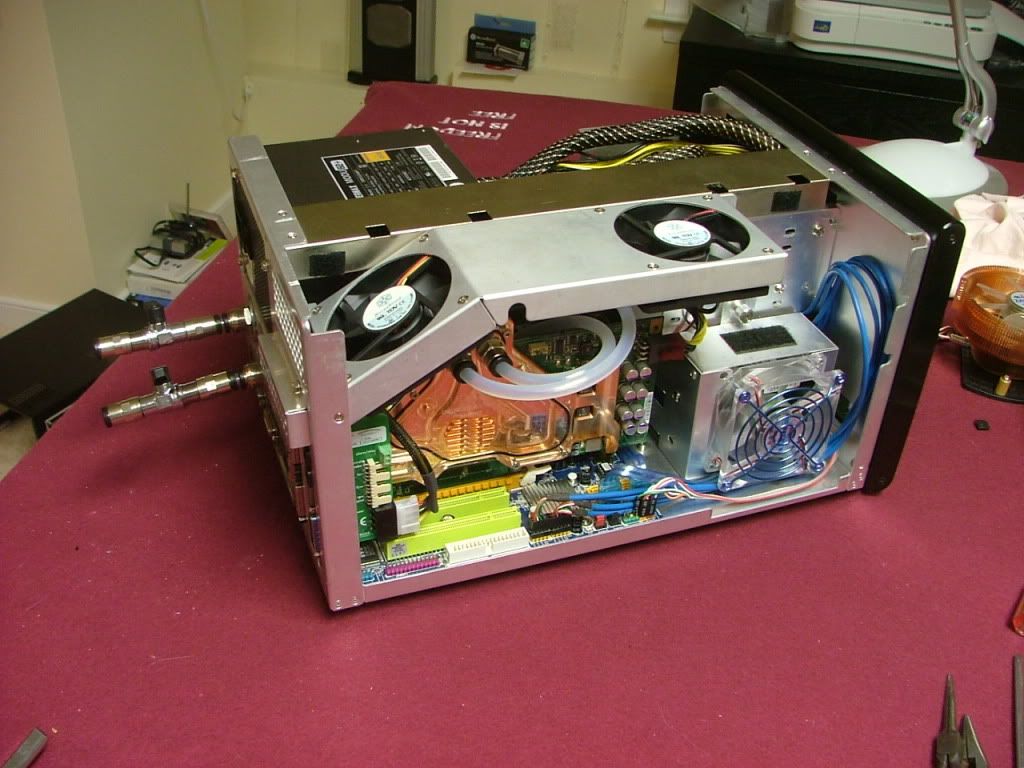
And then the beginning of the __________ (you fill in the blanks!)
A major FUBAR!!! Set everything up on the work bench to leak test. Aqua Computer provides a PSU mobo âbypass plugâ that allows one to run the PSU without powering up the mobo. This is so you can fill the Aquaduct 240 PRO Mark II internal res and get the coolant though out the loop. In my usual rush I forgot to turn the PSU off and as soon as I plugged in the supply the coolant started filling the loop. So I grabbed the coolant bottle and started filling the resâ¦â¦..then occurred to me maybe I should check for leaks!! Sure enough the tube going to the GPU inlet was not seated all the way in and I was quickly creating a mess.
After I got that cleaned up I started anewâ¦.topped off the res, closed the cover, and started looking for more leaks. Sure miss having the mobo tray from the MX6 as I needed to use a flash light to see everything. Notice a large air bubble in the GPU so started moving the case around to get to move. Then everything quit.
Okay so I plugged the power cable in the mobo to start again, except the only thing that happened was the fans started to move then quit. Oh snit I then remembered that I read some where that one should only use the power jumper for a short period before possibly screwing up the power supply.
I tried all kinds of things to get the PSU to power stuff up but with no joy. Just as a test I tried an older PSU to see it the water cooling pump would run as I couldn't get to anything else easily. Yep it runsâ¦â¦.
So now I looking at the fact I may have just killed the PSU.
Based on some initial testing, I declared the PSU as tote and looked to replace it. In the mean time here the box sits with no leaks and no power supplyâ¦â¦â¦
So everything came to a screeching halt until I get the new PSU, of course thought about going back to the window if I got over my depression of my 3rd PSU biting the dust.
_________________
As of 02/01/11
DreamCatcher AM3 >> (Down Again) >> SG01 Evo, MSI 785GM-E65, PII X4 955(AQ H2O Cooled), XFX GTX285(EK H2O Cooled), Seagate 7200.10 ST380815AS 80GB, 2 x G.S. F3-12800CL7D-2GBPI, MODU82+ EMD525AWT, XP Home SP2
KestrelFlight >> (Under Construction) >> Zalman Z7+, MSI NF980-G65, PII X4 1055T, 2 x Galaxy 580GTXs, Zalman 32GB SSD, WD V'Raptor 300GB, 2 x WD 1 TB Blacks, G.S. F3-16000CL9D-4GBTD, Zalman ZM1000-HP Plus , Win7
Oz1a v2.0 >> XFX MDA72P7509 750a, PI X2 8870BE, 2 x XFX GTS250, WD 250GB, F2-8500CL5D-2GBPK, Tt TR2 600W, XP Pro SP3 |
|
| Back to top |
|
|
jedihobbit
Rated XXX
Joined: 22 Mar 2007
Posts: 238
Location: Central Virginia, USA
|
| Posted: Wed, 14 Oct 2009 11:15:19 Post Subject: |
|
|
Later on I did more testing andâ¦â¦.Well, well again how things change so quickly for meâ¦â¦â¦.it seems it is not the PSU ladies and gents! Have a look at the following pics of the mobo.
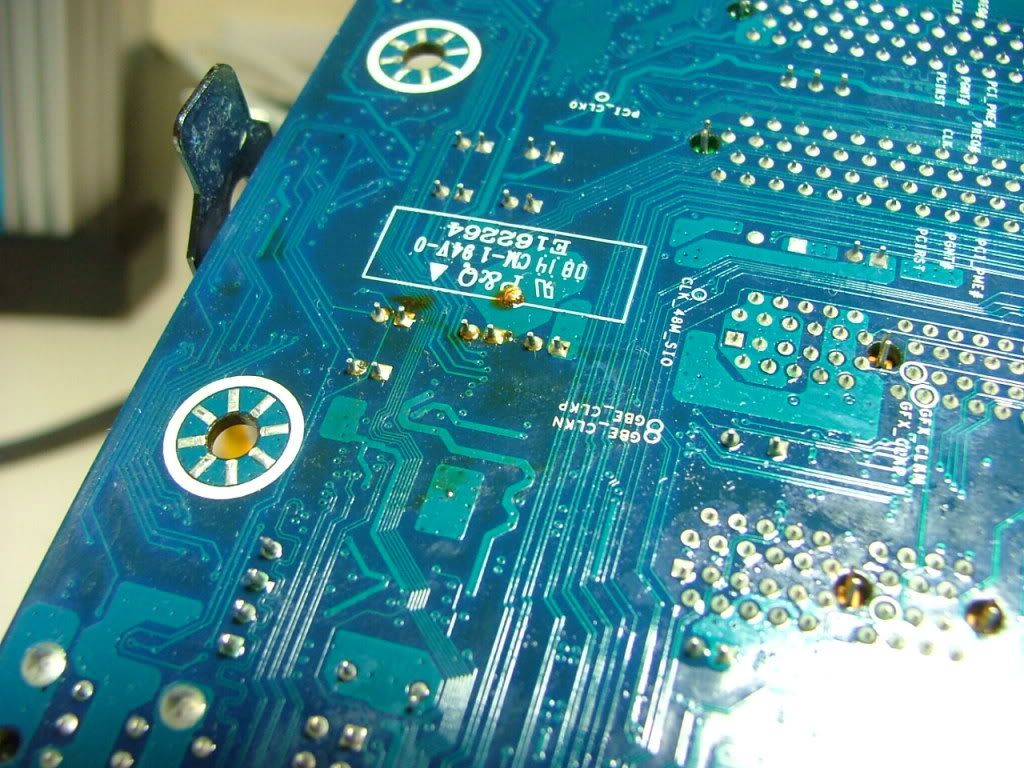 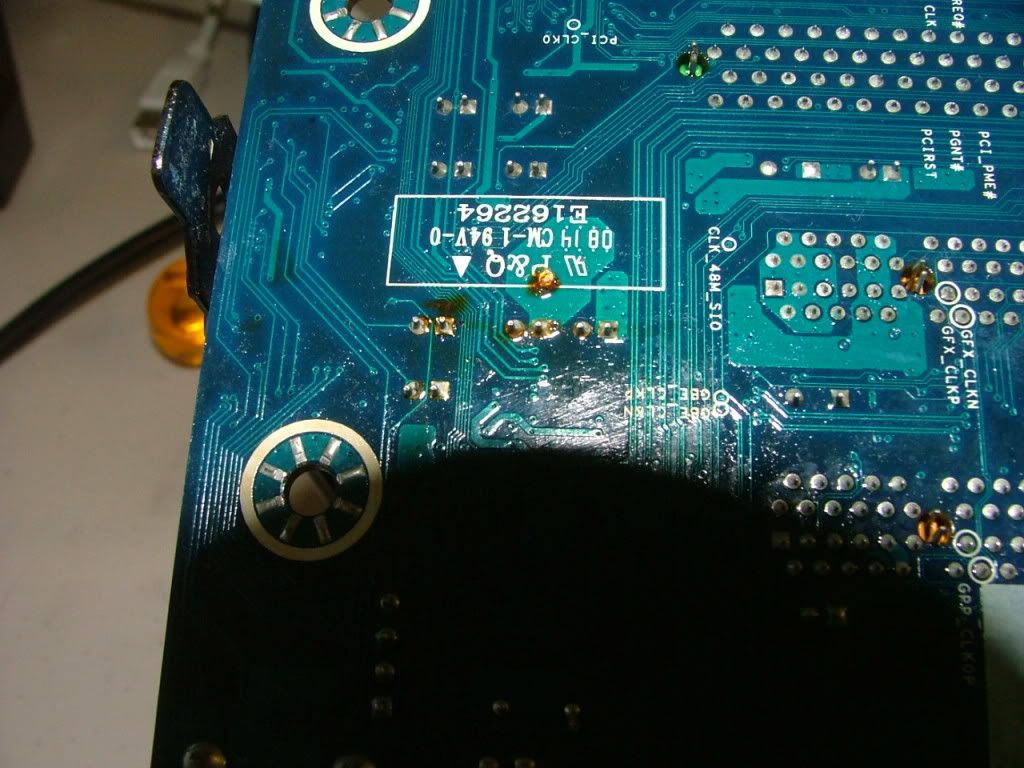
It seems my hasty âclean upâ was just that. Next time I have a leak that big I'll take everything apart, a bit of expensive reeducation here!
If there is a bright spot to this I did figure out a way to remove the internal water loop / motherboard assembly out of the SG01 as a unit.
As a starter I remove the shut off valves and used AQâs plugs in the bulkhead connectors. As the mosfet cooling fan was a real pain to install I didnât want to remove that, so out came the fan cross mount (normal) and removed the center brace.
At this point it was discovered that Murphy came to play. The plan was to remove the nut and washer used on the outside of the case and then pull the bulkhead connectors through the case. However as it turns out these bulkhead connectors have a nut that doesnât come off. You guessed it, I had installed these just opposite of what I needed them to be. So off to the utility sink to drain the coolant. With the connectors in the âcorrectâ orientation here we are ready to remove the assembly.
After removing and discovering the apparent damage it is time to take everything off anyway. Just pulled the trigger on a TA760 M2+ as a replacement as it appears the only difference is HD3000 (760) vs. HD3200 (780). That and it was $20 cheaper and I couldnât find another TA780!
Shortly after this life got in the way and interest seemed to be lostâ¦â¦â¦â¦â¦
_________________
As of 02/01/11
DreamCatcher AM3 >> (Down Again) >> SG01 Evo, MSI 785GM-E65, PII X4 955(AQ H2O Cooled), XFX GTX285(EK H2O Cooled), Seagate 7200.10 ST380815AS 80GB, 2 x G.S. F3-12800CL7D-2GBPI, MODU82+ EMD525AWT, XP Home SP2
KestrelFlight >> (Under Construction) >> Zalman Z7+, MSI NF980-G65, PII X4 1055T, 2 x Galaxy 580GTXs, Zalman 32GB SSD, WD V'Raptor 300GB, 2 x WD 1 TB Blacks, G.S. F3-16000CL9D-4GBTD, Zalman ZM1000-HP Plus , Win7
Oz1a v2.0 >> XFX MDA72P7509 750a, PI X2 8870BE, 2 x XFX GTS250, WD 250GB, F2-8500CL5D-2GBPK, Tt TR2 600W, XP Pro SP3 |
|
| Back to top |
|
|
jedihobbit
Rated XXX
Joined: 22 Mar 2007
Posts: 238
Location: Central Virginia, USA
|
| Posted: Wed, 14 Oct 2009 18:30:59 Post Subject: |
|
|
............lets see if I can get this worklog caught up to "current" status shall we?
August - September
Interest in completing DC v3.5 was suddenly brought to the forefront due to several things - primarily domestic tranquilityâ¦â¦.. so trying to get some ideas together as my number of 'puters will be downsized to 1.
Going to keep DC even though it isn't by far the most up to date but it is my "bling" machine with water cooling. So now it has picked up several additional duties. It will now have to work as a mild gamer, folder, server, folder, business apps / web surfing, and did I mention folding?
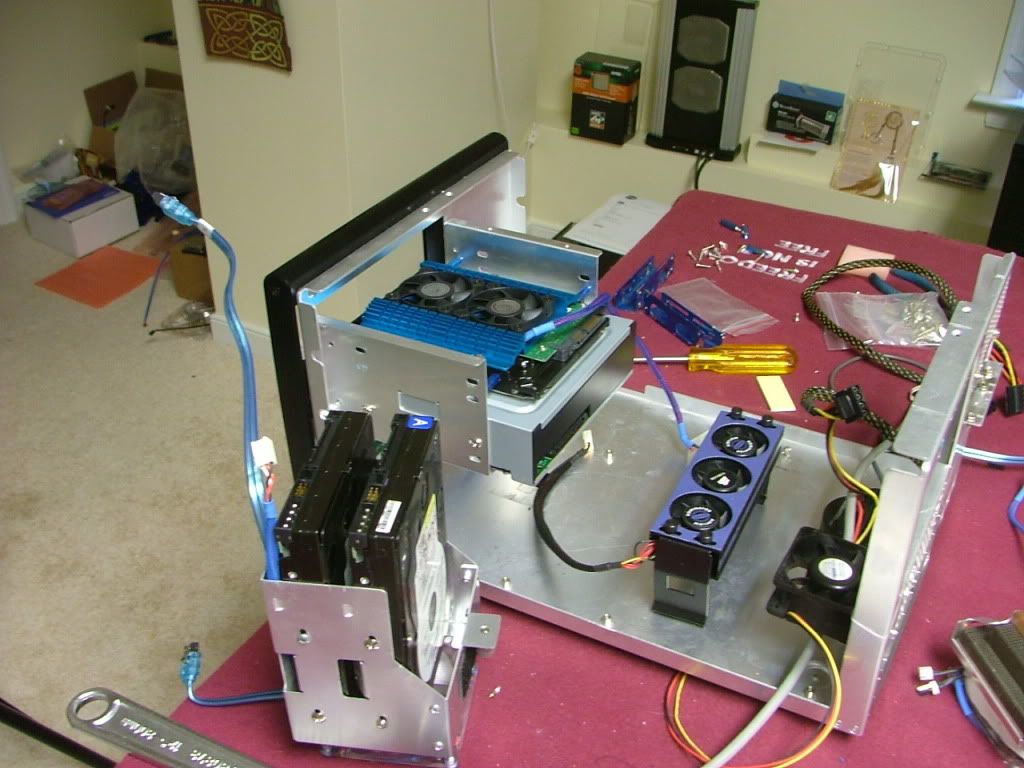
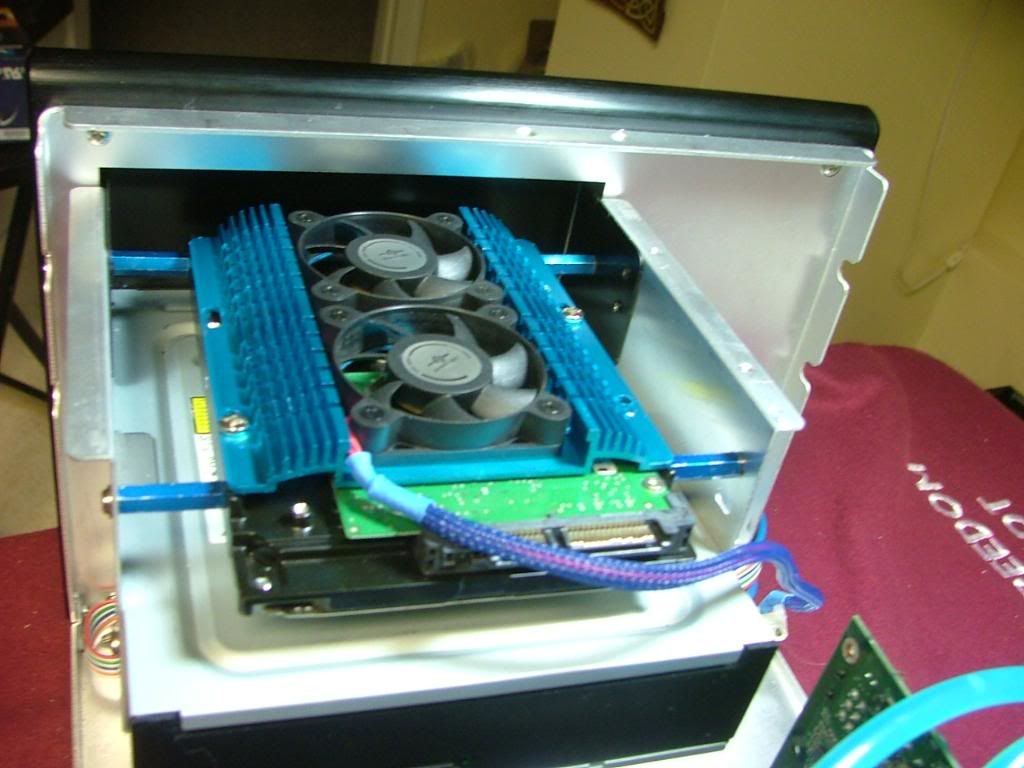
First up are the 2 x WD5000KS-00MNB0 400GB that were in another build for file storage. Heat will be the major factor now with the two new WD 400s (they can be like toaster themselves), so please review my earlier cooling questions! They will occupy the HDD cage, which requires me to move the primary HDD up to the top 5.25 bay where I was "hiding" my psu cables. So it was time to get off my butt and do something!
Dang this is the first time stuff has moved on the work table in months!! Matter of fact even found a few "cob webs" in the case.......that is sad.  
I started with the HDDs.......... mounting the 2 x 400s in the HDD tray and trying to figure out how to mount the Seagate in the top bay. It sure was nice having the empty bay to store the "excess" lengths of PSU cables.
Another issue that was now bugging me was the processorâ¦â¦â¦.while I liked the 8750 it is a PI and would really like to have a PII for my one and only system (love the one in YsSMN v3.0). However the deal with the boss was to build with what I have and there are still over a âCâ note which would not get by her.
Then she made a âfatalâ mistake! My wife is a rabid Wizard of Oz nut, and she found something in a catalogue that she really liked and ordered it. So my question to her was âif weâre in this austerity program, how is it you can get this statue and Iâm not allowed to buy anything?â Dang if it didnât work, but a new item had to be under a $100 bucks to workâ¦â¦â¦..and indeed a miracle did occur! Found a used 720 BE within budget, so boys and girls here is what I'll be now trying to crowd into what is DreamCatcher v3.5......anything "new" (from the first post) to this build is in bold italics
CASE: SilverStone SOG1
PSU: Enermax MODU82+
MOBO: Biostar TA760G AM2+ (04/28/09)
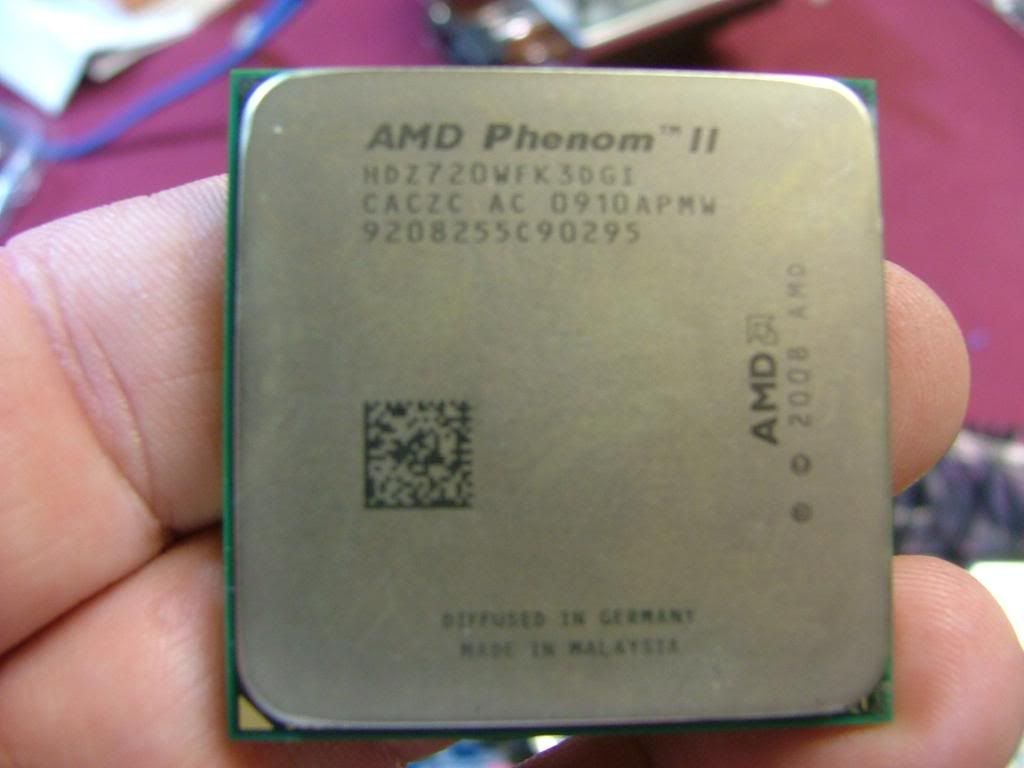
CPU: AMD PII X3 720BE (09/05/09)
HSF: Cuplex XT di
GPU: Evga 8800GTS w/AquagraFX 8800
MEMORY: TWIN2X2048-8500C5DF
Primary HDD: Seagate 7200.10 ST380815AS 80GB[/I][/B]
Secondary HDDs: 2 x WD5000KS-00MNB0 400GB
Optical Drive 1: Sony NEC Optiarc AD-7200S
A major concern was if the 720 and the 760G would play nice together as Biostar can be somewhat vague at times when they describe a bios.
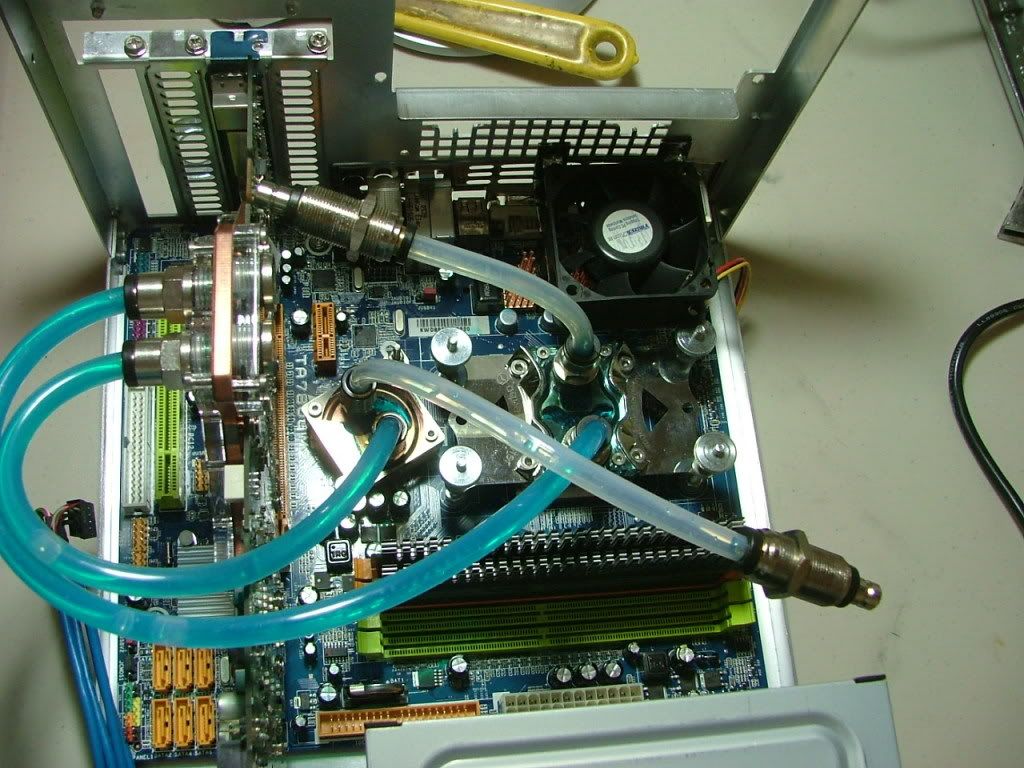
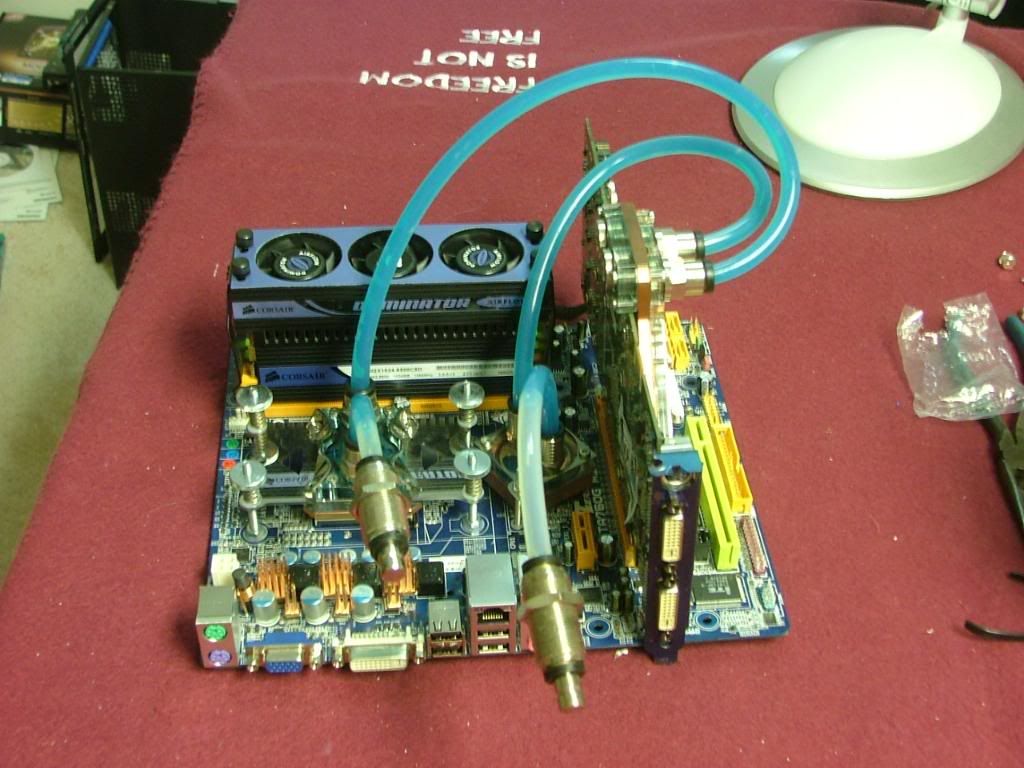
SO, I now have it going and the mobo recognized the cpu with a bios update, and here it is.....mobo, cpu, together, and running a default on the tech station.
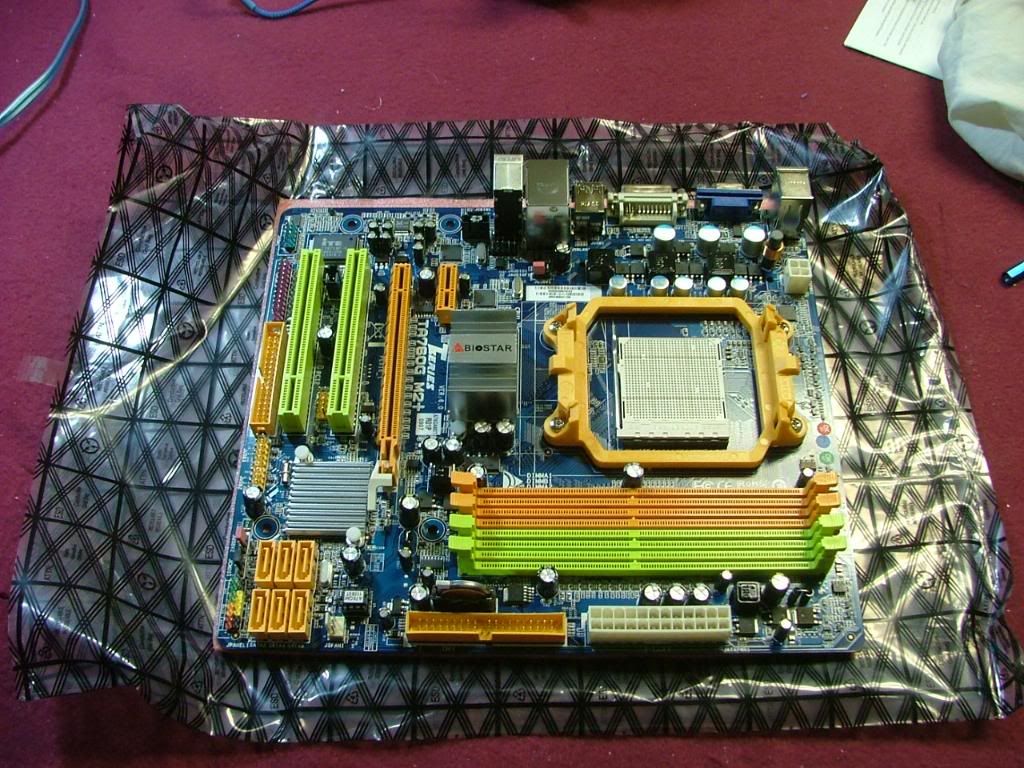  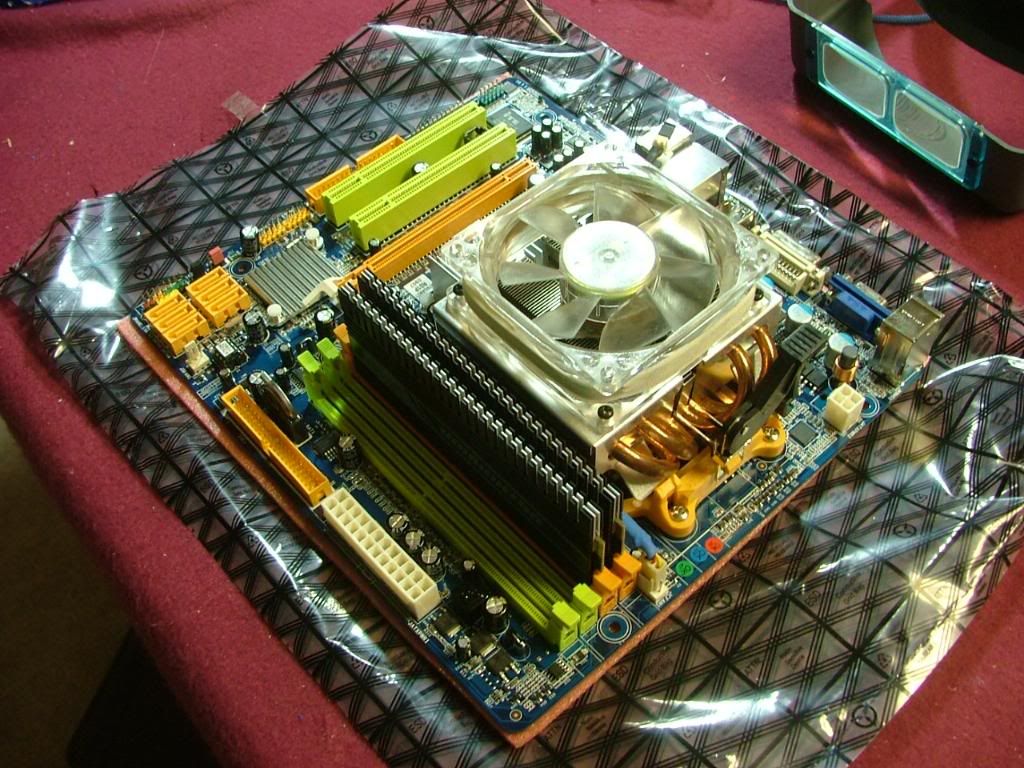 
Using an Opty heatpipe cooler for initial 'playing" and then will start hooking up the W/C after I happy with what is there.
Everything seemed to work so I managed to flash the latest bios using biostarâs thingy. Before I tried to do anything that remotely looked like an OC I added passive coolers to the mosfet (the ones on the 780 originally!). Those will be cooled by the 60mm fan in the case. 
Now on to some "mild" oc joy! â¦â¦â¦..Initial oc'ing........best 8M run of SPi
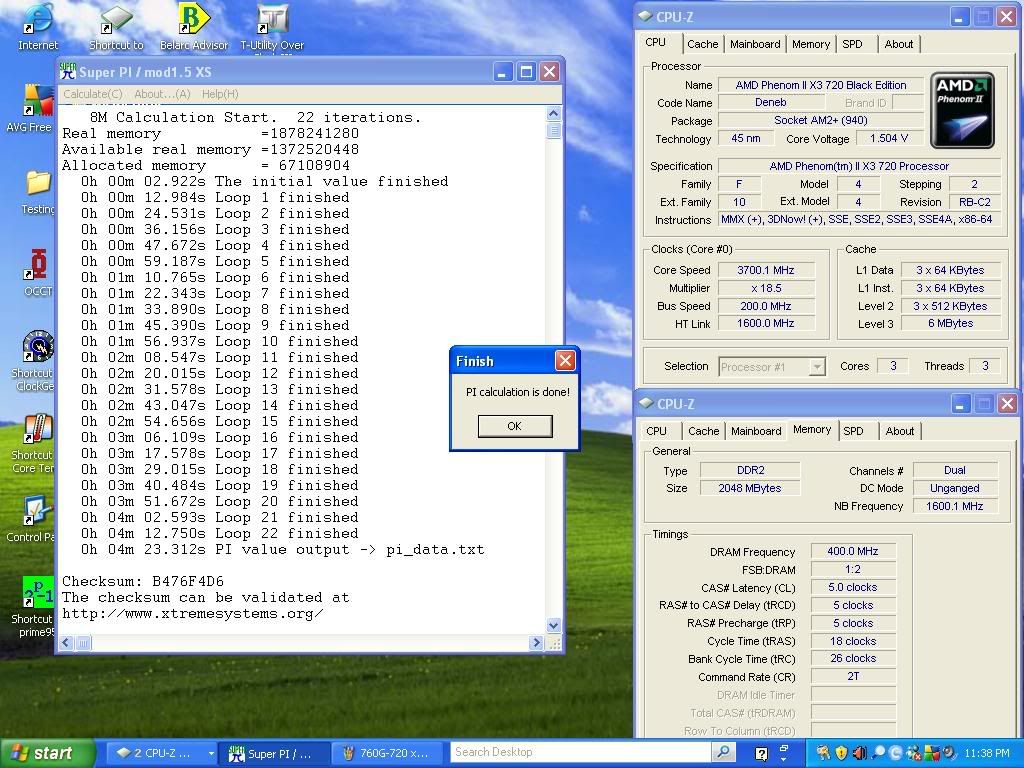
However I'm was getting a mixed bag of reboots, did manage one boot up at 3.8GHz but it's down hill from there. Okay so far 30+ minutes into a prime run @ 17.5 x 200 the best I can figure from SpdFan is that the cores are between 41 - 45C. Guess that's not too bad considering the hsf and vcore = 1.5ish v. Gonna let it run the night for S & Gs and then play with the XP-Pro thingy tomorrow. Then I guess it is on to mounting the wc stuff. :mrgreen:
Okay the prime ran 8+ hours and off to other things.......
1. Need to do a clean install of Pro, oh well.
2. After a day of mostly getting the honey dos done it was on to water cooling items!!
- Bolt 'em on
- Fill 'er up
- Leak test (remembered to make sure all the fittings were pushed all the way in time this time!
- Power it up and let it run
- Running Prime to see temps (41 - 43C all cores)
- Running F@H GPU for temps (53 - 57)
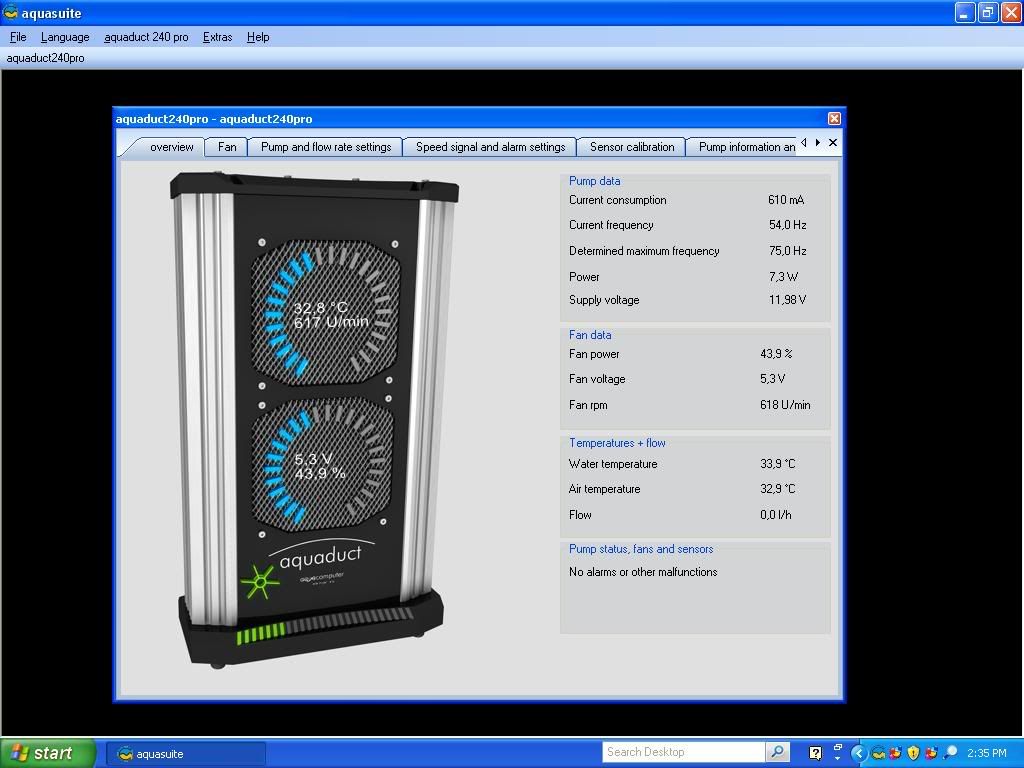
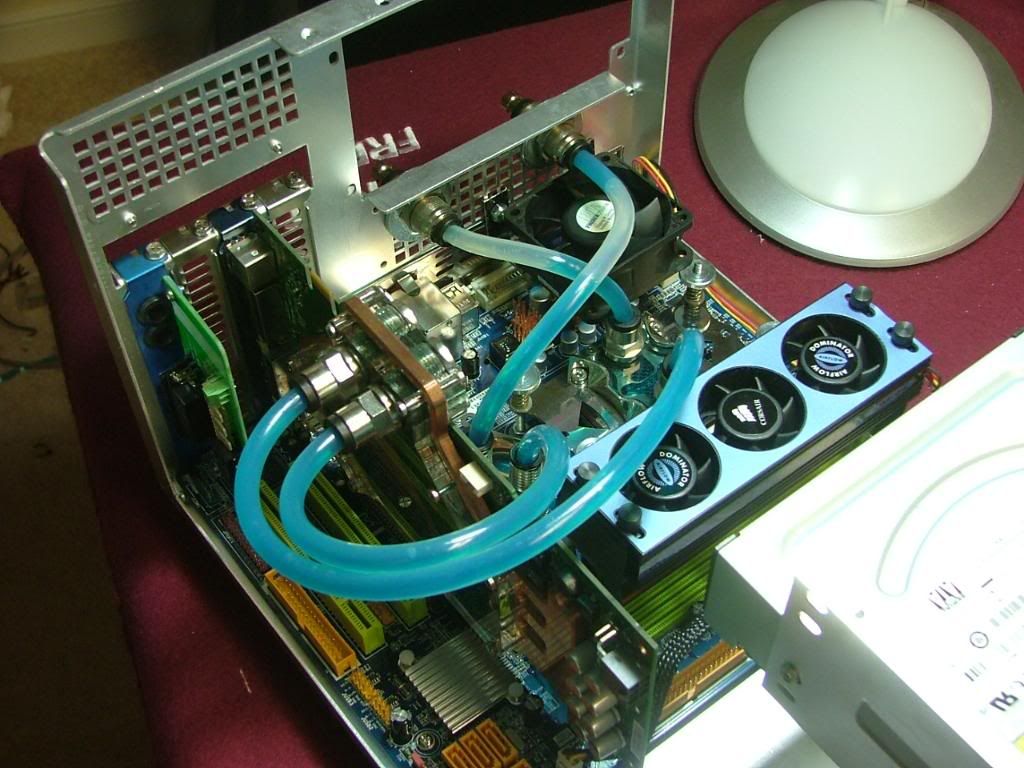
3. Haven't down loaded the aqua computer software yet because of going to do the install. The temps may drop (that'll be good because of going into the mATX case) when I get the fans to start sooner and fun faster.
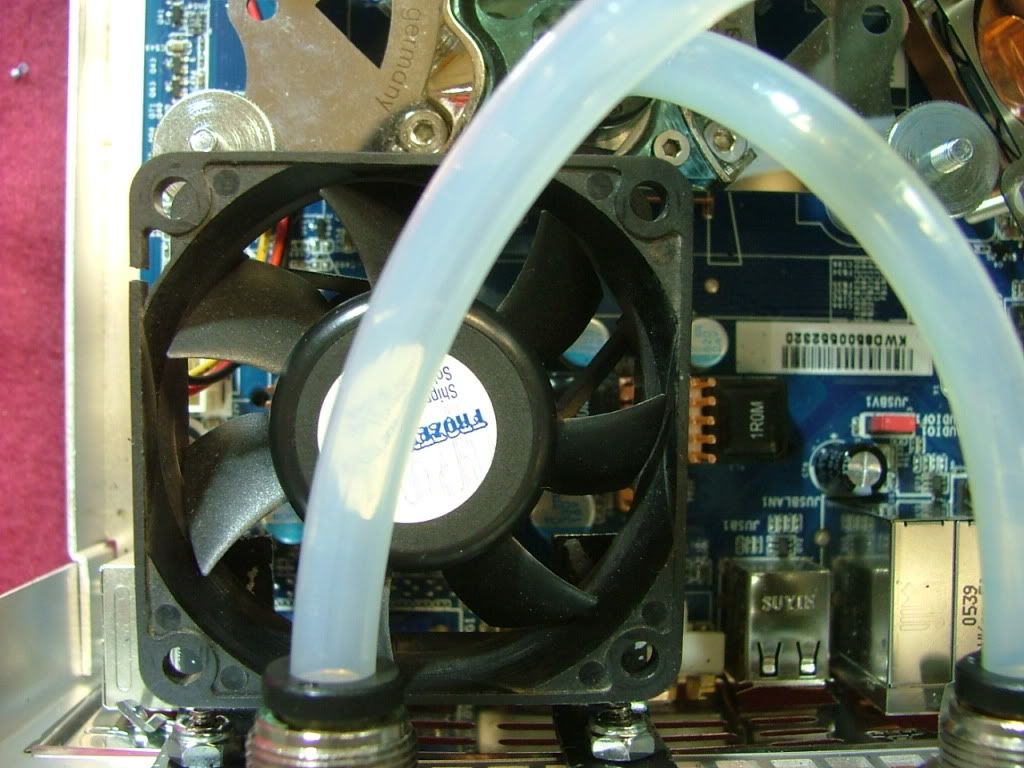
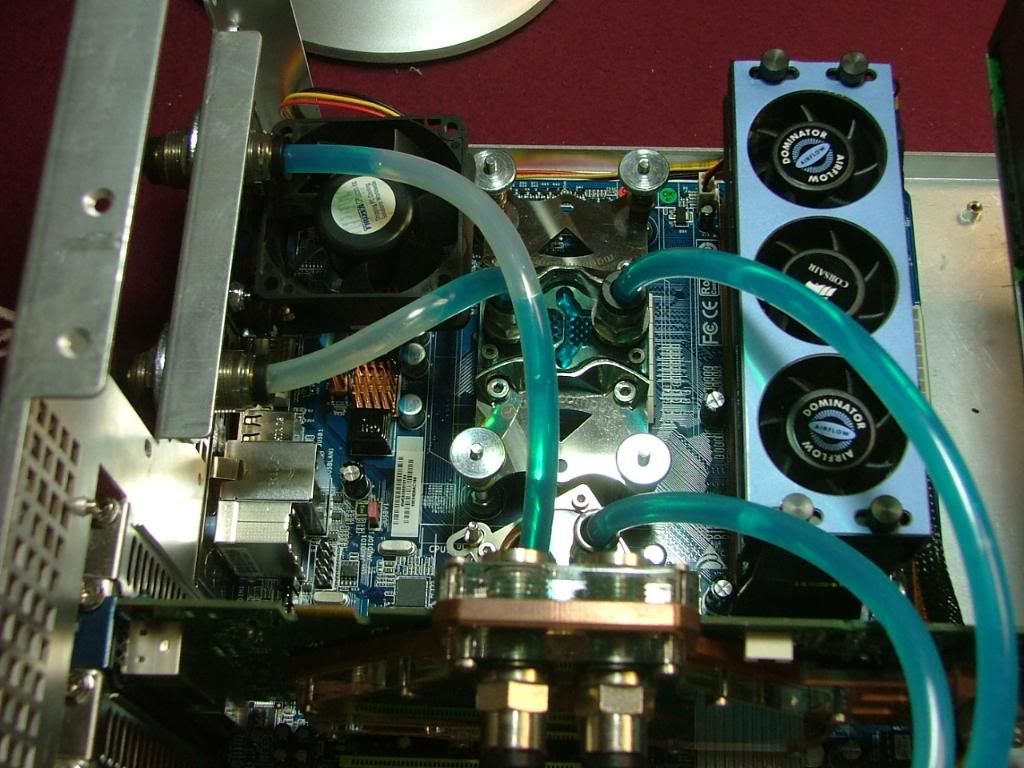
It is amazing the even with the 3 x 40s on the mem cooler and the 1 x 50 sitting on the mosfet coolers how quiet it is!
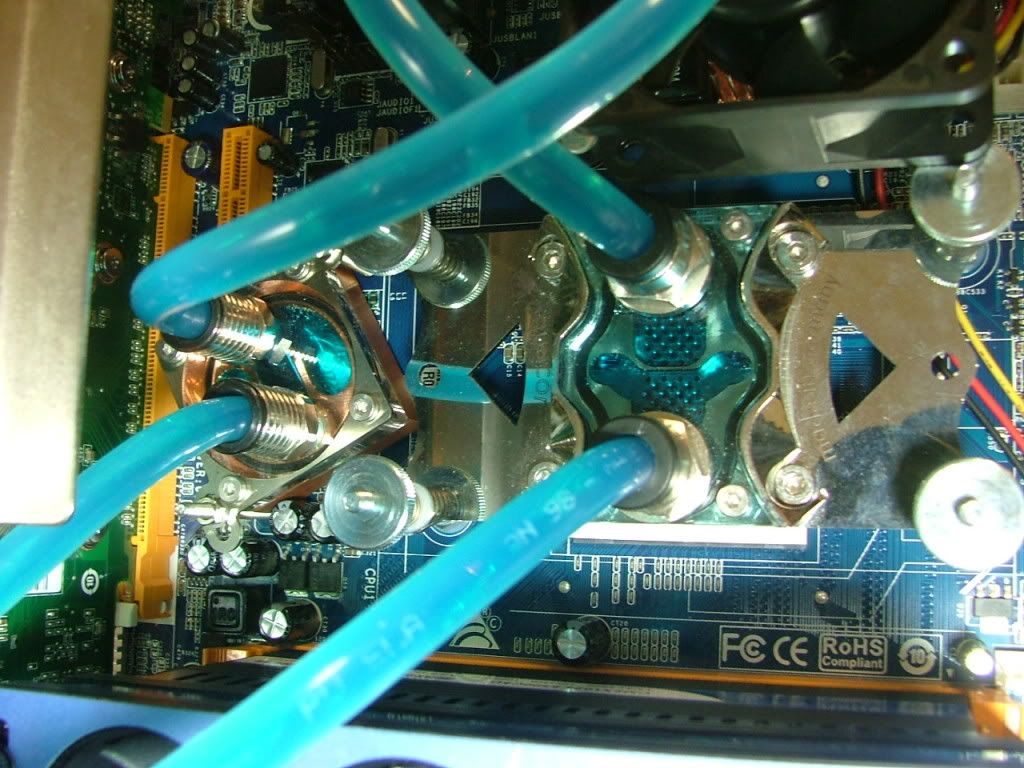
Two low notes though........just realized the coolant is non-UV (bought lights for that! ) and if you'll look closely at this pic you'll see what happen when you let you cooling block sit too long without anything in it! :o :rolleyes:
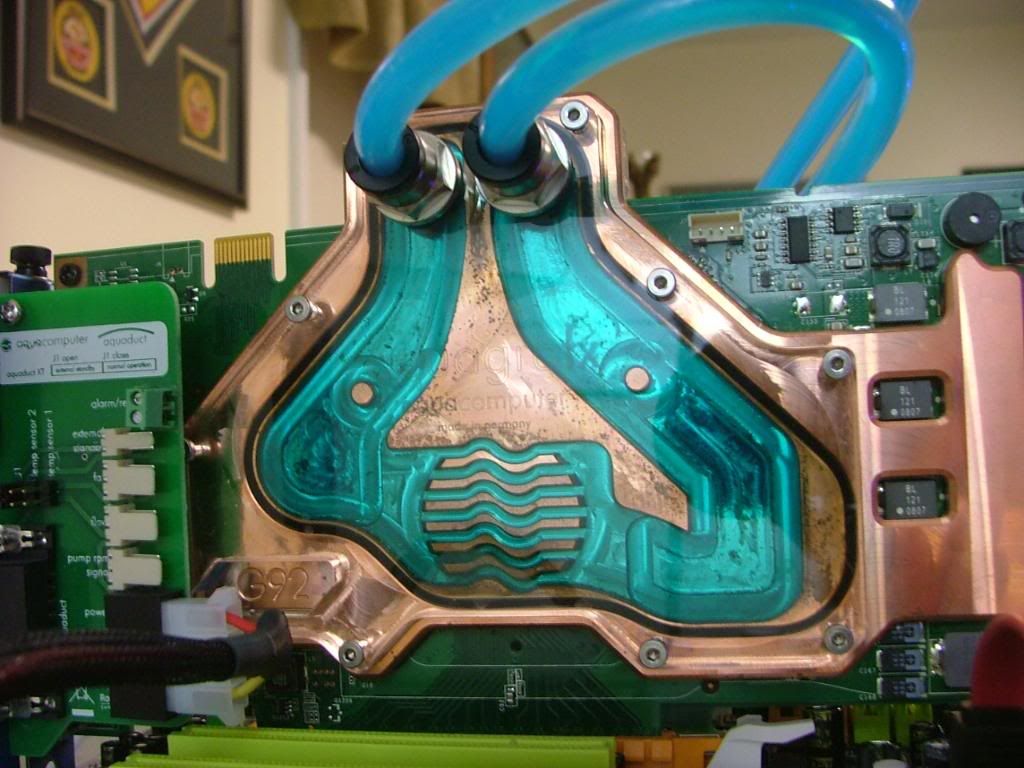
It appears when I flushed the block it still had enough of something to tarnish the copper.
So I went oc'ing again with great expectations now that I'm water cooled........BIG mistake! :oops: Got a bit greedy and it has cost me big!! #-o Ended up spending most of a weekend attempting 3 repairs and finally had to start a total install after wipping the HDD. Really borked that one! ](*,)
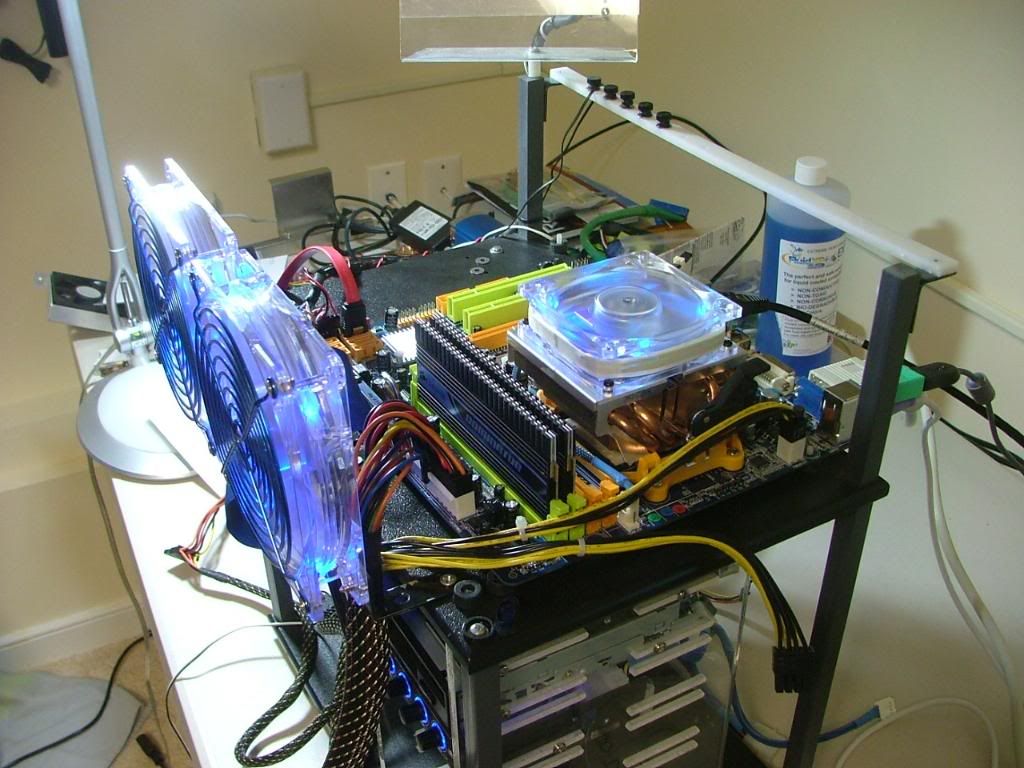
Everything has been running fine since the install, but haven't done anything OC wise. But then again I need to get it "boxed" up and off the Tech Station first! 
Did one small "temp test" kind of thing. Have had the 2 x 120s on the Station running since start up but figured they won't be there in the SG01 so ran a test with 'em off. Temperature wise there isn't much of a difference when the room temp is close, just the fans speed up (meaning the SW is working!).   Running classic and GPU folding. Running classic and GPU folding.
With fans and then without.........
_________________
As of 02/01/11
DreamCatcher AM3 >> (Down Again) >> SG01 Evo, MSI 785GM-E65, PII X4 955(AQ H2O Cooled), XFX GTX285(EK H2O Cooled), Seagate 7200.10 ST380815AS 80GB, 2 x G.S. F3-12800CL7D-2GBPI, MODU82+ EMD525AWT, XP Home SP2
KestrelFlight >> (Under Construction) >> Zalman Z7+, MSI NF980-G65, PII X4 1055T, 2 x Galaxy 580GTXs, Zalman 32GB SSD, WD V'Raptor 300GB, 2 x WD 1 TB Blacks, G.S. F3-16000CL9D-4GBTD, Zalman ZM1000-HP Plus , Win7
Oz1a v2.0 >> XFX MDA72P7509 750a, PI X2 8870BE, 2 x XFX GTS250, WD 250GB, F2-8500CL5D-2GBPK, Tt TR2 600W, XP Pro SP3 |
|
| Back to top |
|
|
jedihobbit
Rated XXX
Joined: 22 Mar 2007
Posts: 238
Location: Central Virginia, USA
|
| Posted: Wed, 14 Oct 2009 18:36:06 Post Subject: |
|
|
Last Week
After letting the assemble fold for a while finally got off my duff and decided to start cramming everything into the SG01. First had to remove the mobo assembly from the tech station and the shutoff valves and plugs did the trick. Here it sits waiting to be mounted in the caseâ¦.
Then into the case it went, very glad I used bulkhead fittings as it made it easy to hookup!
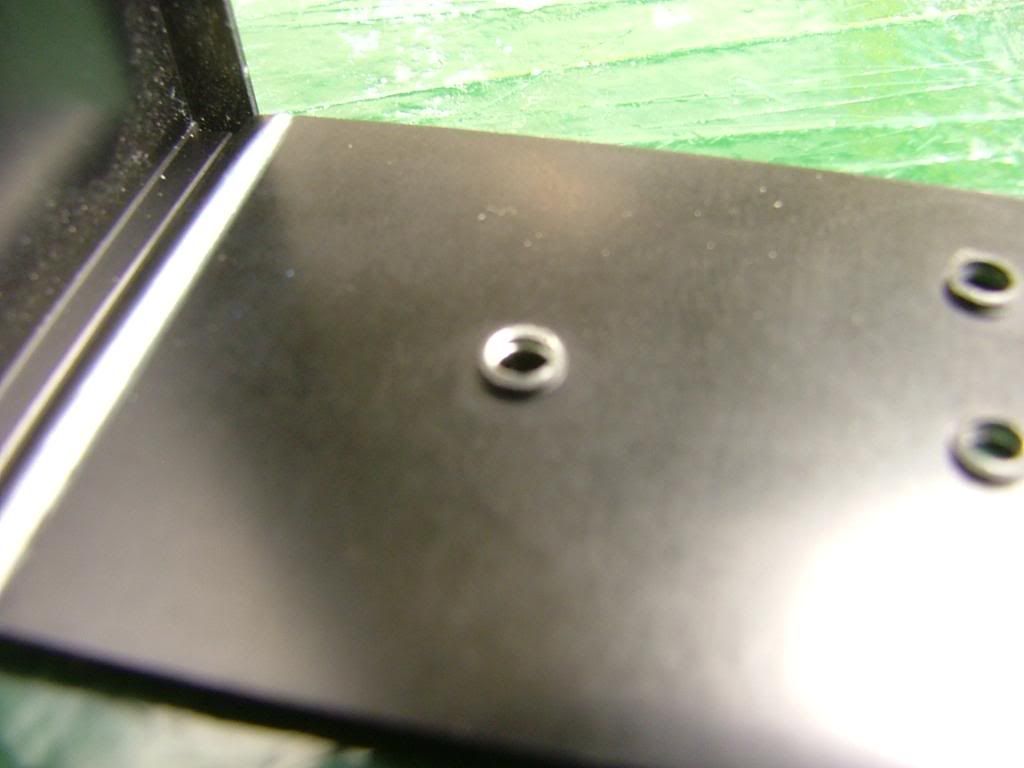
One of the initial fitting issues with the new layout was the Seagate that is to be the primary HDD. Sadly the only place I had was in the top 5.25 bay where I had planned to hid my PSU cables. I decided to âborrowâ several of the standoffs from BHrDx to mount the unit. However the blank also uses the front set of mounting holes so it was off to âhammer, grind, and file to suitâ. First off I had to file down the threaded sheet metal on the cover (here you can see the beforeâ¦.didnât take an after!). Then I had to hand fit the standoffs which took several trips to the vise and file before it would âfitâ.
As it turns out there is a about 3/8â under the HDD so maybe I will still be able to hide some of the power cable excess there. Please excuse the fuzziness of the first shot of the HDD mounted!
Now on to mounting the HDD cage with the 2 x 400GB drives and installing the cross brace and fan holder.
It is starting to get a little tight now!! Okay break over going to mount the PSU, start hooking up stuff, and then try to figure how to tidy it all up.
_________________
As of 02/01/11
DreamCatcher AM3 >> (Down Again) >> SG01 Evo, MSI 785GM-E65, PII X4 955(AQ H2O Cooled), XFX GTX285(EK H2O Cooled), Seagate 7200.10 ST380815AS 80GB, 2 x G.S. F3-12800CL7D-2GBPI, MODU82+ EMD525AWT, XP Home SP2
KestrelFlight >> (Under Construction) >> Zalman Z7+, MSI NF980-G65, PII X4 1055T, 2 x Galaxy 580GTXs, Zalman 32GB SSD, WD V'Raptor 300GB, 2 x WD 1 TB Blacks, G.S. F3-16000CL9D-4GBTD, Zalman ZM1000-HP Plus , Win7
Oz1a v2.0 >> XFX MDA72P7509 750a, PI X2 8870BE, 2 x XFX GTS250, WD 250GB, F2-8500CL5D-2GBPK, Tt TR2 600W, XP Pro SP3 |
|
| Back to top |
|
|
jedihobbit
Rated XXX
Joined: 22 Mar 2007
Posts: 238
Location: Central Virginia, USA
|
| Posted: Wed, 14 Oct 2009 18:44:25 Post Subject: |
|
|
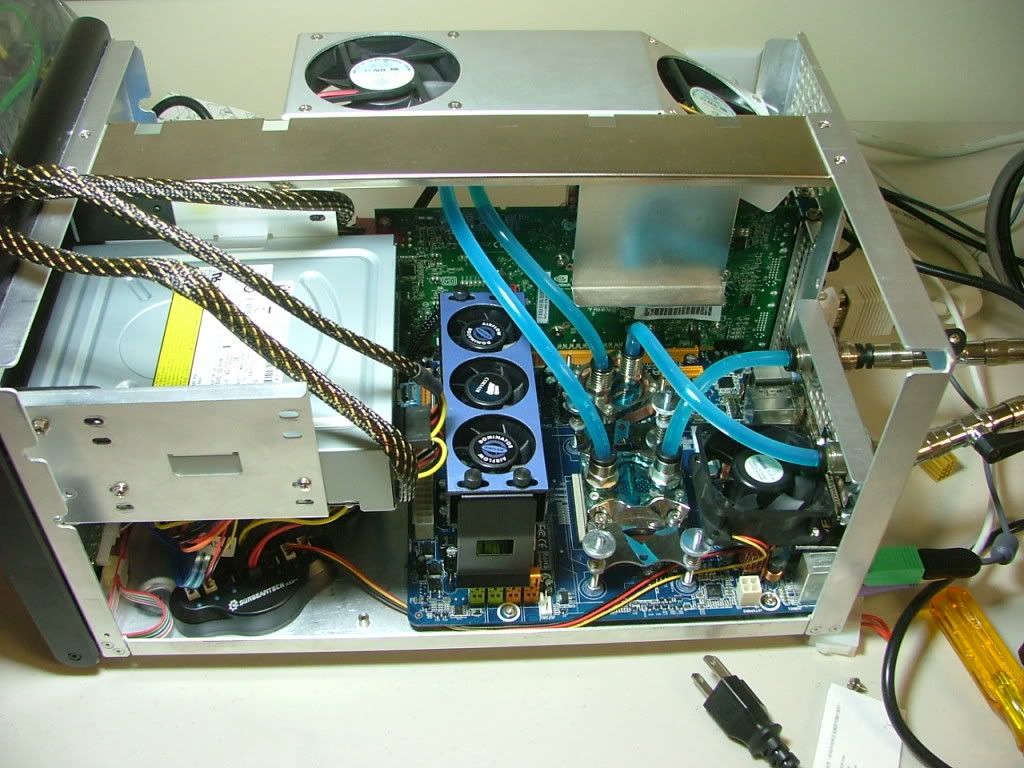
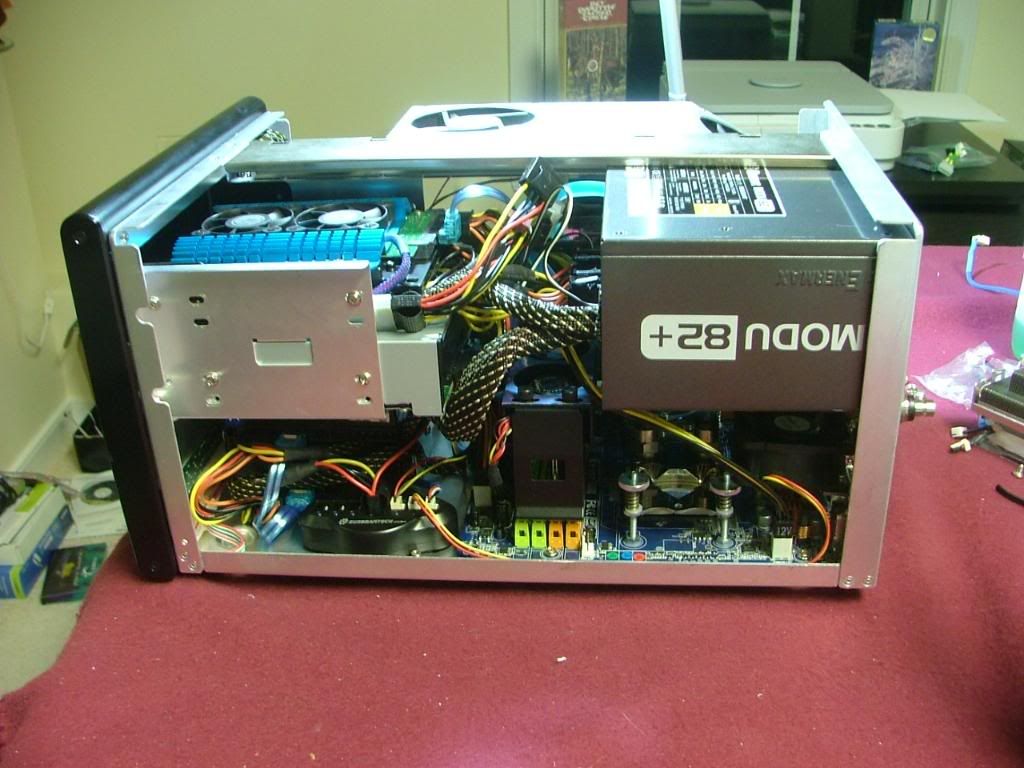
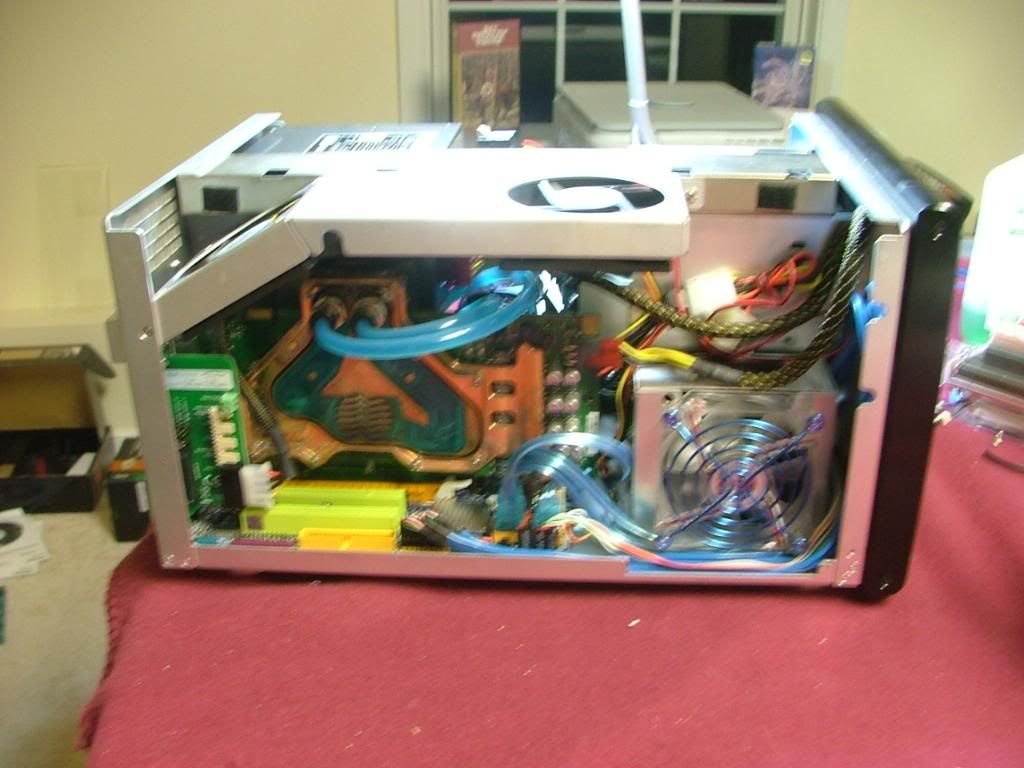
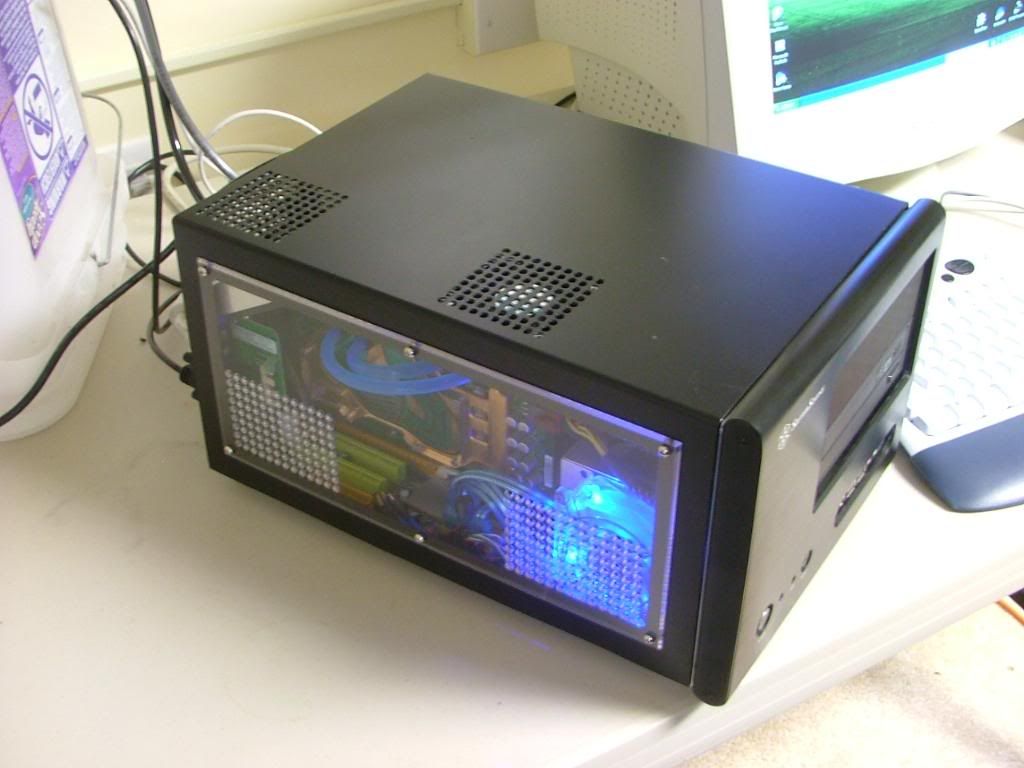
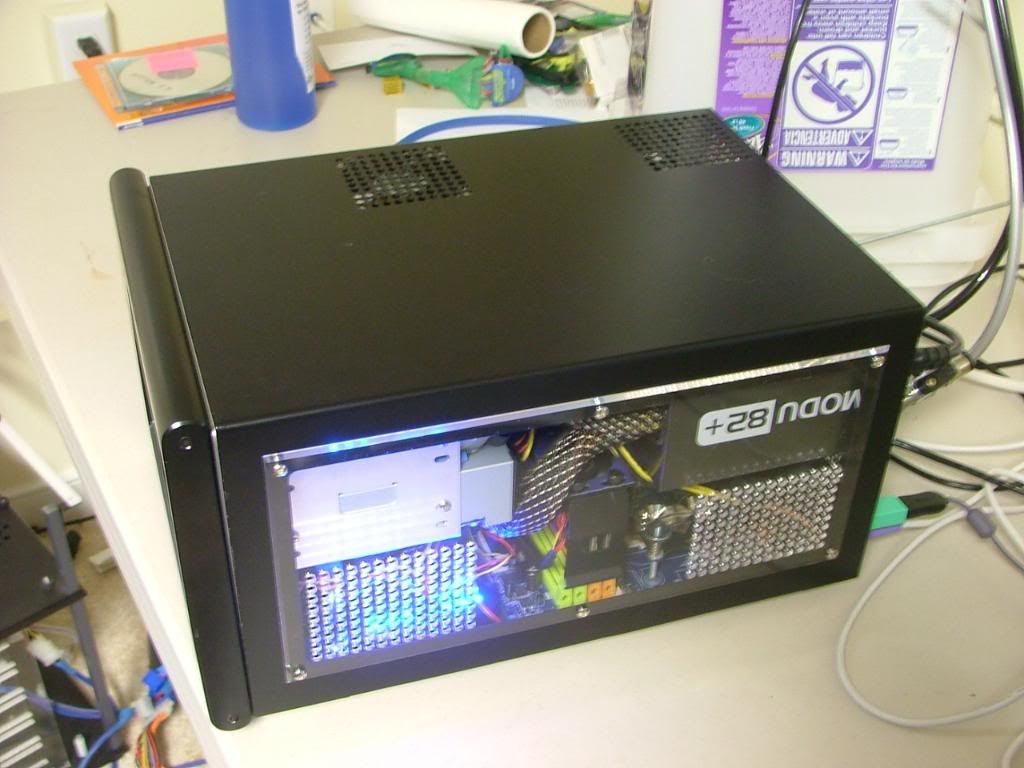
10/11/09
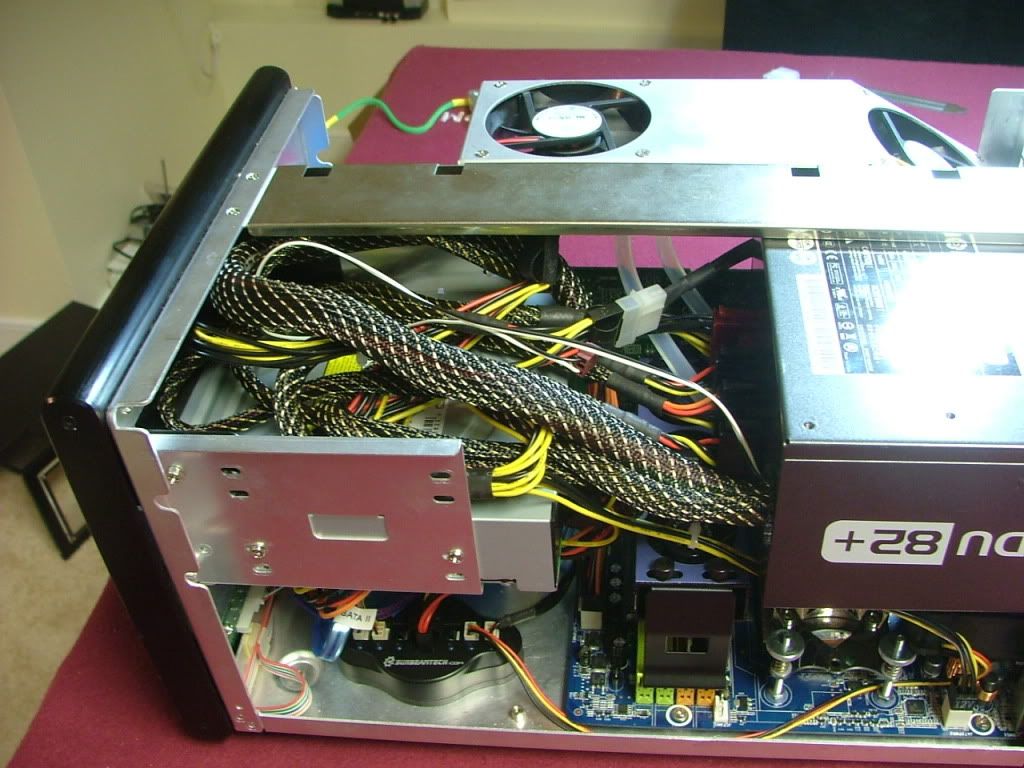
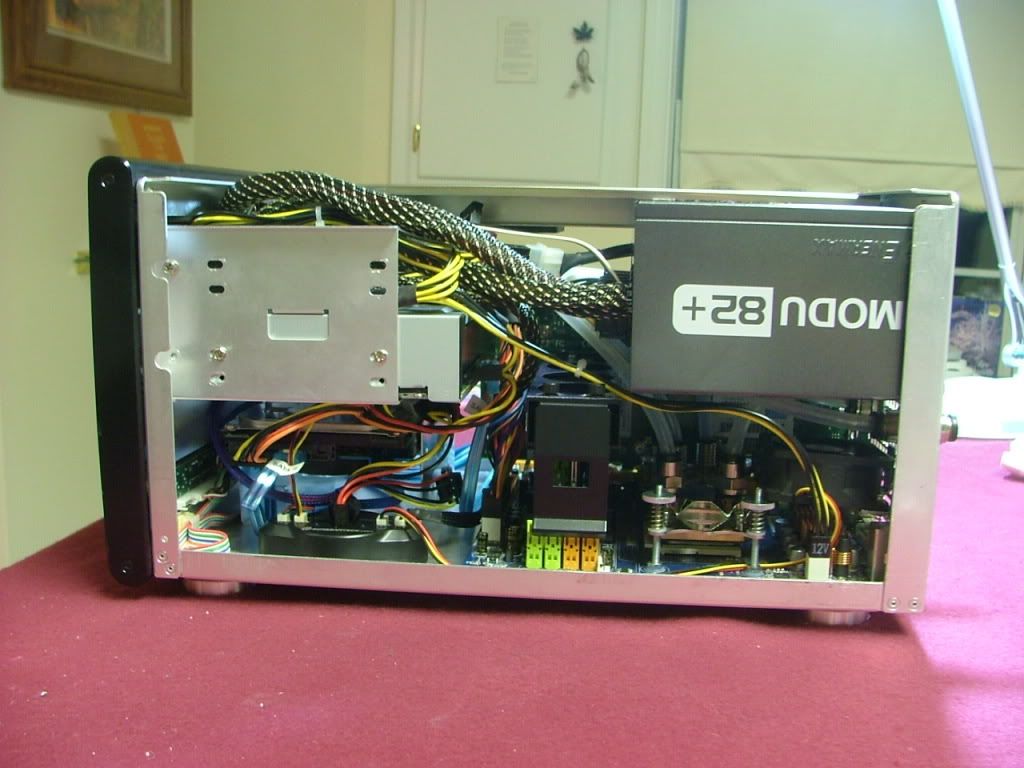
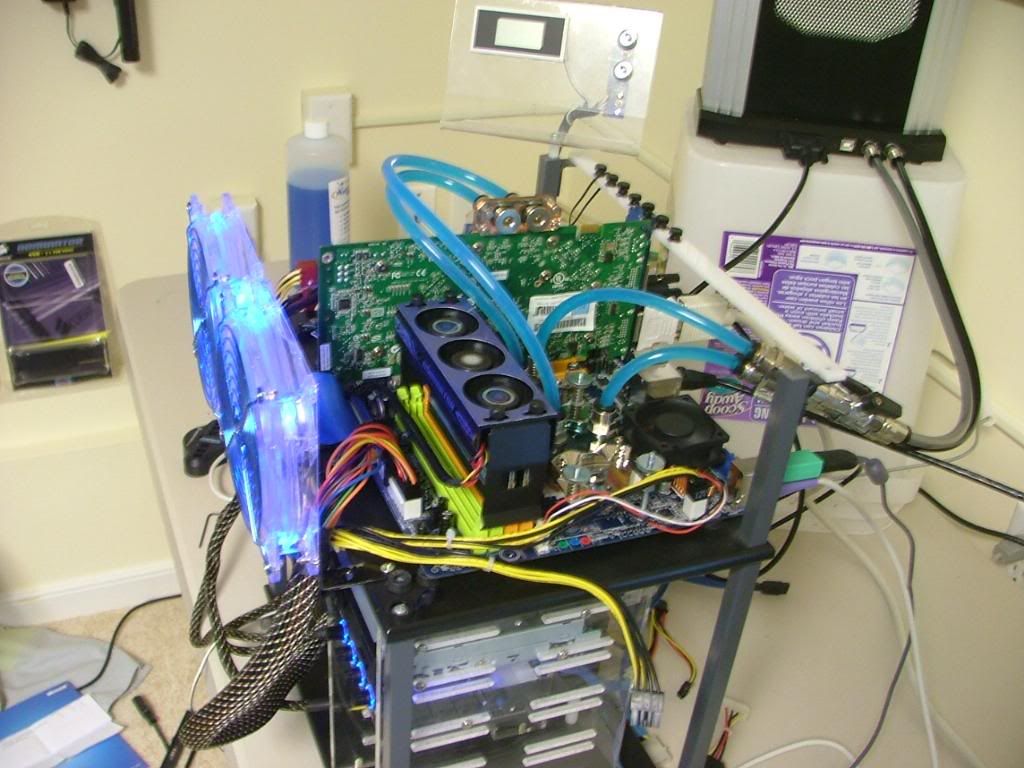
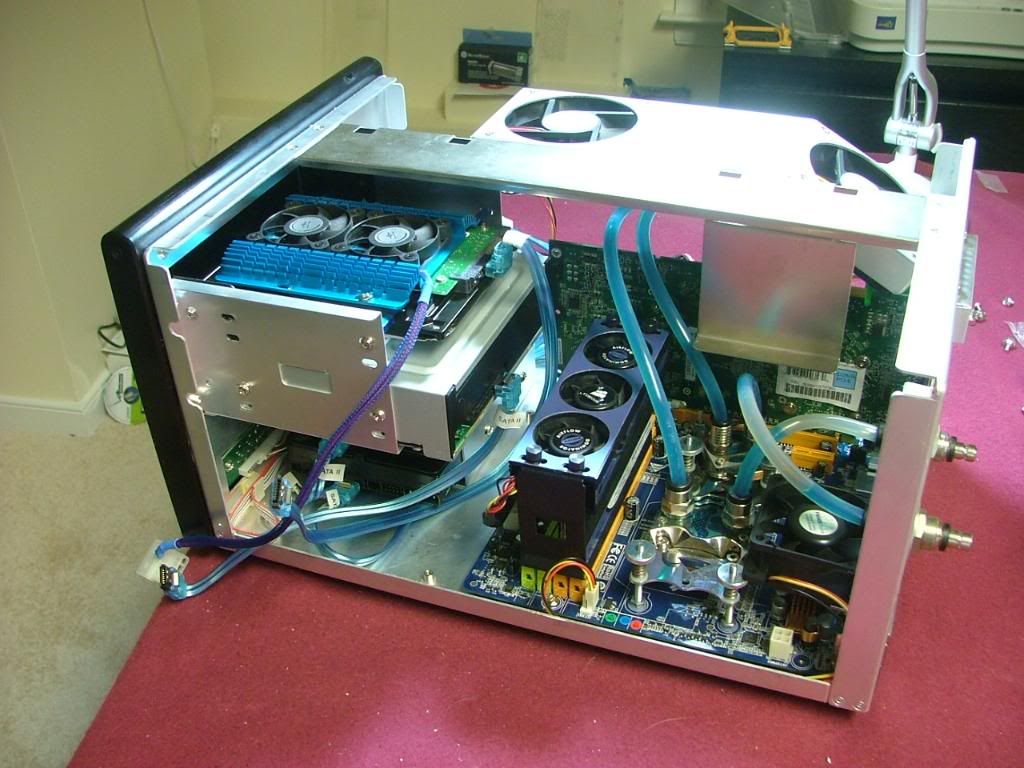
Okay.............adding the two 400GB HDDs really made a mess of things as I had to add an extra cable and then find new homes for the excess lengths. Forget being tidyâ¦â¦â¦..  Here it sits on the test bench after running for a while. NO LEAKS!!!! Here it sits on the test bench after running for a while. NO LEAKS!!!!
AND
This is where it is going to go, just need to work on the cable management after I figure out what all is happening in the corner!
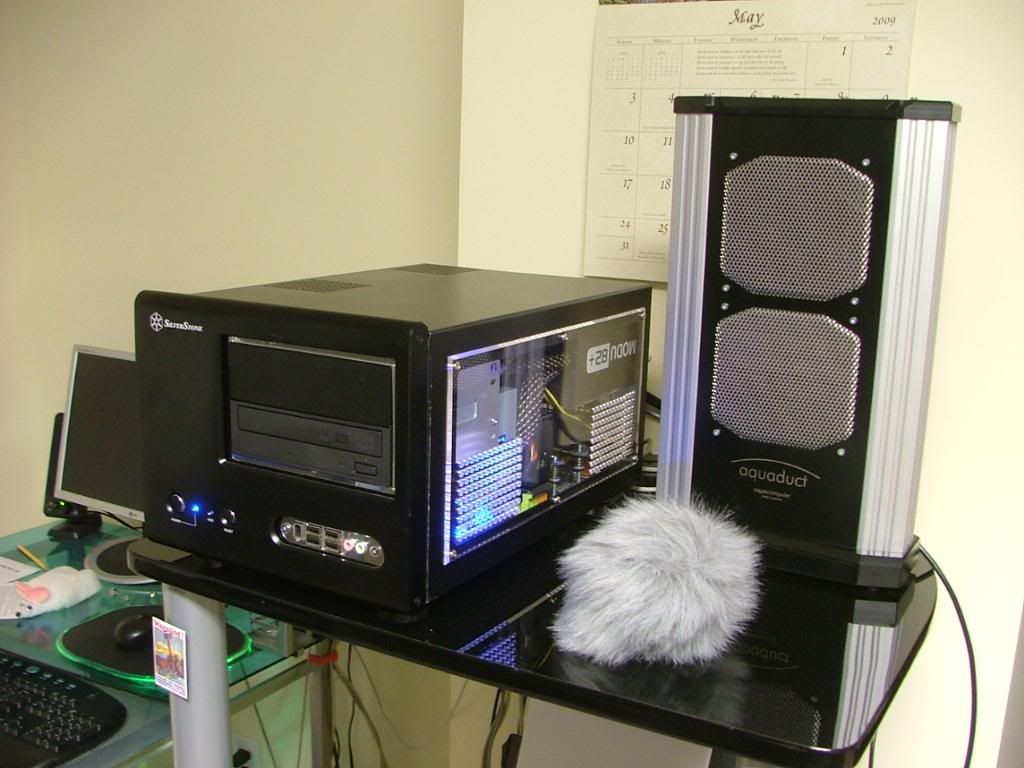 & & 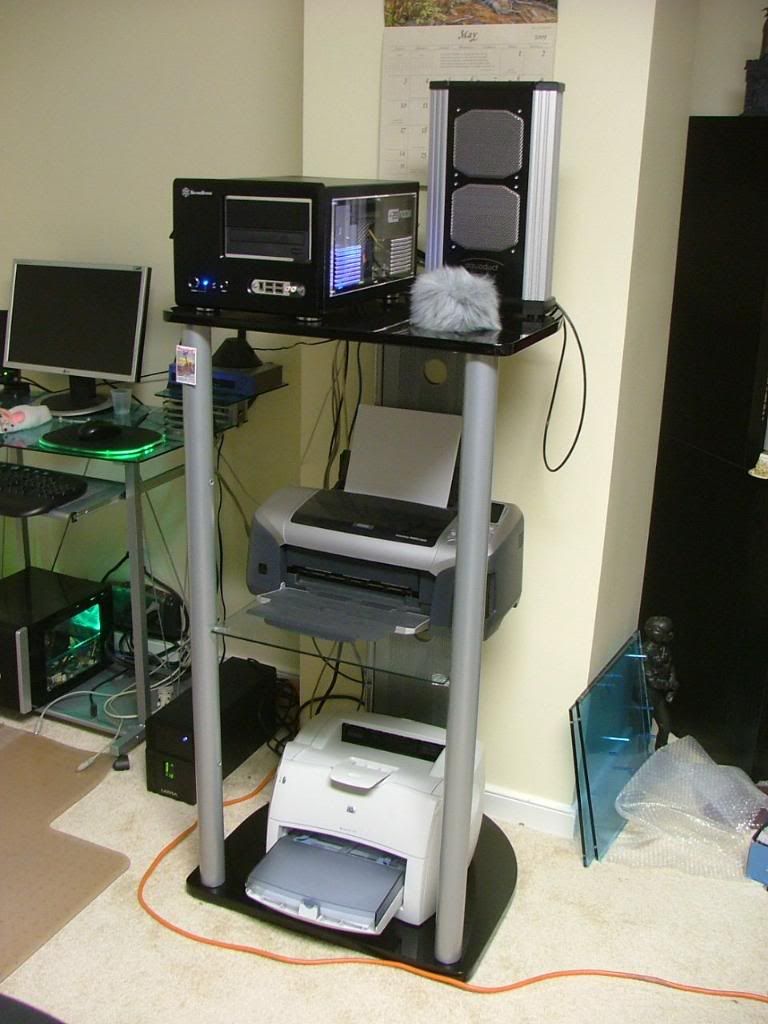
So we're now up to date! 
While I currently have the 720 running at 3.5GHz will be giving the OC another try, just going to move a little more slowly this time!
_________________
As of 02/01/11
DreamCatcher AM3 >> (Down Again) >> SG01 Evo, MSI 785GM-E65, PII X4 955(AQ H2O Cooled), XFX GTX285(EK H2O Cooled), Seagate 7200.10 ST380815AS 80GB, 2 x G.S. F3-12800CL7D-2GBPI, MODU82+ EMD525AWT, XP Home SP2
KestrelFlight >> (Under Construction) >> Zalman Z7+, MSI NF980-G65, PII X4 1055T, 2 x Galaxy 580GTXs, Zalman 32GB SSD, WD V'Raptor 300GB, 2 x WD 1 TB Blacks, G.S. F3-16000CL9D-4GBTD, Zalman ZM1000-HP Plus , Win7
Oz1a v2.0 >> XFX MDA72P7509 750a, PI X2 8870BE, 2 x XFX GTS250, WD 250GB, F2-8500CL5D-2GBPK, Tt TR2 600W, XP Pro SP3 |
|
| Back to top |
|
|
|
|
You cannot post new topics in this forum
You cannot reply to topics in this forum
You cannot edit your posts in this forum
You cannot delete your posts in this forum
You cannot vote in polls in this forum
You cannot attach files in this forum
You cannot download files in this forum
|
|

