| Ultra Products Xconnect 500W PSU - Page 2 of 3 |
The Basics (continued):
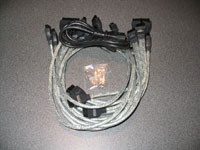
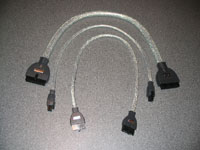
The below left image shows the contents of the smaller box mentioned previously, including; the bundle of internal power cables, a standard AC power cord, and a set of 4 screws to mount the PSU to a case. The below right image shows the 20-pin ATX cable, the 4-pin P4 style cable, and the 6-pin AUX cable. The cables are all extremely stylish, with molded black plastic connectors and UV reactive, braided silver wires. These are by far the nicest cables I have ever seen, and I have to admit I won't miss the typical white Molex connectors and bare strands of red/black/yellow wires.
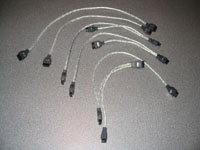
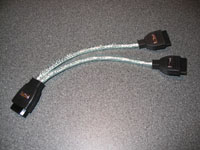
The below left image shows all of the 4-pin power cables. There are two that have single 4-pin connections, two that have a double 4-pin connection, and one that has two 4-pin connections and a 4-pin floppy connection. So, using all of the cables would provide a user with eight standard 4-pin power connections and one 4-pin floppy connection, a generally adequate number. The below right image shows an item that presently has to be requested separately from Ultra Products, after purchase of an Xconnect power supply. The adapter shown can be obtained from their website, and provides two S-ATA power connections that receive power from any of the eight available connections.
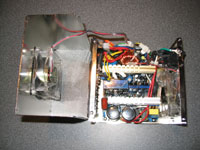
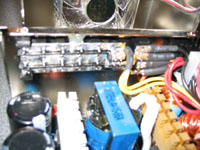
As with any power supply here at BigBruin.Com, we had to crack this thing open and see what surprises we might find. Nothing overly exciting like potentiometers on the voltage rails, but the design is neat and orderly, and of some interest is that the two 80mm fans have socketed power leads for easy removal. The below right image shows an internal view of the DC power connections. All of the 4-pin connections are soldered to a circuit with one set of wires leading to the heart of the power supply.
Installation:
Installation could not be easier! Being able to route each wire individually made the job easier and looks much better. You only install the cables you need, and there are no extra wires left to hide when you are done. My once cluttered case now looks almost empty, and I won't claim to have even done a great job on the wire management. The length of the cables were all adequate, and I was pleased to see them be able to reach my hard drives down in the lower right corner, as that is a bit of a distance to cover, especially when concerned about keeping the cables as out of site as possible. I also like how well the Xconnect's cables go with my existing braided silver IDE cables.
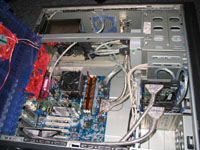 
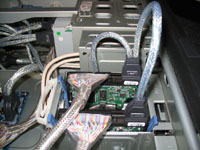
One minor issue would most likely only be of concern to owners of cases that features sideways mounted hard drive bays. The size of the connectors and the bend radius of the cables make it impossible to close the case with them installed, as pictured below. For everyday use, I will have to use a small extension cable I have where the wires run at ninety degree angles to the connectors.
Testing:
Testing generally consists of using a digital multimeter to measure the +5V, +12V, and 3.3V voltage rails directly from the back of the 20-pin connector on the motherboard. It wasn't until everything was installed that I realized that would be just a little bit tricky with this power supply, due to the sealed ends on the cables. I know I could have connected the multimeter to an unused 4-pin conenctor to get readings on the 5V and 12V lines, but I saw that these readings were inconsistent from cable to cable (not just on this power supply) and it did nothing for a 3.3V reading.
So, the test strategy shifted to monitoring the voltage readings reported by the Winbond Hardware Doctor 2.7.0 included with the motherboard used for testing, as well as taking a few readings with the newly acquired Seasonic Power Angel power monitor.
The test system consists of the following components:
Pentium 4 2.6C processor
Abit IS7-G i865PE motherboard (BIOS 20)
(2) Seagate 80GB S-ATA hard drives in RAID-1
Gigabyte Radeon 9600XT AGP card (Catalyst 4.7 drivers)
Corsair TwinX1024-4000Pro DDR memory
Innovatek Premium XXS Water Cooling Kit
(2) 120mm case fans, (1) 50mm chipset fan, and (1) 4 channel fan controller
Windows XP Professional (SP2)
Astute readers may notice that the specifications described above do not match the system picture in the Installation portion of the review. The power supply's final installation will be in the system pictured, but testing was conducted in this system for comparison with another 500W PSU...
For comparison purposes, the Ultra Products Xconnect power supply will be put head-to-head with another 500W unit, the Allied AL-B500E, reviewed at this link. The matchup is pretty evenly matched on paper, and I have had zero problems with the Allied power supply, which has been running just about every hour of every day in the test system above.
Please read on to the next page for more... Next
Page 1 | Page 2 | Page 3 | Home | Forum | Review Index
|
|
|
|


