The Basics:
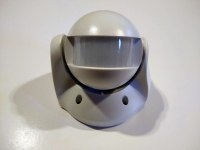
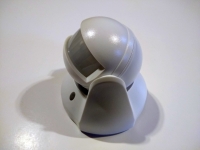
The ZSE29 looks much like other motion sensing devices in many ways, with a PIR motion sensor mounted behind an opaque screen in the spherical portion of the housing. The part can be tilted up and down relative to the base that houses the bulk of the electronics, including the battery compartment. Looking at the below left image we see two holes in the base, and these contain recessed screws that hold the battery compartment cover on.
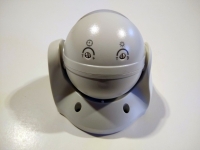
Taking a look at the image below we see the bottom of the sensor's spherical section, where we find two adjustment screws. The screw on the left (with the clock icon) controls motion time out, while the screw on the right (with the sun icon) controls the trigger sensitivity based on the lighting level. Finding your preferred setup will be a bit of trial and error, but for setup purposes you can turn the screws all the way counter clockwise to enter testing mode which will let you see if you have the sensor in the right orientation since it will light a red LED when it detects motion.
The images below take a look in the battery compartment, which reveals a few interesting things. One thing we see is the large tamper switch located just to the right of the battery compartment. If anyone takes apart your motion sensor you will know, and given the unique mounting design, you will know if they remove it from the wall. The battery compartment cover has two threaded inserts where the screws come through to hold it to the housing. There are also two holes through the cover where you would use screws to hold it to your mounting surface. Mounting the battery compartment cover to your wall, and then screwing the device to the cover seems like an odd design to me, and these four holes don't seem very weather resistant to me. On top of that, there is no gasketing around the interface between the battery compartment and the door, so it is just plastic on plastic, which isn't going to make the best seal.

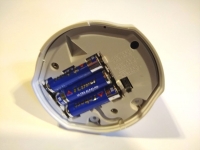
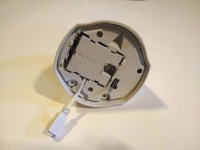
From the images above we can also see how the three AA batteries are installed, as well as how the optional power adapter is installed. Of note is that to use the adapter you have to cut your own notch in the housing to get the cable to the outside of the device. There are score marks in the plastic where you should do this, but in general it will be a further reduction in the weather resistance of the device. That said, my opinion of this battery compartment and the way everything is held together has me thinking this won't last long outdoors. For those motivated to do so, potting the seams and holes with something like a silicone sealant wouldn't be a bad idea.


