The Basics (continued):
Continuing our look around the outside of the DS415play, we will check out the rear panel.


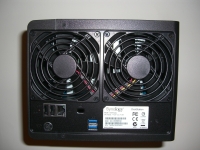
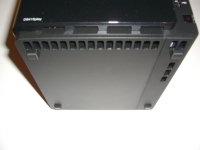
The below left image takes a close look at the back of the review sample, where the main feature of note is the pair of 92mm cooling fans. Additionally, this is where you will find two more USB 2.0 ports, two USB 3.0 ports, the power connector, a lock slot, and a label with a good deal of manufacturing information. While the layout is just fine, if I had my way I would rather have a USB 3.0 port up front, instead of the USB 2.0 port that is up there. The below right image shows the bottom of the housing, which is mostly solid except for some ventilation holes along two of the four edges. Additionally, rubber feet elevate the device and provide solid vibration isolation.
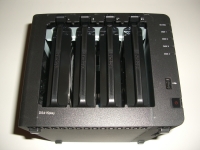
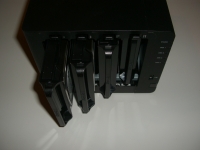
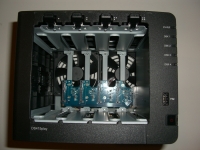
The next set of images show the front of the device, this time with the cover removed. You simply pull the cover away from the housing; no tools are required and when installed it is held tightly in place by rubber knobs which grab on to the edge of the opening in the housing. The below left image shows the tool-less drive trays all in their installed position, latched on to the housing. The below right image shows the drive trays in various states of removal. You simply press on the lever at the top of each tray to release it, and then slide it out.
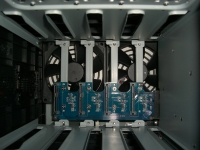
Next we see the inside of the DS415play with all four drive trays removed. At the back you can see plenty of exposure to the two exhaust fans, which should allow for plenty of airflow to hit each drive. Along the bottom of the opening you can see the daughter card which brings the SATA data/power connections to each drive.
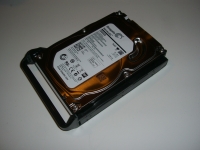
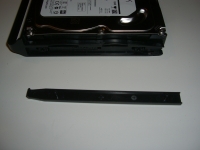
The next two images are a bit dark, but what is being shown is the tool-less drive rail with a 3.5" drive installed (a 2TB Seagate Barracuda, to be specific). You simply place the drive in the tray, and then you pop a thin rail on to either side to lock the drive on to the tray. These rails have pins on them that line up with the drive's screw holes, and are a snug fit in to the body of the drive tray. Installing a drive is extremely quick and easy, and the whole assembly seems rather secure.
The final image in this section shows the drive tray flipped over in order to show that it is not a solid piece so that the drive can stay cooler, and to show that there are four holes in the bottom frame which would allow you to install 2.5" SATA drives. This allows you to use SSDs or laptop style hard drives, if you were so inclined.