Internal Inspection:
Opening the M350 couldn't be much easier, although I do plan to try to simplify it further. There is a single screw on the back panel that holds the three sided cover in place. Remove the screw, slide the cover towards the back just a bit, and then lift off. My simplification plan is to replace the single philips head screw with a thumbscrew.
The two images below show the case with the cover removed. No much to see really... Just a few more views of the ovular perforations. Of some interest is that you can tell the case is painted assembled, as the cover and internal brackets serve to mask off some areas, leaving a semi-straight line transition between black and bare steel. In addition, we see the single hard drive bracket suspended over the main body of the case. It is clipped in place on one end, and secured on the other end by a single screw. If you purchase a second drive bracket it would look just like the first while covering the half of the opening.
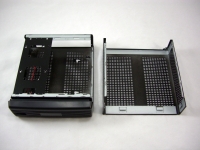
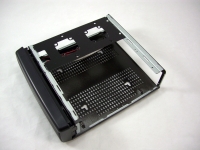
The case is barely larger than a mini-ITX motherboard, so expansion isn't the key selling point. You have room for up two 2.5" hard drives (one if you don't buy the extra bracket), no optical drive bays, no expansion slots, and you could install up to five 40mm fans (three with the base configuration).
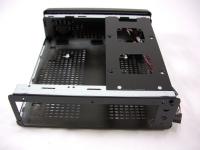
Since the case is so small, taking a look from the side or the rear doesn't show you much else, but we'll take a look from those angles anyway. In the below left image you can see the handful of front panel connectors, though. There are well labeled leads for USB, a power switch, and a power LED.

The final image in this section shows the case with the front bezel removed. A few cool things here include the two hidden USB ports, the custom power setup, and the fact that you can tell these are Mini-Box.com designed parts by the name screened on the PCB and molded into the bezel.
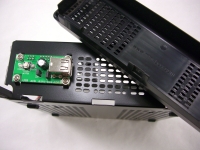
Some may be wondering what the point of hidden USB ports would be since you can't access them once assembled. For USB devices that you would like to be semi-permanent they are a great idea. You could install Bluetooth, WiFi, flash storage, wireless keyboard/mouse receiver, and so on. My plan would be to use this location for Bluetooth and WiFi adapters; install them and forget about them.


