Installation:
Although
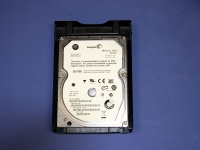
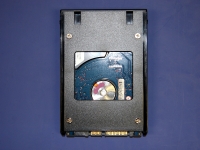
Synology supplied and installed four Seagate Momentus 320GB 7200.3 RPM SATA hard drives for the review, I will go over how to install a hard drive into a tray. In the below left image, a hard drive is inserted into the tray. There are screws provided for securing the tray to the hard drive that can be used on the sides or bottom of the tray, as shown in the below right image. You can also see there is a space in the middle of the tray, I would expect this is for heat dissipation to keep the drive cool inside the enclosure.
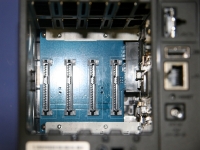
The drive hot swap trays are easy to remove, I just stuck my index finger in one of the gaps and gently pulled each one out. With the hard drives removed and set aside, we can see the SATA connection board inside of the Synology Disk Station DS409slim. It looks like a simple setup, each drive has its own SATA power and data connector on a single board that is connected to the main board (on the right side). One thing to pay attention to is installing the the hard drives in the proper orientation.
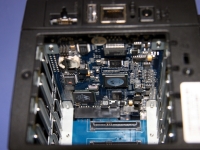
Although most manufacturers of network attached storage systems probably do not want you to open up their device and see how everything is connected, I can't say I didn't try. There are two screws on the top and bottom when looking at the back of the unit. These remove the one side, but the side with all of external ports was not accessible. I saw some screw heads, but did not have a long and very skinny screw driver to remove them. It is probably a good thing I didn't remove them, because getting them screwed back in would have been worse then playing Operation after downing a pack of Red Bull.
I did ask the Synology representative, and he said that the main part of the system is a double sided motherboard. As for the specifications on the hardware, we have a Marvell 6281 CPU (1.2GHz with 16 bit memory bus), and 128MB DDR2 800MHz memory (both of which are soldered onto the motherboard, so upgrading these will void your warranty).
In the below left image, you can see the motherboard. The below right image shows the bottom of the hard drive tray rails where you can see there is good room here for airflow from the fan.