User Interface:
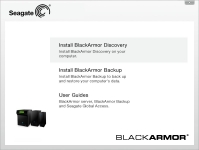
Now let's move on to the software and web-based user interface provided for managing the Seagate BlackArmor NAS 440. The device comes with a CD that will launch the installer shown in the below left image. Your choices are to install BlackArmor Discovery, install BlackArmor Backup, or to view the user's guides. The primary function of BlackArmor Discovery is to initially locate a new BlackArmor NAS on your network, as well as to register the product with Seagate. BlackArmor Backup is the Acronis powered backup software included with the device that can be used on up to 10 systems. If your network requires more licenses, you can buy them from Seagate at either
two for $50, or
five for $100.
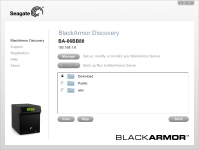
The above right image shows a subsequent screen after choosing to install BlackArmor Discovery. Once it has discovered the BlackArmor NAS on your network, you can begin to do some of the preliminary configurations steps. Once the most basic steps are completed, pretty much after the actual 'discovery' is complete, you should move on to using the web browser based interface.
You can either navigate to the device by IP address, or find the icon for it that should automatically be added to the Network section of Windows Explorer. The screen below shows exactly what you will be greeted with on your first visit.
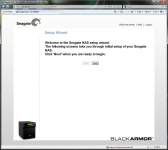
Once you are past the setup you have similarly themed pages which feature two rows of options along the top. The very top row only provides a link to help, and a link to logout. The second row provides links to settings filed as either system, network, storage, access, or media. We'll take a look at most of these settings and the options available with each.
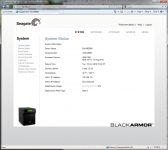
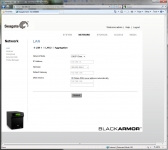
The below left screen shows the "System Status" page where we are provided a good deal of basic information on the NAS 440... model, serial number, firmware version, uptime, temperature, disk usage, and RAID configuration to name some details. The below right screen shows the "LAN" sub-menu from the network options. Here you can configure how the device acquires an IP address, and how to use the two Ethernet ports found on the device. You can use one port, use two ports independently, or aggregate the connections to increase the speed by processing transfers in parallel.
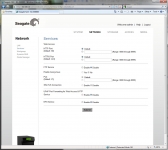
Continuing our look through the network related set of options we come to the below left screen... "Services". Here you can enable and configure HTTP and FTP connections, including the selection of custom ports and security features such as HTTPS and enabling SSL/TLS. This tab is also where you would enable UPnP (Universal Plug and Play) port forwarding service and where you would enable NFS (Network File System) service.
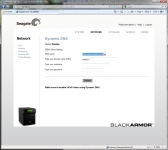
As a supplement to HTTP and FTP access to the device, there is also a tab to configure dynamic DNS. Once you sign up for an account online with the dynamic DNS provide, you can then configure the NAS 440 to know the domain name you wish to assign to it. This is far more convenient than remembering an IP address, especially if custom ports are required.


