Installation:
The first step is to decide which 5.25" drive bay you wish to use, and then it is time to run the cabling. This part of the installation can be either very simple, or very time consuming, depending on how you have your cable management set up. Personally, I like to have my cables neatly arranged so there were many zip ties that needed to be removed and existing cabling had to be rerouted.
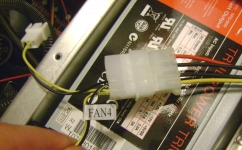
The basic concept is very easy and NZXT has helped keep everything organized by labeling all the thermal probes and fan connectors. Simply connect the desired fans to the Sentry 2 via the 4-pin or 3-pin power connectors, and position your thermal probes accordingly. Once that is done you can worry about making your cables look good again.

 In Use:
Without a user manual it may take a few minutes to get yourself acquainted with the Sentry 2, but by no means is it difficult to use. The far right fan symbol allows you to switch between fans while the plus and minus symbols adjust the speed. Temperatures can be shown in either Celsius or Fahrenheit, whichever the user prefers.
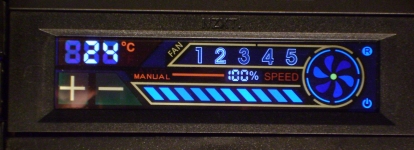
Personally, I found the touch screen interface to be very solid and sturdy while at the same time extremely responsive.

