Interior Inspection (continued):
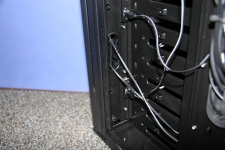
On the backside of the motherboard tray NZXT did not forget about the end user running cables. There are plenty of spots to route cables out of sight, and lots of places to attach a cable tie, as displayed in the image below.
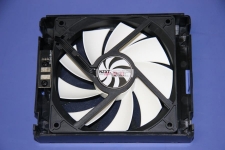
One interesting thing I found was the connections to the fans on the front panel. In the below left image there are two 3-pin wires connected to the front chassis. In the below right image is where the front fans are located. Removing the fans we can see that both fans are powered by a metal contact, not a power wire routed through.
The image below shows the inside of the fan and its hot swap enclosure. It is a well thought out design, but now if a fan dies you would need to strip wires and solder them to the small board.
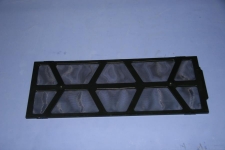
I can't find anything on the NZXT H2 Classic Series Silent midtower case that cuts corners. Two examples are the 5.25" device bay covers (below left image), and the bottom air filter (below right image). With many cases I have used in the past, I would break a tab off the cover, and even have one arrive broken. Putting a slider on one end is a great idea, and makes it easy to remove without bending cheap plastic tabs. These are the best 5.25" bay device covers I have seen, ever! Another thing I love about this case is the bottom filter. The filter can be removed without removing one panel or loosening a single screw.

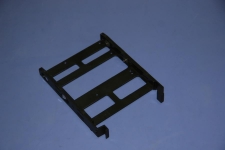
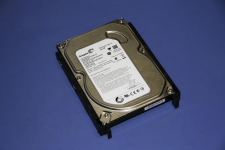
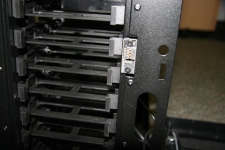
The last item to look at are the 2.5/3.5" hard drive trays. In the below left image is a tray without a drive installed. It's a little hard to make out, but there are four pins that line up with a 3.5" hard drive. There are also four holes on the bottom for a 2.5" hard drive to be installed. In the below right image I have installed a Seagate SATA hard drive. You will need to remove the pins, then line up the rubber grommets with the screw holes on the drive, then push the pins in. After the drive is in the tray and the front panel fans are removed, it will slide and lock into place.