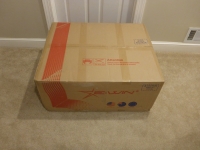
Packaging and Accessories:
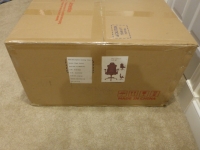
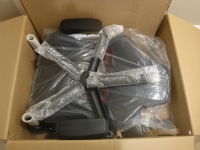
When the FedEx guy showed up with this, my first thought was: “what the hell did my wife buy?” He was carting this huge box (90cm x 74cm x 40cm) up the driveway on a dolly. When he got to me I saw the sticker and realized what it was. What I didn’t expect was how heavy this was going to be; it was nearly 70 pounds. For the most part the box is understated; there is a red set of stripes across the top and down the side along with the E-Win logo and on one end there is a picture of the chair with model number info. The top of the box does warn you not to use a knife to cut it open, but you might be able to get away with one if you don’t fully extend it. Under the typical flaps of the box there is another cardboard sheet to further protect the contents. Once this is removed you will see the 5 arm base on top of the backrest which is on top of the seat base and another box of accessories.
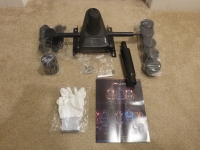
Inside this other box you will find a pair of white gloves, the hydraulic cylinder, the adjustable base, the caster wheels, side bolster covers, hydraulic cylinder cover, socket head cap screws (SHCS) and other hardware, Allen wrenches, and the assembly guide.
 Setup:
The assembly of the chair is easy in concept but at times was a bit challenging. The first challenge for me was trying to put the gloves on. Perhaps I should have asked my son to do the assembly as the gloves are small. While I was able to get the gloves mostly on, they were quickly removed when I realized my lack of getting my fingers fully inserted made it impossible for me to pick up the Allen wrench. After this you remove the (4) SHCS from the sides of the backrest. Then you are to place the backrest between the back adjusters mounted to the seat bottom. The problem I ran into was the width of the backrest, it just wouldn’t fit between the support brackets. To get this connected I needed to tighten the screws on one side first. This slightly compressed the foam on that side and allowed me to compress the other side to get the backrest more or less lined up. From there I took the smaller Allen wrench to line up one hole as I threaded the SHCS into the other hole. After this you install the support bracket covers with a single screw then fill the hole with the included caps.
Flipping the base over you will find (4) more SHCS which you need to remove. Underneath not only will you find a well-constructed fully welded frame, you will also see they added elastic straps under the cushion for additional support. At this point you install the tilt adjustment bracket, ensuring you line the front indication on the mechanism to the front of the chair. After securing it in place with the (4) SHCS you move on to the base assembly.
To assemble the base you simply push the (5) casters into the heavy aluminum base, then insert the hydraulic cylinder into the center of the base. Finally you take the hydraulic cover and drop it over the cylinder. At this point I suggest you get some assistance and have someone help you place the seat on the base. I did this by myself but with how heavy this chair is it was no easy task.


