In Use:
Installing the Evercool Venti could have been much easier if the manual had been more detailed. The images provided are very small and typically detail multiple steps in one view. Additionally, the text that acompanies the pictures isn't all that detailed either. There are plenty of small parts, and it was a bit of ingenuity and a bit of trial-and-error to get it right (or at least what I think is right).
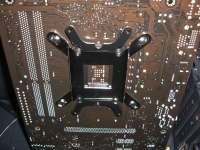
The image below shows the backside of an Intel LGS 1155 motherboard with the backplate in place. I really don't like this, as there is a good deal of uninsulated metal on this backplate that comes very close to solder points and other circuitry on the motherboard. Nothing touched, but I spent plenty of time inspecting it, and eventually covered the backplate in electrical tape for good measure. What you also see in this image is that four small hex head bolts go through the backplate and motherboard from this side. Since it is a universal bracket, and the difference between one platform and the next are so slight, the installation is rather fiddly. The hex head bolt can easily move around from one position to the next and you have to adjust your work as you progress to getting this thing installed.
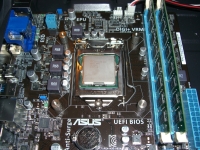
As you are trying to keep those hex bolts in place on the back, you need to place plastic washers and knurled nuts on them from the front side of the motherboard. The image below shows the final result of this part of the installation. It took longer than expected to get to this point, because: I was checking to make sure I avoided short circuits on the board, the parts are so fiddly, I kept adjusting the bolts to keep them positioned properly, and I intially didn't use the washers since I overlooked that tiny detail in the instructions.
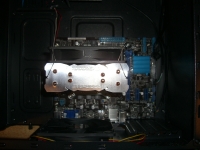
Once the backplate is secured, things go much more smoothly. With the mounting bracket attached to the cooler, you simply need to use a screw driver to attach it to the motherboard in four positions (don't forget your thermal past first, though). The images below shows the cooler bolted down to the motherboard, and with the fan clipped on to the aluminum fins. I may have spent 10+ minutes on installing the backplate and the knurled nuts on top, but attaching the cooler and the fan took only another 2 minutes or so.
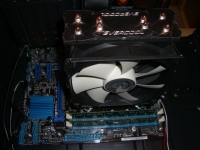
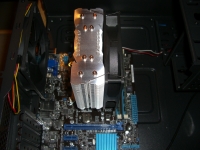
Regardless of cooler installation orientation, there is good clearance around memory slots, the first expansion slot, and other features in a system that could interfere with a bigger CPU cooler. That said, it is always best to check out your system before buying a new cooler, especially if it is a small form factor system.