Installation:
For this review, the
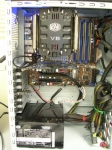
Cooler Master V8 heatpipe CPU cooler was installed in a system with the following components:
» Intel Core i7 920 (2.66GHz) processor
» MSI x58M uATX motherboard
» HIS Radeon HD 4650 512MB PCIe video card
» Seagate 500GB SATA 3Gbps hard drive
» OCZ Technology Platinum PC12600 1600MHz DDR3 triple channel memory
» CoolerMaster Real Power Pro 750 power supply
» Windows 7 Ultimate 64-bit operating system
Getting the Cooler Master V8 installed was a bit of a challenge. In fact, the whole time I kept wondering why they had made it much more difficult than was really necessary.
First, you'll need to attach the appropriate bracket to the base of the cooler via the four included Philips screws. Next, you'll apply thermal paste and mount the cooler onto the CPU, fitting the mounting pins into the holes in your motherboard (if you're using and AMD setup, you may have to remove the stock CPU retention bracket in order to install the V8). While holding the unit in place, you take the universal bracket and line up the pins which protrude from the other side of the motherboard and fit the pins into the appropriate holes in said bracket. Finally, you'll use the nut driver attachment to tighten the supplied nuts in the typical criss-cross pattern to insure proper seating of the unit.
Because our case had a nice large cutout for changing out the CPU back-plate, this was probably a lot easier than just removing the motherboard completely. Now, just plug in the fan header and you're ready to go!

 Testing:
The test system is run on an open bench in a room with an ambient temperature of 28 degrees Celsius. CPUID’s Hardware Monitor 1.15 was used for measuring the idle and load temperatures. Idle conditions were established with a 30 minute period where only Hardware Monitor was running. For load conditions, a combination of Prime 95 (with 8 instances running), SiSoft Sandra Professional’s Burn-In Test, and FutureMark 3DMark Vantage were run for 30 minutes. All readings were noted and the average of the four core readings were charted. No additional fans are used in this setup.
For comparison purposes, the following coolers were run through the same set of tests:
» Stock Intel cooler
»
Thermaltake V1 AX (running on high)
» Scythe Katana 3
»
Prolimatech Megahalems
