Internal Inspection:
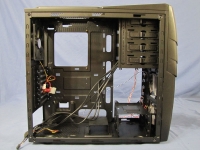
A quick look at the internal components of the Storm Enforcer shows that the interior paint job matches the exterior, which is becoming a fairly common, but welcome, look for cases. Each section will be looked at in closer detail below, but two features immediately jump out at me. The first is the large hole in the motherboard tray which will make it very easy to install any CPU cooler without removing the motherboard from the case. The second is the four other holes in the motherboard tray which are provided to help hide cables and permit easy routing behind the motherboard tray.

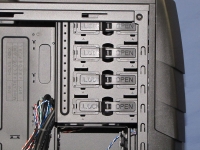
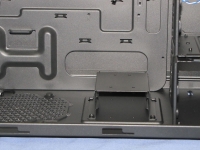
The 5.25" drive bays are tool-less using a simple locking mechanism. They are clearly marked to indicate whether the drive is locked in place or whether it can removed. The 3.5" drive chassis uses a tool-less rail system to install the 3.5" hard drives. The picture on the right shows the 2.5" hard drive chassis, which is also removable by two screws. The 2.5" drive chassis is not tool-less, and to install drives here screws are required. Next to the 2.5" drive chassis is the power supply location, and Cooler Master has installed four rubber supports which will help to reduce vibration from the power supply.
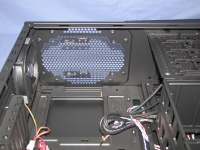
The internal view of the back panel shows that the expansion ports are not tool-less, and a black non-LED 120mm exhaust fan is pre-installed. Cooler Master has installed a fan with the small three pin fan power connector, and has included an adapter to convert this to a four pin power connector. The picture on the right shows the top of the case where a 200mm or two 120mm fans can be installed. No filter is provided as these are designed to be exhaust fans, not intake fans.
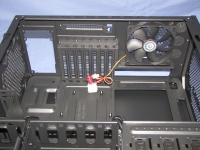
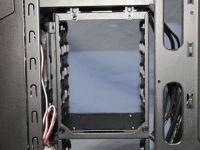
The middle 3.5" drive cage can be removed or rotated. Initially it is secured to the case by four screws on the back which will need to be removed. With the drive cage removed, the super long video cards now have plenty of room. Also, this drive cage can be rotated so the drives would face the motherboard.
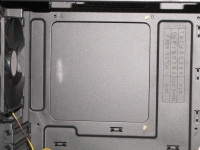
As previously mentioned, there is a large hole in the motherboard tray to allow installation of CPU cooler back plate mounting hardware without removing the motherboard from the case. Next to this hole is a listing of which locations a standoff needs to be installed for each size of motherboard.
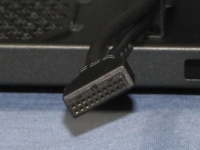
The front USB 3.0 ports are designed to be internally connected only. If you happen to have a motherboard with a USB 3.0 card or motherboard mounted USB 3.0 ports, this solution will not work for you. It would be nice if the cable could be changed depending on whether you need an internal or external USB 3.0 connector.