Setup (continued):
Under Advanced Settings, you have several more menu options, the first is Record. Under this menu you can set up schedules to allow recordings, set the parameters for the feed recordings including the substream. This can be done for each camera independently. The export function will allow you to export all recordings for a given date range of the selected feeds. This is a useful tool should you have to give this data to the police, though I do wish you could set up and auto export just in case someone swipes your NVR.

Next menu is for the HDD, here you will see relevant drive info. But one disappointing thing is that it currently indicates there are 0 days of recording left. This is because the drive is full and needs to overwrite old data. I would like this to show an estimated number of days based on historical info. This would give the end user a better idea of how many days they have backed up without scrolling through recordings. Under Configuration you can see some network IP details, set how the Live View is configured and set your challenge question and answers. Under Maintenance you can set a multitude of log details. There are several pages of log triggers and again it is a little strange that they include audio triggers. Here you will find several more options like Upgrade, Default, Traffic, Network Detection and Network Stat. should you choose to really dive more into the settings and how this works on your network.
The next option from the Main Menu is the information screen. This can be used to see overall info about the system, cameras, recordings, network and HDD. This main screen will also be used if you want to link the system to the EZVIZ app. For that you would simply scan the QR code and follow the directions.
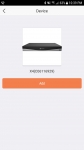
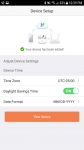
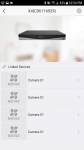
If you want remote access to your cameras you need to download the EZVIZ app from your app store. In my case I already have an account, so adding this system was simple. You simply tap the “+” in the top right and then scan the QR code for the NVR as mentioned above and the device will pop up asking if that is what you want to add. The next screen will confirm it was added and allow you to set time zone, daylight savings time and date format. Selecting “View Device” will bring up a screen with linked devices. If you customized the name via the NVR directly these names will appear. In my case I didn’t do any customizing yet, so they just said Camera 01 for all cameras.
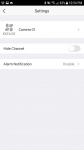

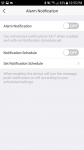
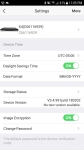
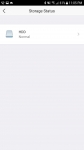
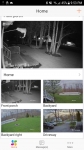
Selecting any of the cameras will allow you to edit the name, hide the channel or enable alarm notifications. Back at the list screen if you select the settings; you can edit the NVR name, time zone, DST, date format, see storage status, firmware version, enable encryption and change password. Once set up you will see the four channels clustered together on the apps main screen as seen below. In the case the NVR is named Home and the channels are Front Porch, Backyard, Backyard right, and Driveway.