Setup:
I am not going to cover camera installation in too much detail since every installation will be different, but I do recommend you temporarily mount each camera and see if you get the FOV you are expecting before you permanently mount these or any cameras. For those of you with vinyl siding, you may want to investigate something like
this. I picked these up at Amazon and they worked quite well; allowing me to not only temporarily mount these to test them but they worked well enough I made little mounting plates for permanent installation. Since these are POE cameras, running the cables is also super easy since you are just fishing one cable and end through your walls. But if you find you need more than 100 feet I would strongly recommend you buy bulk cable and crimp your own ends. I think using an additional coupler may present a problem for long runs.
Since these cameras do not have local recording to a microSD card I decided I wanted to hide the NVR away from my other networking and electronics. My thought was if an intruder got in, after jewelry they will be going for your electronics. So, having this sitting with your gaming systems, receiver etc. could mean you have no footage of what happened. At first, I was worried about concealing mine since you need a mouse to navigate the system and set it up. But I used a
wireless mouse from my son’s laptop to test and found it worked from about 20 feet away. This allowed me to mount the NVR in another room discretely and run the HDMI and Ethernet back to the main area.
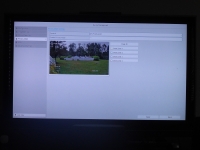
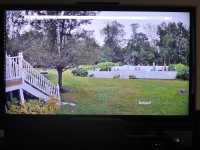
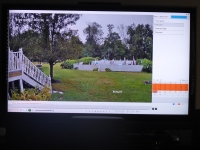
Once you connect the power to the NVR, connect a mouse and your cameras, and then HDMI or VGA to your TV, you can start setting up the system. Here you will do most of the customization of the system. Right clicking the mouse will bring up the menu bar as seen below. The first five selections are all about your view mode. The first will show just one cameras view, the second will give you a tiled view, the third and fourth allow you to navigate back and forth between feeds and the last is an auto cycle selector if this feed is run to a dedicated monitor.
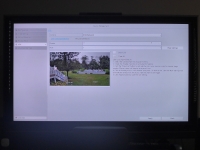
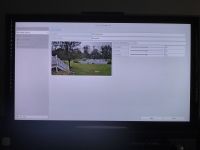
The next icon is to see your recordings. But to access this or any of the configuration screens you’ll need to input your password. This is a little cumbersome with a mouse, so if you often access these screens you may want to investigate a wireless keyboard. At the top right you can choose the feed you want to review, then along the bottom you can select your date. Once you get to that point you can see activity along the bar at the bottom and go to any point in time you wish. I had originally set this up to record continuously but I thought that was overkill for my application and went to just motion. Hopefully this helps with hard drive life as well.
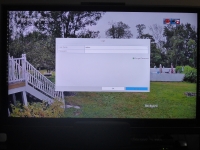
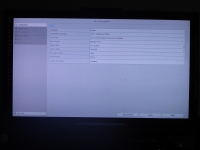
The next icon is for the settings menu. The first option is the Configuration of the system, allowing you to language, output screen resolution, time, date, DST settings etc. Under Image Settings you can select each feed and adjust image brightness, contrast and saturation as well as name each feed. Motion Detection allows you to select areas you want to trigger recordings and how sensitive you want this trigger to be. This is very important if you choose to record by motion since this is not a passive infrared sensor, so you will get a lot of false alarms due to leaves moving in the wind etc.
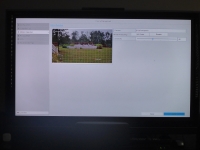
The next option is Privacy Mask; here you can block out areas in the recordings. For me this is not necessary, but I could see this being useful if one of your mounting locations was seeing inside a window. Under VCA you can do some cool stuff. Rather than setting up motion zones you could for instance draw a line and trigger recordings based on when an object travels across this line.