Installation (continued):
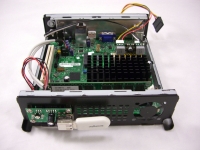
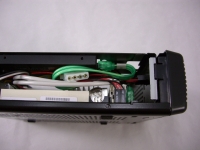
Before installing the hard drive and closing up the case, I had to get my hidden USB devices in place. In the images below you see a single Bluetooth adapter installed. I had planned to also install a USB WiFi adapter, but the fit was a bit too snug. I have an older AT&T branded wireless G adapter I intended to use, but it was a bit too thick to fit with the Bluetooth adapter in place, so will leave the second USB port open for now.
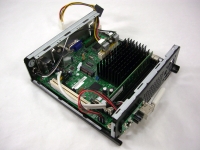
The next set of images show the hard drive bracket installed so that the drive is suspended above the area away from the processor (seemed like a better idea for cooling purposes). The below right image takes a closer look at the front corner of the case, as it is a bit cramped in here. The SATA cable not only has to avoid the front panel connections as it leaves the motherboard, but it has to make a rather tight bend to get into the drive's connector. You definitely want short cables here (the one pictured is only 6 inches long), and you may want a cable with at least one right angle connector.
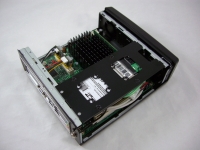
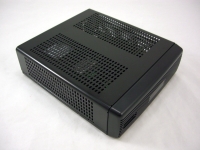
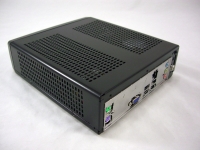
The next two images show the case all sealed up and about ready for action. The open perforations give you a decent look at the components inside, and should allow for adequate passive cooling. And if you do regular maintenance by blowing the dust out of your computers, you might not even have to open this one up to do so.
Finally, I had planned on installing this system on the back of a monitor using the VESA mounting kit we looked at earlier. Unfortunately, of the five LCDs I had on hand, only the two currently mounted to walls have VESA 100 mounts... and I wasn't inclined to get them down and find their bases for this. One other unit had no VESA mounts, while two others had VESA 75 mounts. It would be great if Mini-Box.com could integrate a VESA 75 mounting pattern on the bottom of the case, too!
There isn't a whole lot to the assembly of a system in the M350, and as such it goes rather quickly. As shown, there were just 9 screws to tighten, and just a handful of cables to connect to get the PSU, SSD, and front panel connections wired up. Even with the breaks to take pictures included, the whole job was done in less than 15 minutes.
Once powered up, the system provides plenty of horsepower for basic computing tasks, and does so in total silence, with minimal power draw, and with minimal heat generation. Look for a complete review of the system built in this case soon!


