The Basics:
The
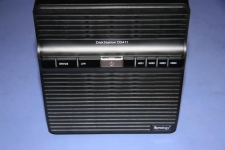
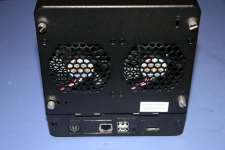
Synology DiskStation DS411 NAS looks almost exactly the same as the DS411+. The only physical difference from the DS411+ is on the front bezel. The power switch on the DS411 is painted silver, while on the DS411+ it is painted gold. In the below left image, we can see the front of the unit, where we find six lights (status, LAN, and HDD 1-4), along with the single button for powering the device on and off. In the below right image we see the very familiar looking back panel. Again juast as on the DS411+, we have dual 80mm fans, and ports for power, network, 2xUSB, and eSATA.
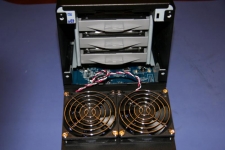
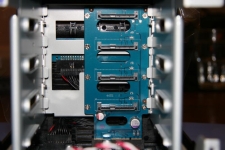
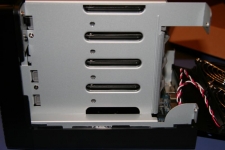
Removing the four thumbscrews on the back panel allows you to install hard drives or replace a noisy or busted fan. In the below left image we can see the back panel laying down, exposing the dual 80mm fans and giving you access to the four hard drive trays (the angle of the photo is hiding one of the hard drives). In the below right image we can see the SATA riser board with all drives removed from the DS411. This design makes hard drive installation very easy.
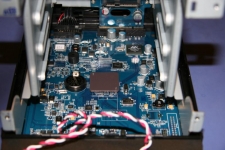
The image below shows the main board of the unit. The DS411 only has one heatsink, and no fan for the CPU, like the DS411+. Also another difference is that the DS411 doesn't have a DIMM slot. Personally I like that the CPU can be cooled passively, the fan on the DS411+ was noisy and needed replacement.
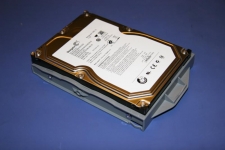
There are four 3.5" SATA hard drive bays included with the Synology DiskStation DS411 NAS. Most likely when you purchase a Synology NAS it will not have drives pre-installed, so you will need to install your own hard drives. In the below left image we see a Seagate Barracuda 1TB 7200 RPM SATA 3Gbps hard drive installed into one of the hard drive trays. Once you have the trays filled you can slide them into the NAS. They lock in, but also have places to be screwed in. In the below right image, we have all four drive bays filled up.
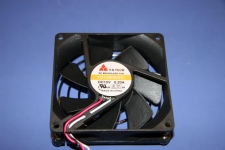
I removed one of the two exhaust fans from the back of the unit. Below we can see the model, and most importantly, the required voltage.