Installation (continued):
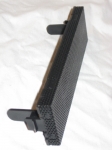
Installing optical drives and media readers in the Cupio 6140 is literally easy as pie! Seriously, just remove any EMI Shielding in the way, remove a bay cover and slide until it clicks. The Gigabyte Cupio 6140 is the first case Iâve run into that has handles inside the bay covers for easy removal. No more carefully prying the front of the case off (and yanking front panel wires in the process) to install something in the external bays! It takes longer to hook up data and power cables than it does to mount an optical drive in the Cupio 6140. Again, some fan controllers and some media card readers might need to be screwed into the bay, if they arenât of a decent depth for the fingers of the mechanism to grasp.
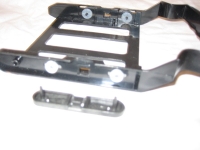
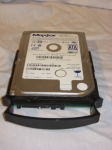
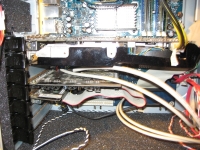
Installing hard drives in the Cupio 6140 is nearly just as easy. All that is needed is to pull a drive caddy from the bay, pop off the retainer, slide the drive in, and place the retainer. Fingers on the retainer hold the drives in place, with silica grommets in the caddy to help reduce vibration and noise. It does take a couple of seconds to gently spread the sides of the caddy to have the drive clear the grommets. The caddies are designed for mounting the drives with either cable to the front or rear of the caddy. If you wish to mount the drives with cables to the rear for neatness, youâll need to hook up the SATA and power cables before sliding the drive in. I chose to mount the drive oriented connectors out, and attempted to hide the cables.
Now weâll see how sturdy and reliable the tool-less expansion clips are. It takes a small bit of effort to release the clips, and they are not attached to the case â" so use caution as they could fly onto the floor and (if youâre in a rolling chair or have dogs nearby) become damaged or unusable.
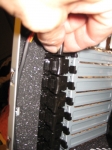
Mounting the video card wasnât too difficult. The only issue I initially had was securing the clips â" but this was due more to not being familiar with the mechanism. To my surprise, the Cupio 6140âs clips held the dual-slot 9800GTX+ as firmly as two screws would.
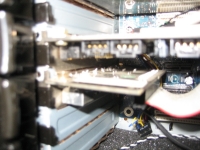
The sound card was a bit trickier than the video card. Remember, I stated I would use an older Creative SoundBlaster Live! Pro sound card, because it comes with a slot-less daughter card. The main card mounted tight and true, however, the daughter card is loose and sags. If I was building this for myself and using a card as such, Iâd probably forgo the clip(s) for any expansion card that doesnât physically mount in a slot.
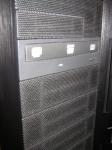
Whew! Thatâs a bit of building in quite a short time. Time to build this machine to this level took all of 32 minutes, not counting pausing for photos and writing. I remember building that machine inside an old Antec T1040B case, and because of all of the screws, it took almost an hour. The only things that concern me about the case are the foam sheeting, which might raise operating temperatures; and the solid door, which might inhibit airflow (and in turn, also raise temperatures).


