Internal Inspection:
Now let's pop the side cover off and have a look around the inside of the Cougar Spike mini gaming tower case.


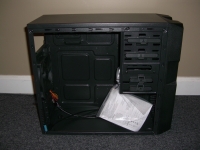
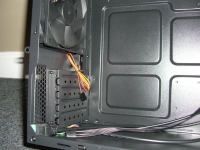
The side panel is secured by two thumb screws which have Philips head tops in case you want to crank it on really tight. As soon as you remove the cover you'll notice that the interior receives the same matte black paint job that the outside features. The image below shows the opened case with the bag of accessories twist-tied to a drive bay.
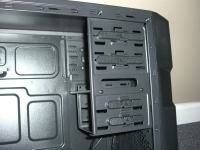
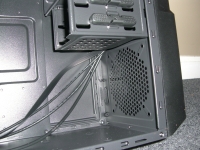
The below left image shows the drive bays, where we find two tool-less 5.25" bays (for internal or external devices) and two tool-less 3.5" bays (for internal devices only). In between the two sets of tool-less bays is another 3.5" bay which requires tools and is for internal or external devices. The below right image shows the lower half of the front of the case. here find a perforated area that has been punched to accept a few different sizes of case fans, and we'll install that red LED fan they provided right here. Also visible in this image is the front panel wiring and the holes on the floor intended to be used with 2.5" drives. The steel is stamped a very slight amount, and I am uncertain how useful that location will be for installing a drive as it may be tricky to connect cables in that position.
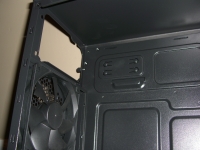
The below left image shows the upper rear corner of the case where we can see the power supply opening and the all black 120mm exhaust fan. The below right image shows the lower section of the case's back half. YOu can see the 3-pin lead off of the 120mm fan, the four expansion, and that the motherboard tray is permanent and provides no cut-outs that would make swapping out a CPU cooler easier.
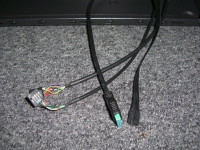
The final image in this section shows the front I/O panel wires, which include well-labeled connections for USB 2.0, USB 3.0, audio, plus the typical lights and buttons. These wires are all about the same length, and should be longe enough to reach headers anywhere on your motherboard.
Overall, the inside isn't anything special but it is well finished with no sharp edges. Considering the fit and finish, available drive mounting locations, and room for up to four case fans


