The BIOS:
The BIOS for the
ASUS P6X58D-E is packed with features that are sure to appeal to overclockers. We'll take a quick look at a few of the main screens of options available in this section. All of the images shown happen to have been taken with the system configured for a decent overclock, taking a 2.66GHz Intel Core i7 processor up to just above 4GHz.
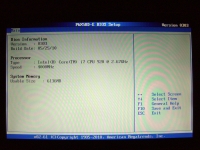
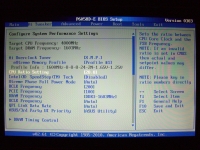
In the below left image we see the Main Screen which confirms that the current BIOS version has been applied, that the processor is set to run at 4.00GHz, and that there is 6GB of memory installed. The below right image takes us to the first page full of overclocking features found on the AI Tweaker screen. This top portion of the screen provides some familiar adjustments, such as enabling XMP profiles from the memory, as well as setting the CPU ratio and frequencies for various components. The QPI Link Data Rate option may be of interest to extreme overclockers, as it is suggested to adjust this setting from "auto" to "slow" when implementing a BCLK Frequency greater than 200MHz. During testing we ran at a maximum of 201MHz, and were able to maintain "auto" for the QPI Link Data Rate.
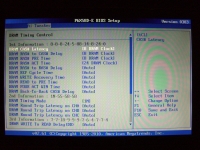
At the bottom of the above right screen we saw a link for DRAM Timing Control. Selecting this will bring up more memory related options than I think I have ever seen before (some shown in the below left image). We get confirmation of the selected XMP profile's timings (8-8-8-24), as well as the option to adjust them manually. Plenty of other settings are available, and one that I made sure to adjust was to drop the DRAM Timing Mode from 2N to 1N.
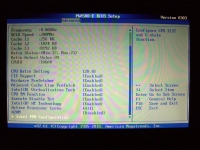
Backing out of the DRAM Timing Control screen brings us back to the AI Tweaker screen, and scrolling down a bit leads to the options shown in the above right screen. Plenty of voltage settings to fine tune your system's performance, and to be honest I'm a bit overwhelmed at the number of options I don't recognize without doing some extra reading.
This page of options has even more to offer, and scrolling down some more reveals the options shown in the below left image. With everything in the voltage department set to "auto" with the overclock to 4GHz, I did notice something users may want to adjust. The CPU voltage was set to over 1.4V at this speed, which is quite a bump from the stock 1.06V I was running. Entering a manual value resulted in the system running just fine at around 1.7V. The below right screen simply shows the Advanced tab which confirms some of the CPU settings, as well as providing even more options to adjust.
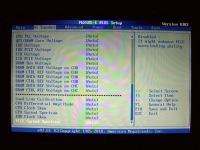
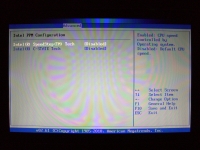
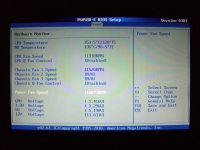
More Advanced screen options are shown in the below left image, with the ASUS recommended setting of having Intel's C-STATE disabled (to optimize USB 3.0 and SATA 6Gbps performance). The Hardware Monitor page is shown in the below right image, where you can take control of your system's fans, especially the CPU fan, with great detail.
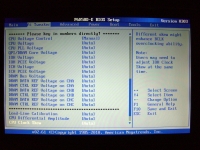
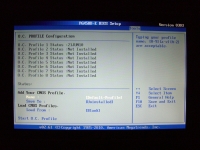
Finally, we have a look at the O.C. Profile section of the BIOS. Here you can save up to 8 different profiles defining system performance that can be saved for use at any time. You could create your extreme overclocking profile, a low power / low noise multimedia profile, and up to 6 more in between. 8 seems like an overly generous number, but at least you won't be restricted.
The BIOS really does offer an extensive array of options to define the performance of every system component. While we only looked at a small sample, the options could get overwhelming to some less experienced users. One thing not covered that may appeal to those looking for a quick boost without any effort would be the "Turbo Mode Control" found in the PPM options. This allows improved threaded performance for users running at stock speed, and it could still be applied while overclocking.


