The Basics:
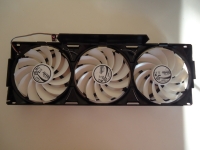
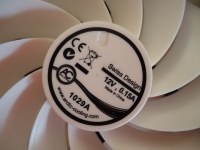
Once the Accelero XTREME Plus is removed from the outer case, we stripped the fan housing from the heatsink to get a better view. The fan housing is held onto the heatsink assembly via six clips that attach to grooves in the heatsink's fins. The three low-speed, high-output fans are daisy-chained together so you'll only need to connect one power lead. The two images below give you a more detailed view of how the fans are laid out, as well as a closeup of an actual fan hub label.
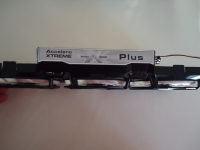
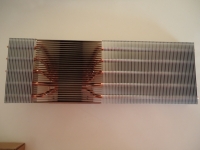
Turning the fan housing on its side reveals the Accelero XTREME Plus label and gives you a good idea of how thin the housing and fan assembly is.
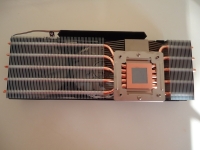
Next we move on to the heatsink itself. From the backside you can see that Arctic Cooling has pre-applied a generous portion of their MX-4 thermal compound, which is ideal for graphics and CPU applications. You can also see how they laid out the five heatpipes running the entire length of the cooler. Flipping the little bugger over reveals that the portion directly over the GPU is made of cooper, while the remaining portion of the heatsink is made of aluminum - that should help with getting the heat out of our Fermi cored graphics card.
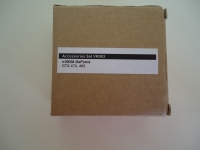
On an important note, the Accelero XTREME Plus is actually just the fan and heatsink unit. You will need to also purchase the mounting hardware. Arctic Cooling has designed the Accelero XTREME Plus to fit a myriad of GPU solutions, so make sure you get the appropriate hardware for your graphics card. For our testing, we'll be using an ASUS GTX465 graphics card, so Arctic Cooling sent along accessories kit VR003. This ships in a plain brown box labeled with both the kit number and which graphics solutions the kit is for. Once out of the box, the first thing we have is the instructions. These are fairly straight forward and explain how to and in which order to assemble things.

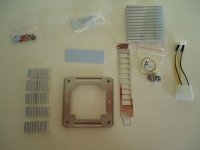
Moving right along, we have all of the parts from the mounting kit. Keep in mind that based on the graphics solution, the kit may include slightly different parts. For the most part, you should have something that resembles what we have below (from top to bottom and left to right): a bag of mounting screws and fiber washers (for the VRM heatsink), a tube of thermal adhesive (for attaching the memory heatsinks), a VRM heatsink, thermal pads, a slotted PCI bracket, a case badge (with some more screws and washers), a power adapter for the fan lead, memory heatsinks, and a mounting bracket for the unit.