| View previous topic :: View next topic |
| Author |
Message |
jedihobbit
Rated XXX

Joined: 22 Mar 2007
Posts: 238
Location: Central Virginia, USA
|
 Posted: Sat, 05 Apr 2008 00:14:02 Post Subject: Yodaâs SMN Work Log..v1.0 & v2.0 Posted: Sat, 05 Apr 2008 00:14:02 Post Subject: Yodaâs SMN Work Log..v1.0 & v2.0 |
  |
|
I was going to build a server with this name, however having decided to move the server to BluHaz reDux v2.0, I changed a few things with Yâs SMN. To begin with letâs do the obvious and list the specs.
CASE: Ultra MicroFly mATX âHybridâ**
PSU: Enermax Liberty ELT500AWT 500W (NEW)
MOBO: Biostar Tforce 6100-939
CPU: AMD Opteron 170,
HSF: Zalman CNS7000
GPU: Sapphire HD3870 (NEW)
MEMORY: g. skill F1-4000USU2-2GBHZ (2 x 1024)
HDD: WD Raptor X, 150 Gigs
Optical Drive 1: LG GSA-H42N-BK, 18X DVD+R Burner
**Hybrid = the case assembly consists of the chassis from a MX6 with the exterior parts from a windowed MicroFly.
Originally the Biostar / Opty were to go into BluHaz reDux as part of its v2.0 build. However there was one small fitting issueâ¦â¦
   
With not wanting to change out the hsf on the 170, or move the blow hole fan, and being concerned about heat from the ocâed proc decided to move everything over to the Yodaâs SMN (Size Matters Not) build. Besides, by transferring the Raptor X from the original DreamCatcher, I wouldnât have to reload any software! The two new(est) pieces of hardware are the PSU and GPUâ¦.âcourse the P was needed for the G.
As the case was originally meant to be âjust a serverâ no major mods were planned and still arenât > Running out of time, money, and interest. The little stuff planned will be:
1.) Remove the stamped grills for the front 80mm and the rear 120mm
2.) Swap out the stock fans for LED
3.) Rounded cables (the FDD is EL for S & Gs)
4.) May at a later day do an LED fan and acrylic cover for the PSU
5.) Various sleeved cables
As it is the âbackupâ machine and a slight money saver it was decided to go with only one optical drive. Also in a move to speed up assembly I âstoleâ the LG DVD+R from DreamCatcher v2.0. Still gonna keep the dinosaur, a FDD.
Cooling would seem to be my biggest concern as inside this little case I will be cramming a heavily ocâed 170, a single-slot HD3870 (to be ocâed), and a WD Raptor X. Three nice heat sources.
To add more air in (and noise??) Iâve taken the Evercool 3 fan HDD cooler from Celtic Spiritâs (one of my long sad stories) parts box. Right now Iâm trying to figure out if I want just a ânormalâ 120mm exhaust fan (led of course) or go for more noise and install a Tt SmartFan 2. If the Tt gets used think Iâll use the thermister and see how well it can do case temp as opposed to cpu.
I do have one advantage on putting this case togetherâ¦..most of the cable runs will be the same as DC so all I have to do is âcopyâ.
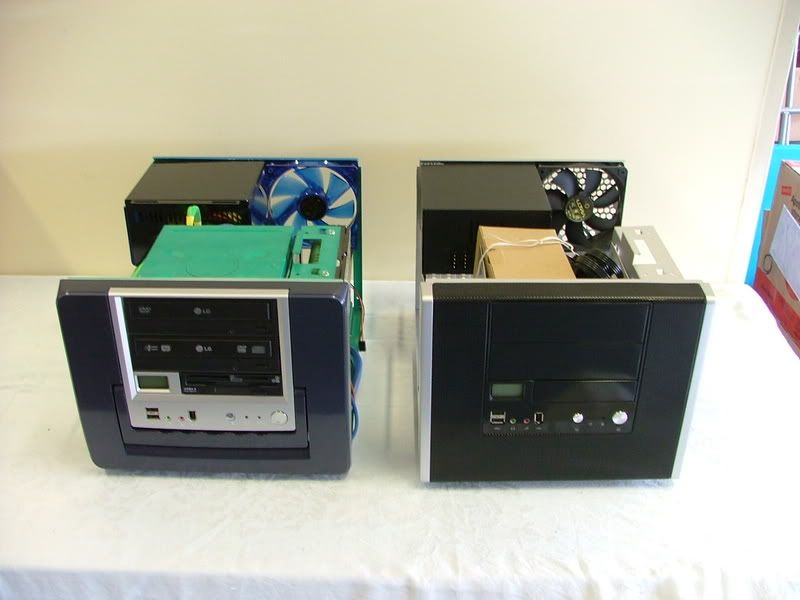
Borrowed some pics from DC v2.0
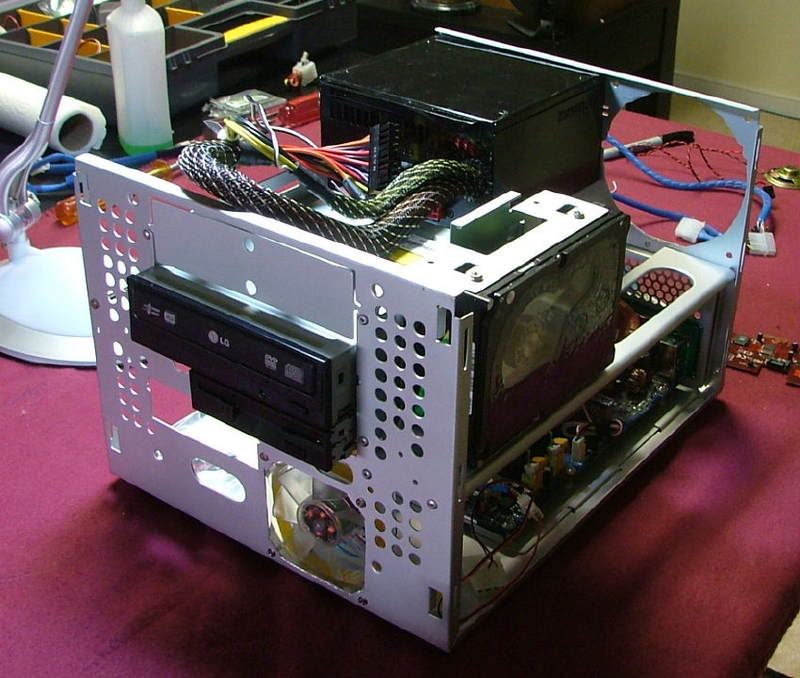
1. Before disassembly 2. Panels removed except faceplate 3. Faceplates gone and you can see on the right where I need to remove Yâs SMN 80mm âgrillâ
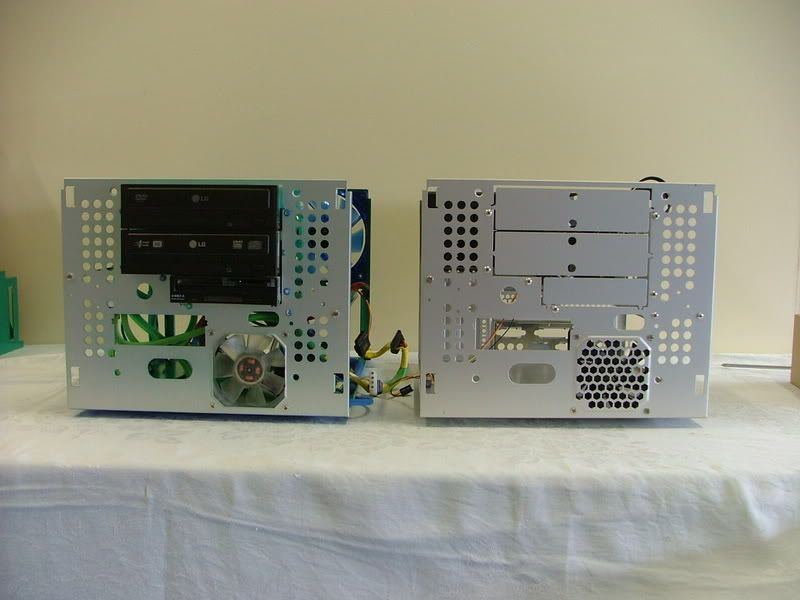
When I first started putting YsSMN together, I hadnât thought about the HDD cooler and still thought about adding a DVD-ROM. That is why you see the DVD-R in the second slot.
  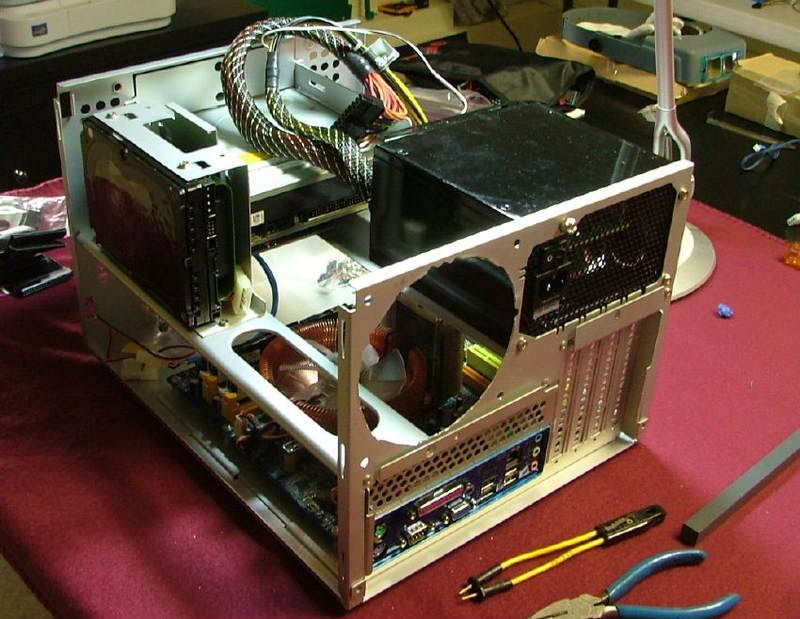
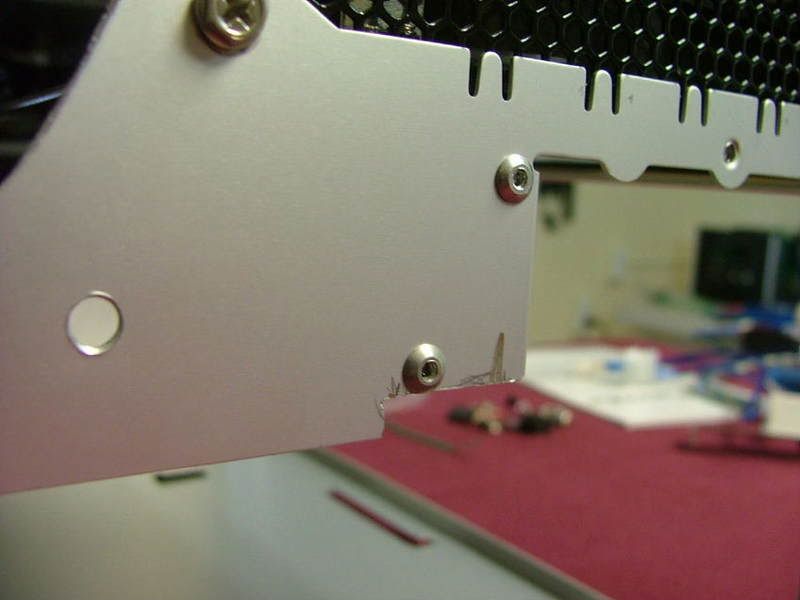
Here Iâve cut out the front and rear stamped fan grills, and regrettably was very caviler about it as âit wasnât to be a bling build.â The first shot is when you donât give a flip and the second is when you do (DreamCatcher). Did a neater job of cutting, then again with DC the chassis had been de-milled while with YsSMN the cut was done assembled.
Also had to notch the rear of the case to allow clearance for the NC-U6 NB cooler. This time however I didnât do the U shaped version, just took off the whole corner. For some reason this MX6 chassis doesnât seem to be as âtightâ as the original MicroFly. I noticed this not only when aligning the notches, cutouts, etc. but also when mounting the things in the drive tray area.
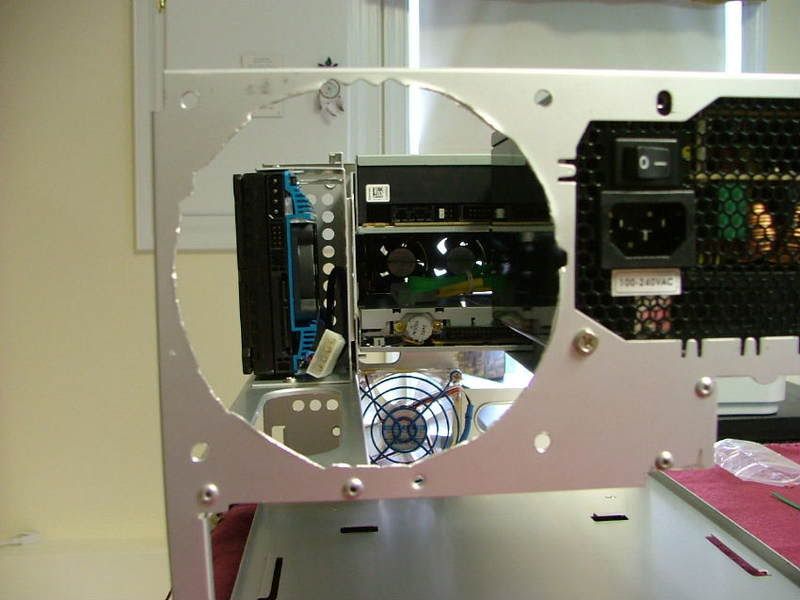
The front of the chassis is shown with the bay items mounted and the front 80mm fan with cutout. The fan is blue LED BTW. Youâll notice the optical drive was moved to the top bay. Figured if the cooler was lower there would be better cross flow to the 120 and it would blow across the GPU. Then I threw on the front bezel.
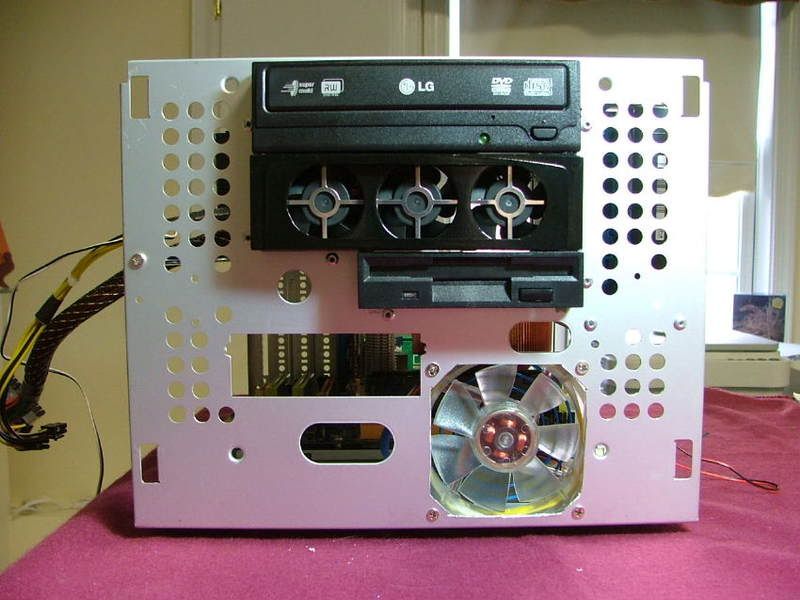 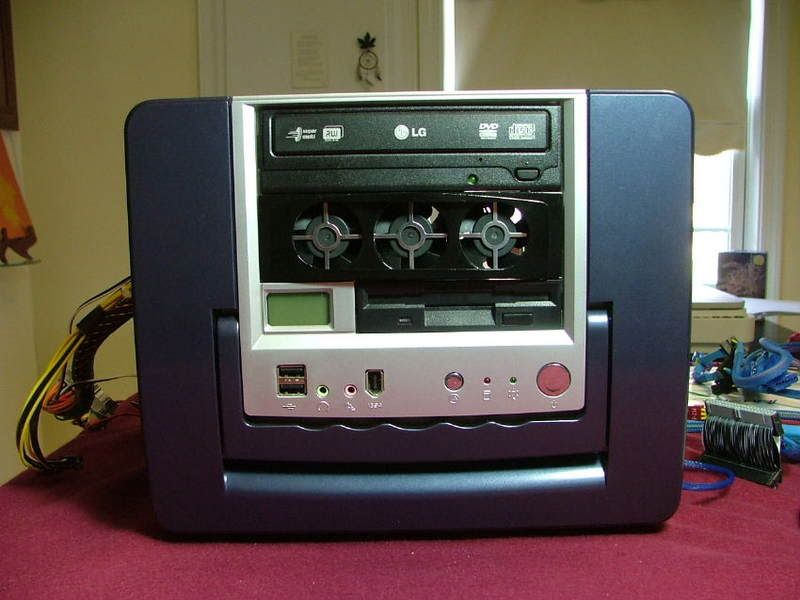
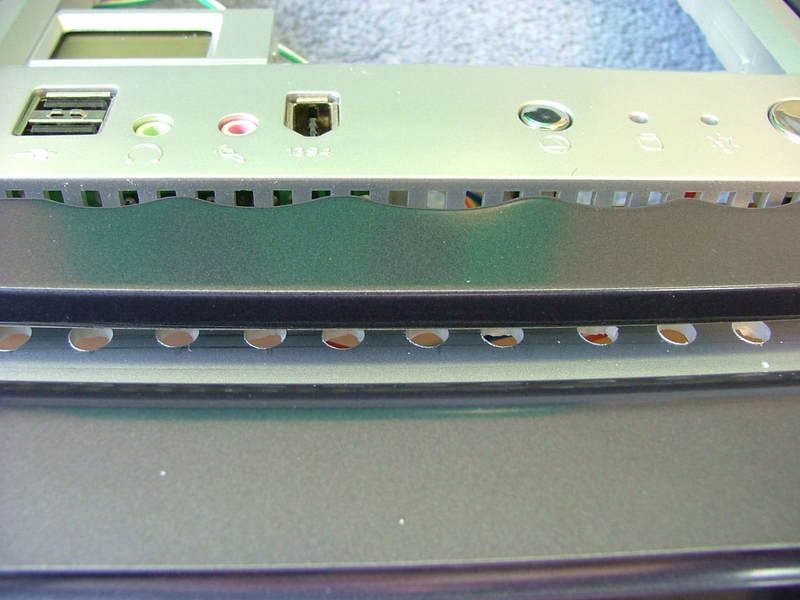
Speaking of the bezelâ¦â¦. One of the biggest complaints Iâve came across with the Ultra MicroFly case (other than a supposed flimsy handle) is cooling. While the chassis is fairly open and the front looks like Swiss cheese, the front bezel is âsolidâ with the only âair ventsâ above the handle.
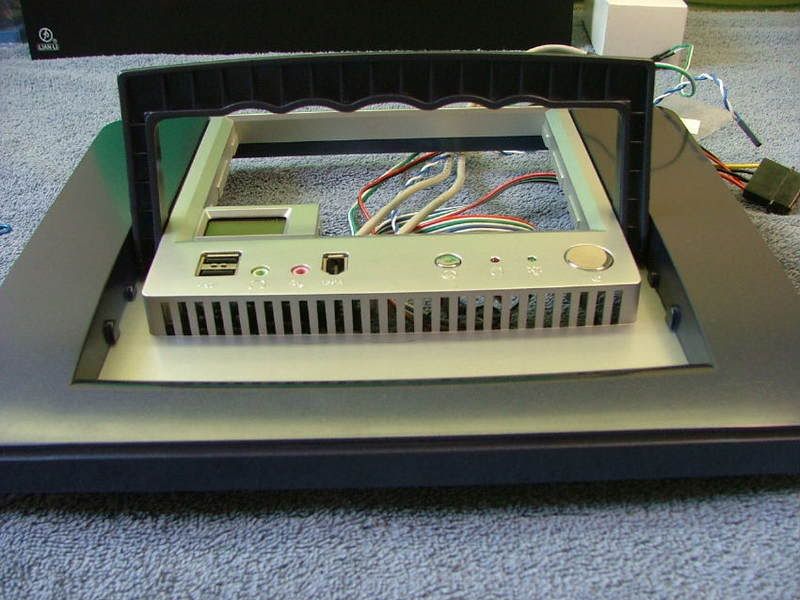
While it had been in the back of my mind to work on this, I hadnât planned on doing anything. Down the pike I had thought about removing some of the plastic in front and maybe âblendingâ in some sort of screen like material. Then had a little inspiration and decided to drill a âfew holesâ under the handle. That way if I fubared it would be hidden. Soâ¦â¦â¦â¦
1. Traced around the handle with a pencil to see what area was covered.
2. Eyeball laid out a hole pattern and âpunchedâ the centers
3. Then drill the holes. Which actually (to me anyway) didnât look half bad.
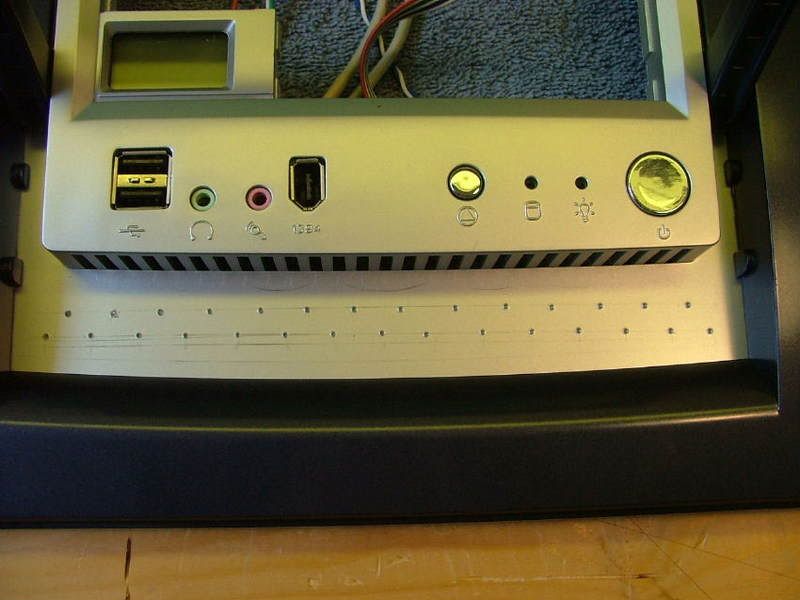 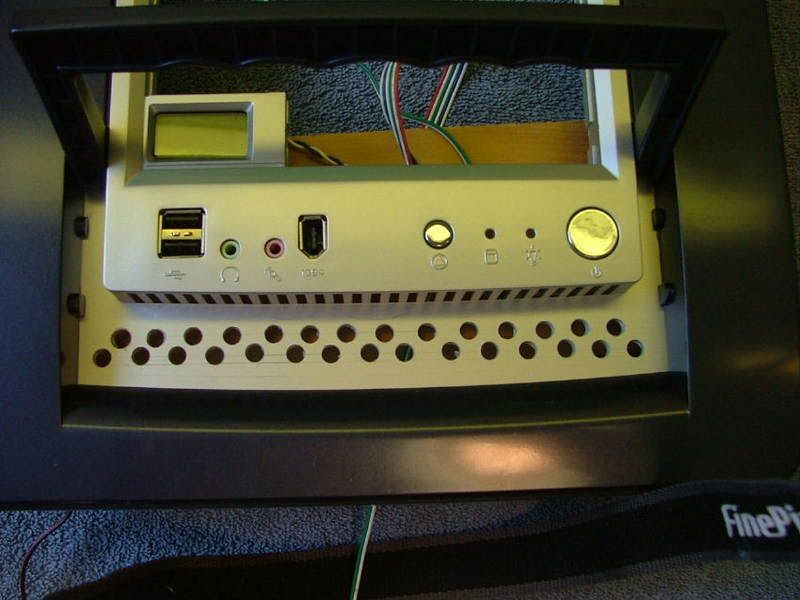
The handle doesnât lay flat against the face so there is room for air to get around it to the holes. This is the area I had thought about removing mentioned above. If I do this later may look at trying to remove the handle as I donât use it anyway.
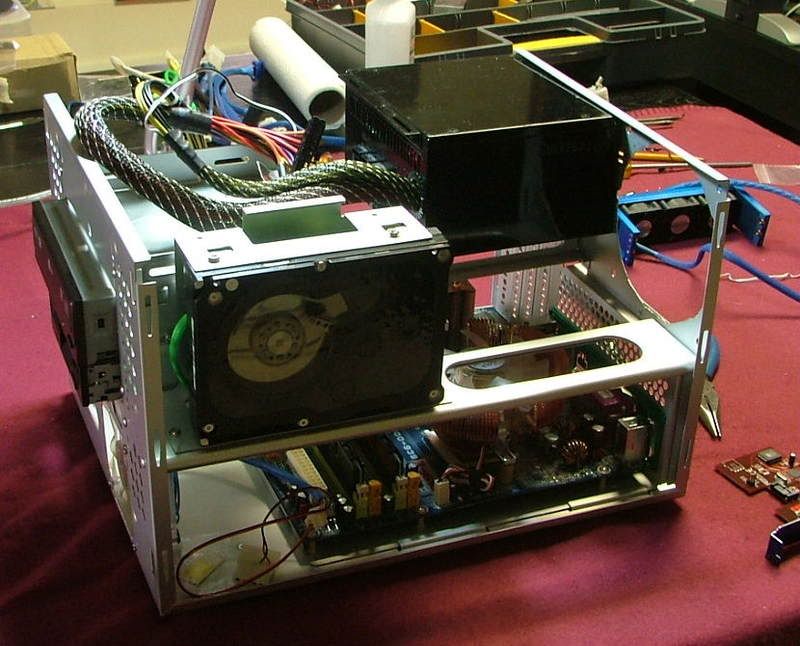
Just for S & Gs thought Iâd throw in a picture of the Raptor / cooler mounted. After that is a pic of what I hope will help tame some of the noise the front mounted coolerâs 3 fans will make. It has HIGH / MEDIUM / LOW settings (100% - 75% - 50%)
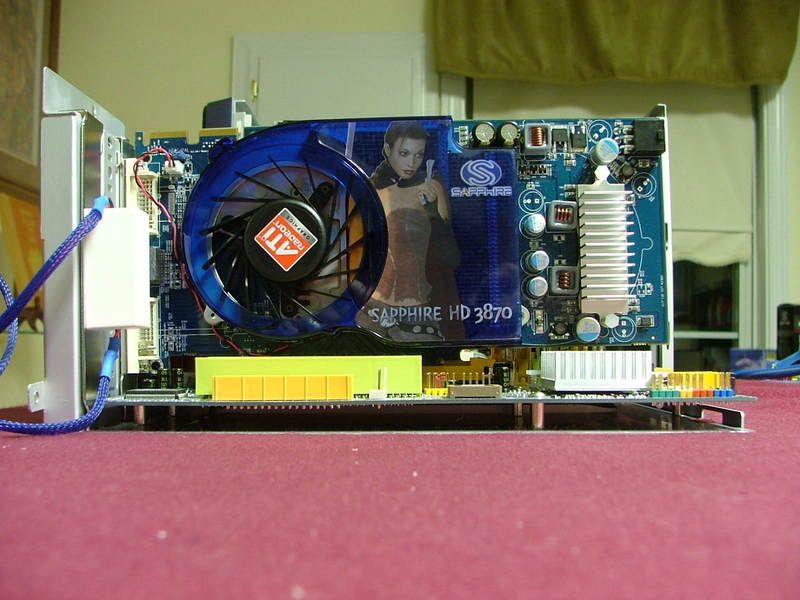
The Sapphire HD3870 came in while I was at work so I had something to play with when I got home. Note, while the link shows red - this one is BLUE!! One thing that kinda stood out is Sapphire doesnât spend much for packaging as compared to evga. Got the equivalent stuff just shoved into a smaller box.
No big deal to get it mounted to the moboâ¦â¦â¦ here is in place - side view, ¾ top view, and the only âcloseâ fit on the mobo, the southbridge cooler.
 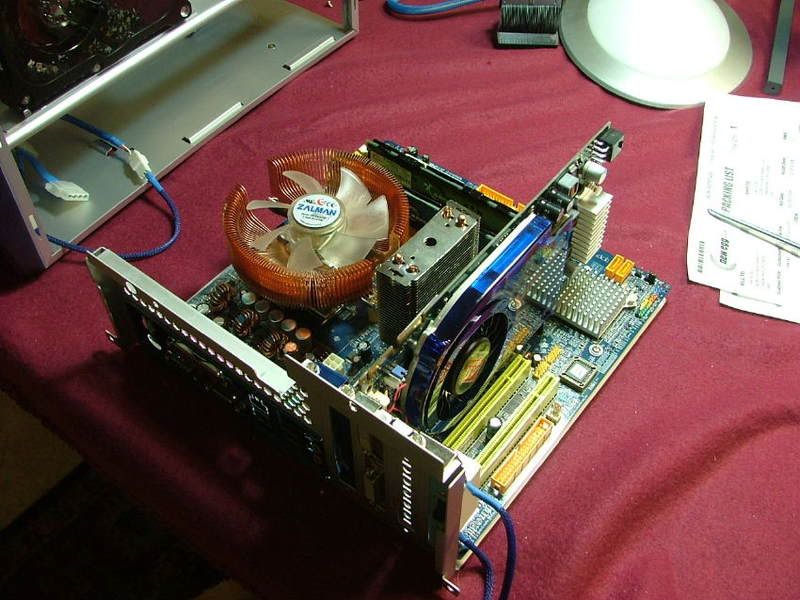 
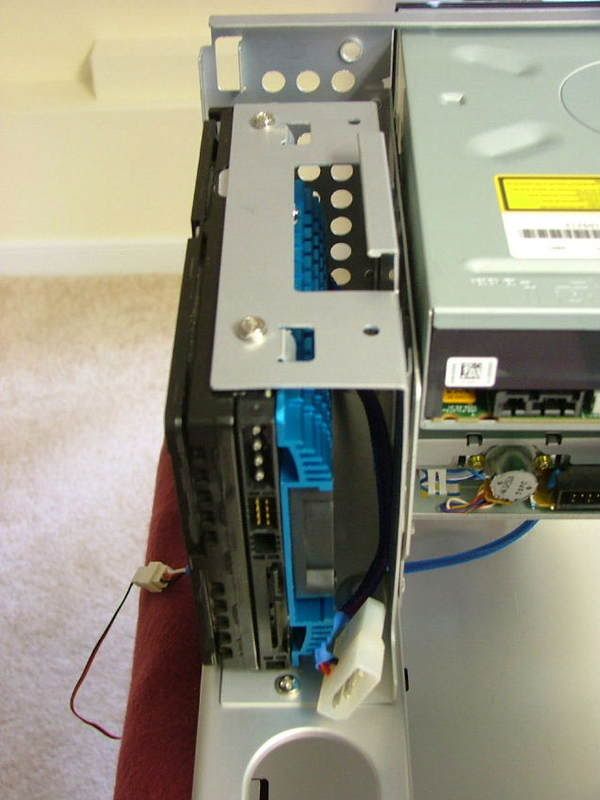
Then went to slide the mobo tray assembly into place and Size does matter!! In the first shot youâll see the limited amount of room from the top of the card to the chassis opening. As a matter of fact I scratched the plastic on the cooler when sliding the 3870 in. Then one has to be careful of the chassis flex as one could snag the fan grill on the PSU if not careful.
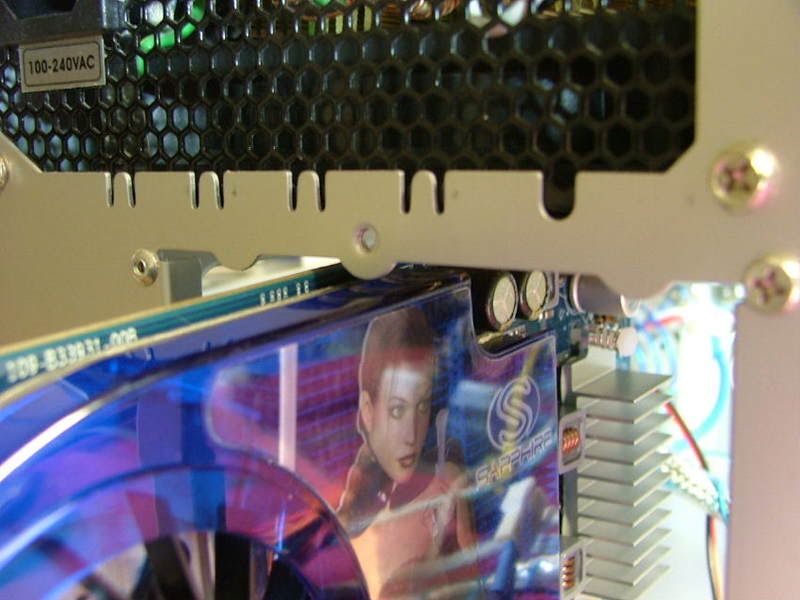 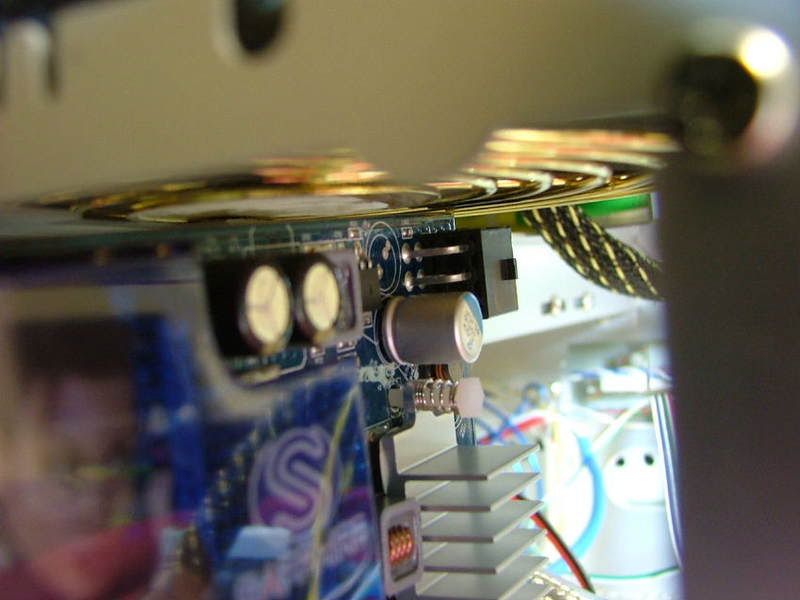 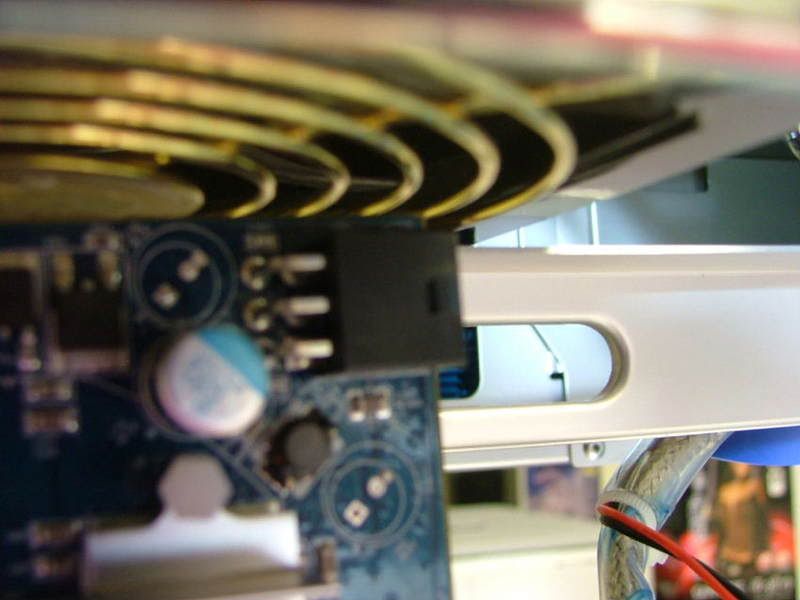
Once everything was in place and the tray thumbscrews doing their thing have about 3/32 â 1/8 inch between the top of the card and the PSU and support frame. Defiantly tight!!
As Iâve been working primarily on BHrDx v2.0 itâll be later before anymore happensâ¦â¦.
Last edited by jedihobbit on Thu, 18 Jun 2009 18:43:05; edited 1 time in total |
|
| Back to top |
|
 |
Crisis
Rated NC-17

Joined: 09 Feb 2007
Posts: 182
|
| Posted: Sat, 05 Apr 2008 00:38:42 Post Subject: |
|
|
Dang, that video card is sure in a tight spot  |
|
| Back to top |
|
|
Barracas
Rated NC-17

Joined: 06 May 2007
Posts: 164
Location: Dayton/Ohio
|
| Posted: Sat, 05 Apr 2008 01:16:26 Post Subject: |
|
|
But I bet it will stay cool if you can force air to it and allow the psu to exhaust it. Great builds buy the way.
_________________

Gigabyte 3dAurora
AMD-939- X2 4400 @2.5gig 10x250fsb
DFI LanParty UltraD
Corsair HX620 PSU
OCZ400-2048 eldcpe-k 2x1g DDR @ 454mhz 2.5-3-2-5 9/10 divuder
3x Seagate 320 SATA 1 external Seagate 320 and external maxtor 160
EVGA 7600GT KO
Ultra ChillTEC CPU cooler
WinXP PRO
Acer 22in AL2223w |
|
| Back to top |
|
|
SUSHRUKH
Rated NC-17
Joined: 28 Jan 2007
Posts: 137
|
| Posted: Sun, 06 Apr 2008 09:24:24 Post Subject: |
|
|
The HTPC is looking quite cool jedihobbit . Nice build & thanks for showing it to us.  |
|
| Back to top |
|
|
jedihobbit
Rated XXX
Joined: 22 Mar 2007
Posts: 238
Location: Central Virginia, USA
|
| Posted: Sun, 06 Apr 2008 15:17:34 Post Subject: |
|
|
| SUSHRUKH wrote: | | The HTPC is looking quite cool jedihobbit . Nice build & thanks for showing it to us. |
My pleasure & thanks as I can always use warm fuzzies!  BTW believe it or not it isn't a HTPC - I just like mATX systems! BTW believe it or not it isn't a HTPC - I just like mATX systems!  This is only one of three ( you've already found one other) systems currently being worked on. This is only one of three ( you've already found one other) systems currently being worked on.
So now on to the latest and greatest.......... errr latest anyway.
Worked on putting YsSMN together over the last couple of days as the wife recoups from her foot surgery. Using DreamCatcher as my template I figured it would be a quick and painless effort. So much for the painless part! Just making 2 â 3 hardware changes made a big difference in how the cables and wiring go! Also add to the time frame of having to respond to the wifeâs requests for help and you about double the required time for assembly. However for a mATX case it went fairly quickly.
The stuff different from DC consisted of:
1. HDD cooler
2. 3-speed I/O switch
3. âUnsleevedâ PSU cables
4. A last minute âLaser Light Modâ
5. An EL lighted FDD cable
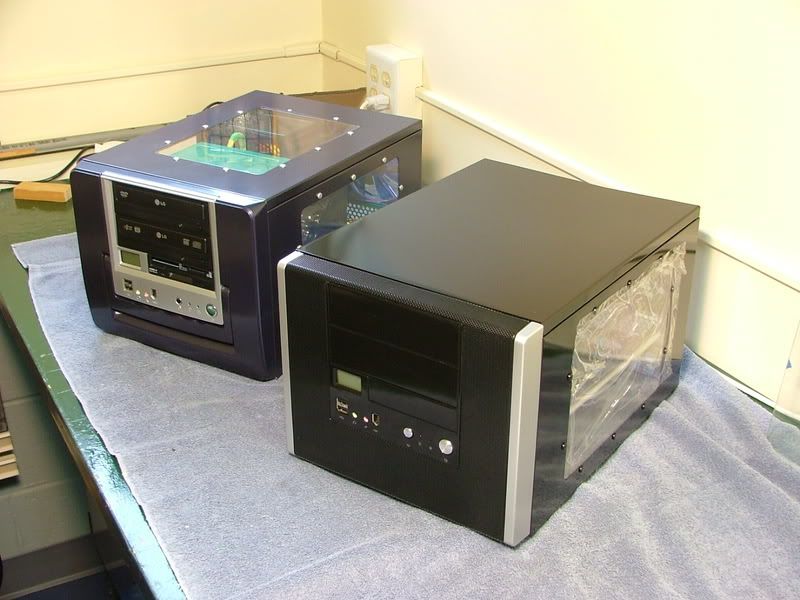
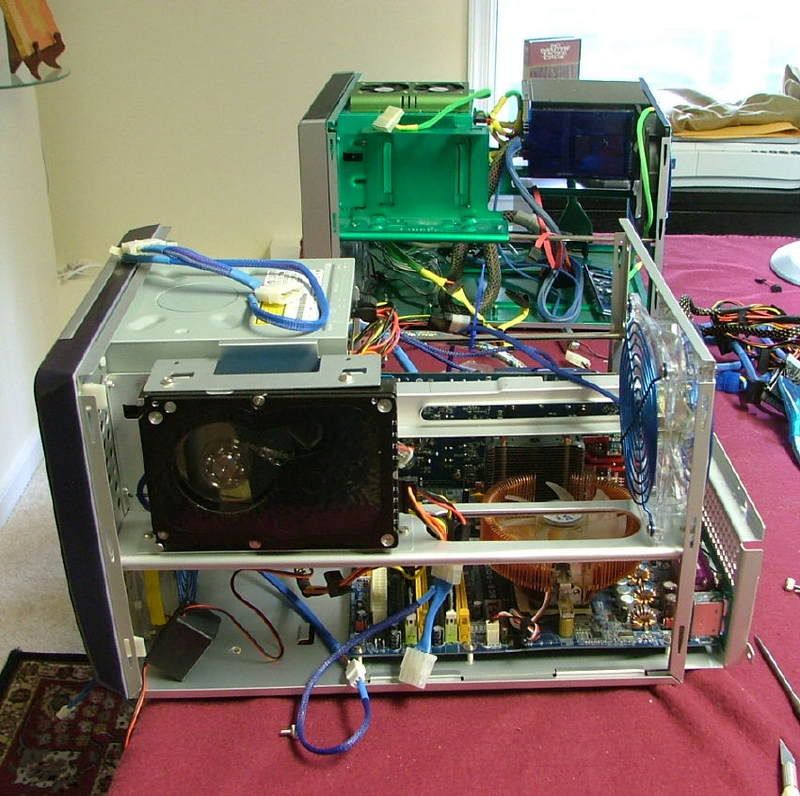
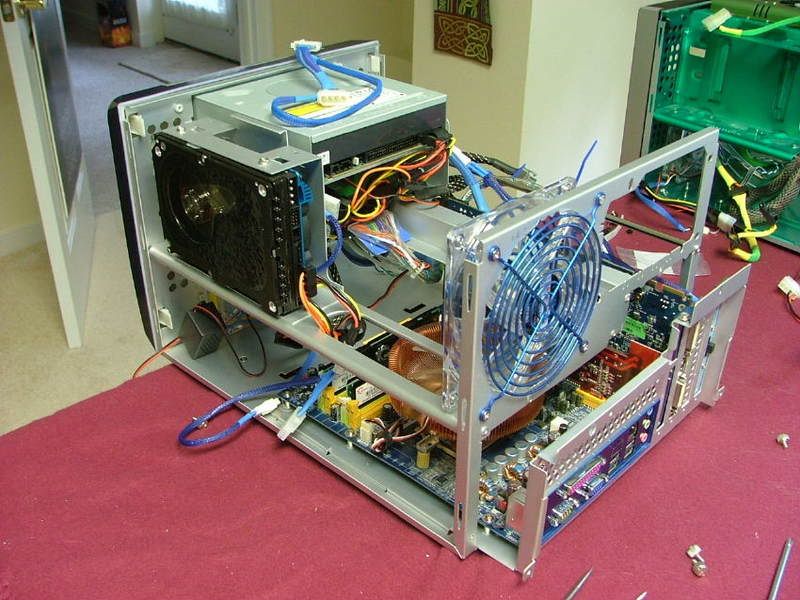
Here we have YsSMN (front) and DreamCatcher v2.0 (rear) together on the table with me trying to get âmentallyâ prepared to start stuffing things into the box!
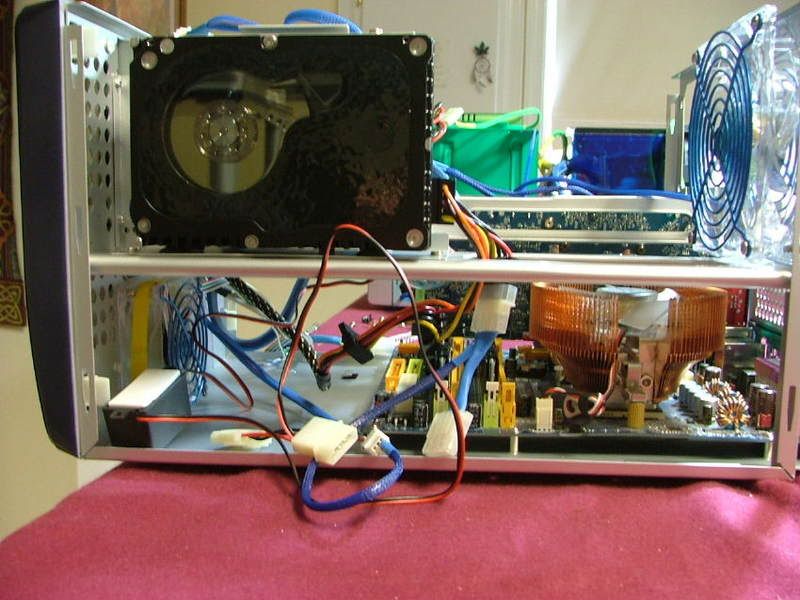
The following pictures show YsSMN from several angles as I started to figure out where I wanted stuff to run. Some of the power distribution ended up being different from DC because of the new items added. Also one of my âmajorâ disappointments came from the Liberty 500âs power cables. As I had not sent them to performance-pcs to be sleeved I had planned on âborrowingâ a couple already done. Unfortunately the PSU plugs are different between the 500W and the 620W, it seems the 620W just blanks off one of the 6 pens whereas the 500W only has 5 pinsâ¦..oh well.
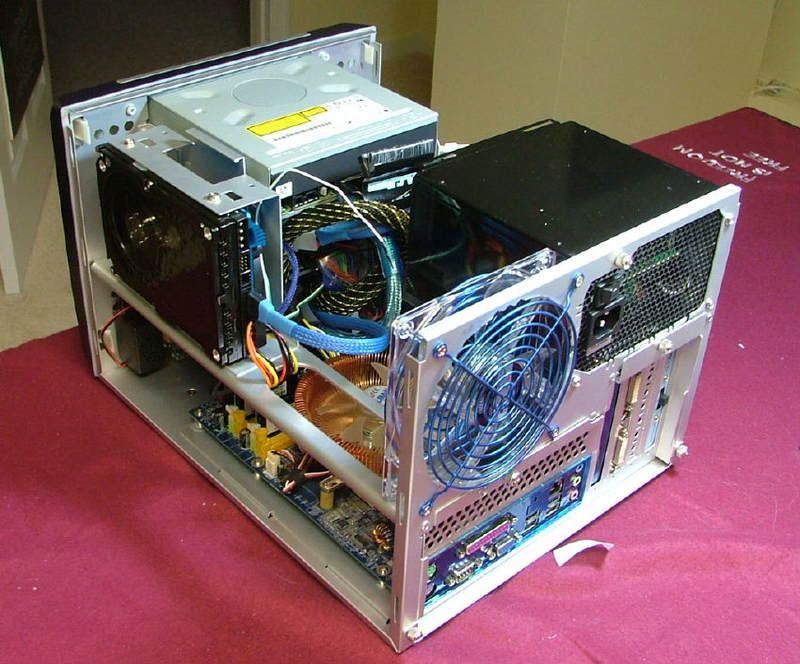
Canât quite remember when I got to this point, but here is everything in its place with me getting the nerve to power it up.
First off here is what it looked like from the rear with the PSU and everything in place.
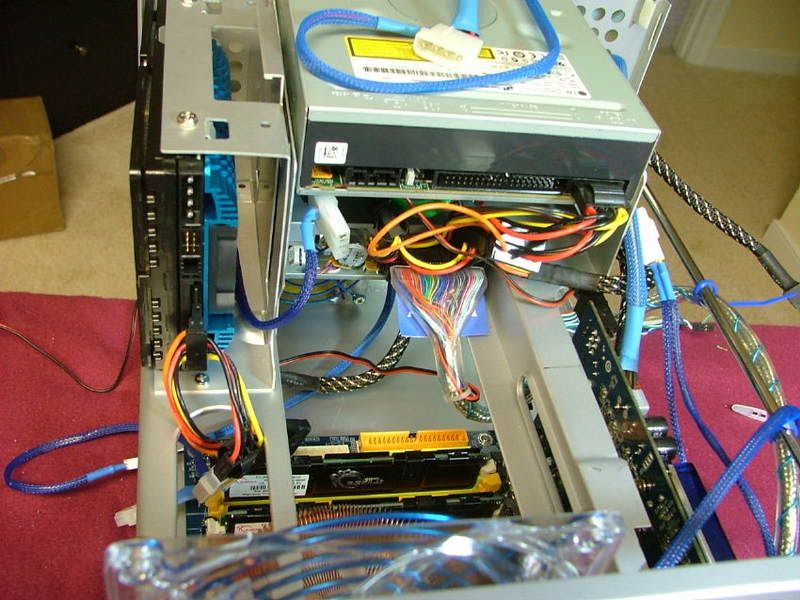
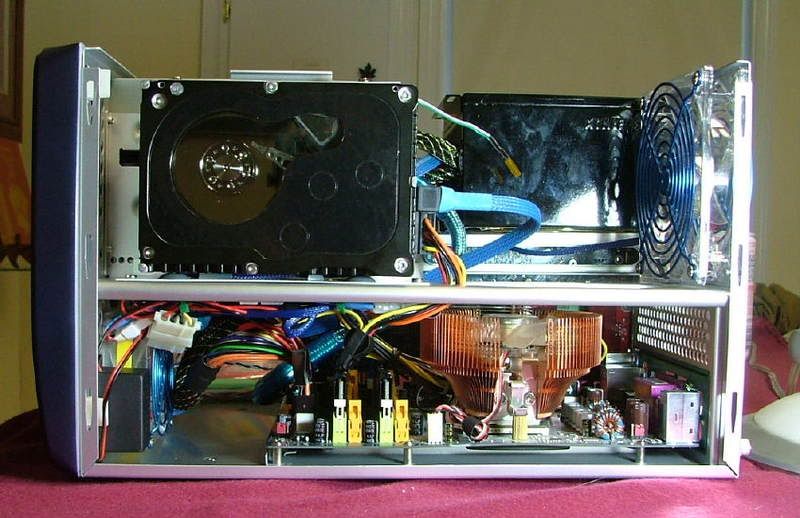
On this side youâll notice where I mounted the converter for the EL wire on the FDD cable (lower left) on the front next to the 80mm fan. The PSU cable comes through an opening in the cross brace and is wire tied with everything going to it under the brace in two places. If you look closely in the middle I still have one molex open. As it turns out this PSU cable is handling the front 80mm, the Raptorâs HDD, EL converter, temperature gage, and the Laser Light Mod.
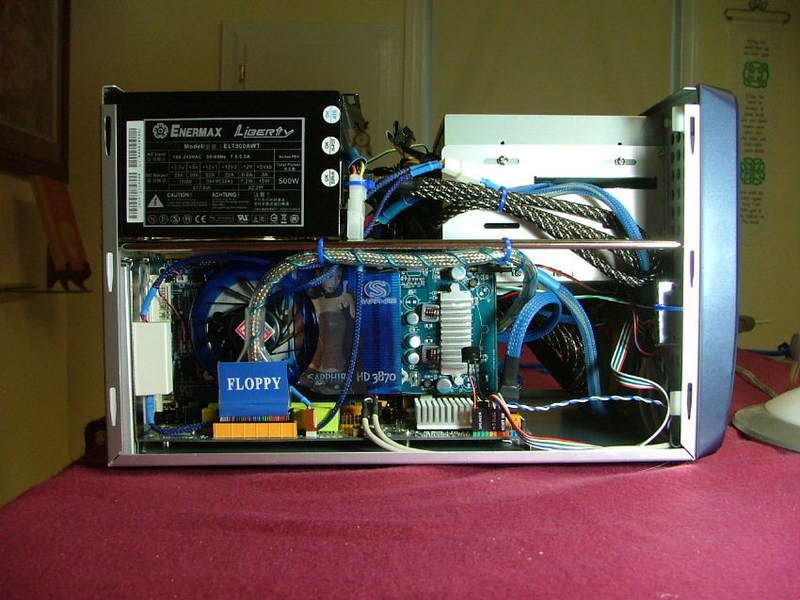
On the opposite side if you look on the right hand side (front) youâll see where I crudely attached the Laser Light Mod with a wire tie to a couple of cooling holes. Also you can see the GPU power cable (blue) and the second PSU power cable powers the Raptorâs cooler, the bay mounted cooler, the DVD-RW, and FDD. On the left hand side is the 3-speed controller (white block) with the top wire going to the 3-fan cooler and the bottom one plugging into the cable attached to the PSU.
When I powered the system up M$ decided to pull some BS. When I started it up it would âboot go to windows - boot go to windows - boot go to windowsâ.....you get the picture. Anyway out of desperation I reset the cmos jumper. Finally go it to go into windows when
"Need to initalize windows before....." okay no big deal, that is until it doesn't want to do it on line "can't find internet connection". So I had to do the telephone bit, well at least that part worked.
I had done some initial ocâing when this combo was still DreamCatcher, which settings were lost when I had to do the cmos thingy. Then it dawned on me....."I DIDN'T DOCUMENT MY OC SETTINGS FOR THE 170!!!!!!!!!!".  The worst part is I don't remember the mem settings, the rest I can fake. The worst part is I don't remember the mem settings, the rest I can fake.
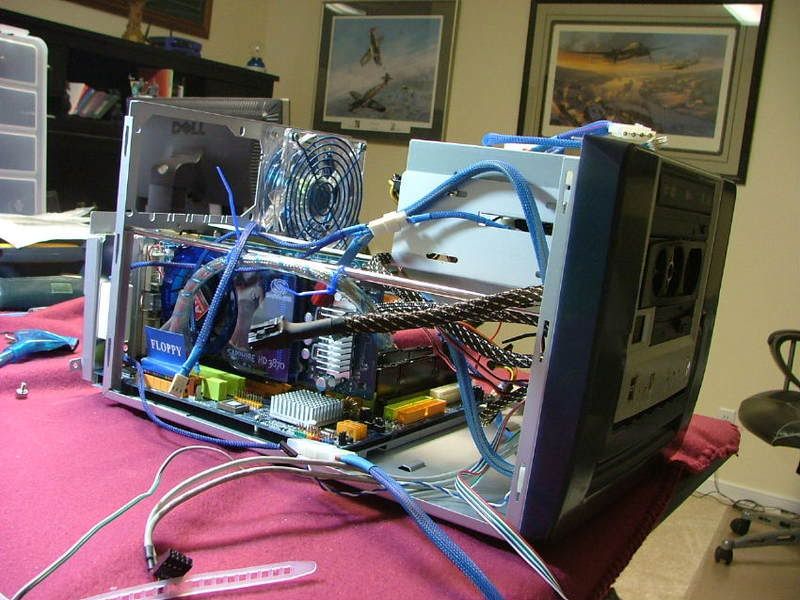
Before working on the OCâing part again, here it is running âin the darkââ¦â¦.left side, right side, and two ¾ left front views.
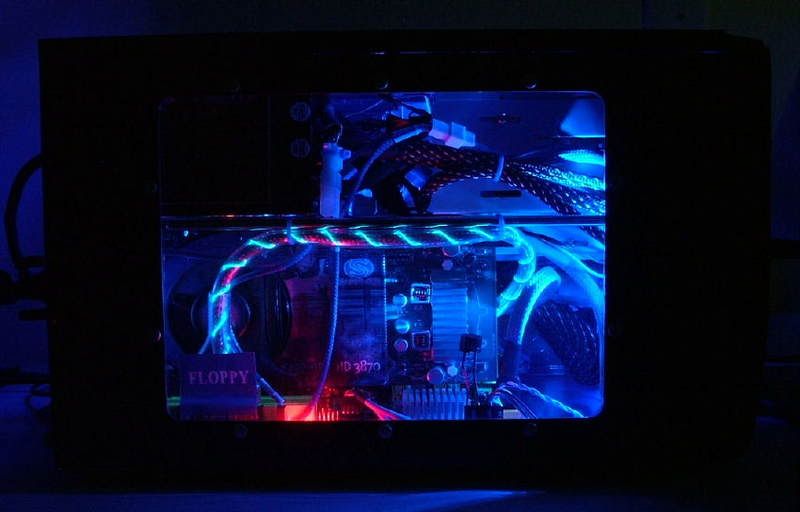 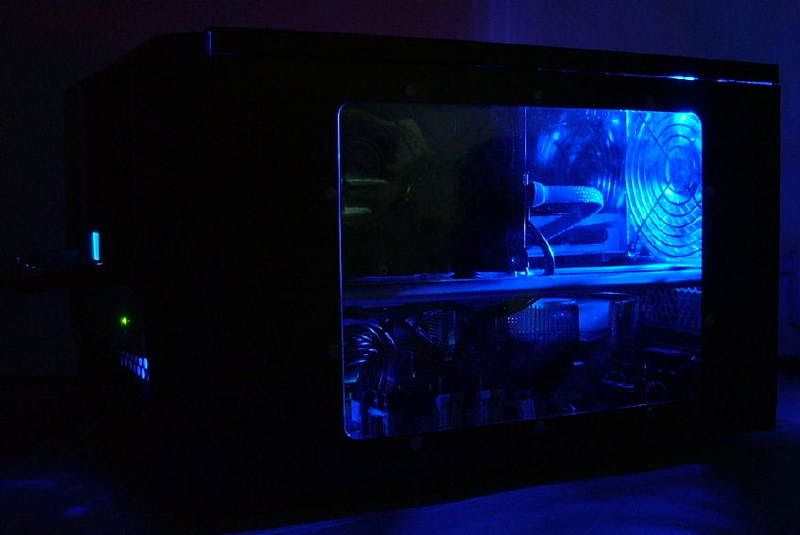 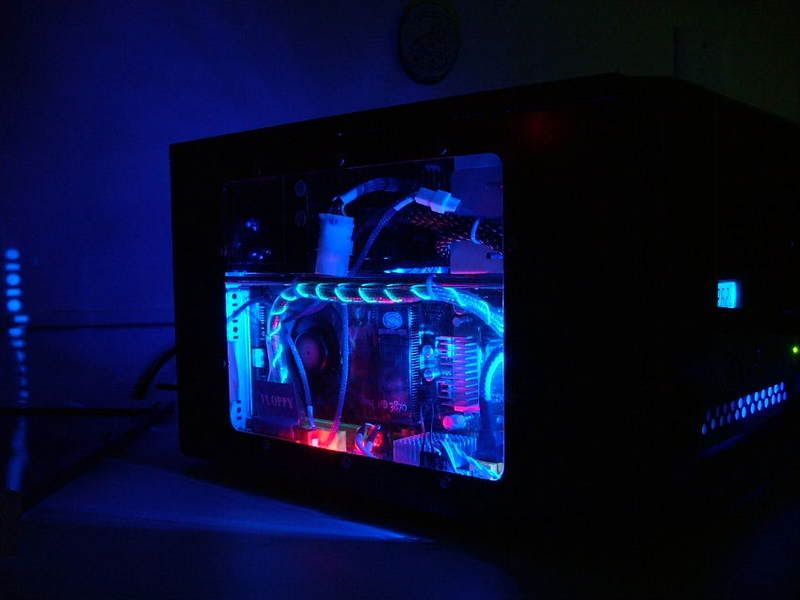 
Now on to the overclocking! |
|
| Back to top |
|
|
acruxksa
Doh!

Joined: 17 Oct 2003
Posts: 1051
Location: The Cradle of Storms
|
| Posted: Sun, 06 Apr 2008 19:48:07 Post Subject: |
|
|
Very clean for a mini-system.
_________________
 |
|
| Back to top |
|
|
SUSHRUKH
Rated NC-17
Joined: 28 Jan 2007
Posts: 137
|
| Posted: Mon, 07 Apr 2008 02:29:52 Post Subject: |
|
|
| jedihobbit wrote: |
My pleasure & thanks as I can always use warm fuzzies! BTW believe it or not it isn't a HTPC - I just like mATX systems! This is only one of three ( you've already found one other) systems currently being worked on. |
Sorry for that jedihobbit.Actually the case looked like an HTPC case to me.Anyways, build as many as you can & show us them. |
|
| Back to top |
|
|
jedihobbit
Rated XXX
Joined: 22 Mar 2007
Posts: 238
Location: Central Virginia, USA
|
| Posted: Mon, 07 Apr 2008 02:38:01 Post Subject: |
|
|
| SUSHRUKH wrote: | | Sorry for that jedihobbit.Actually the case looked like an HTPC case to me.Anyways, build as many as you can & show us them. |
An apology is not necessary as in this day and time the majority of mATX builds are HTPCs.  |
|
| Back to top |
|
|
mrweasel
I can haz cheezbrgr?

Joined: 13 Jun 2005
Posts: 1444
Location: Pasadena, MD
|
| Posted: Mon, 07 Apr 2008 13:55:12 Post Subject: |
|
|
Been following this over at [H]. nice work
_________________
 |
|
| Back to top |
|
|
Digerati
Rated NC-17

Joined: 07 Apr 2008
Posts: 111
|
| Posted: Mon, 07 Apr 2008 23:11:14 Post Subject: |
|
|
Holy crap, that is one intense project. Very neat system you built there - end result is pretty sweet-looking. Thanks for sharing! |
|
| Back to top |
|
|
|
|
You cannot post new topics in this forum
You cannot reply to topics in this forum
You cannot edit your posts in this forum
You cannot delete your posts in this forum
You cannot vote in polls in this forum
You cannot attach files in this forum
You cannot download files in this forum
|
|

