jedihobbit
Rated XXX

|
 Posted: Sun, 26 Oct 2008 00:02:40 Post Subject: Kermit the Folder Worklog Posted: Sun, 26 Oct 2008 00:02:40 Post Subject: Kermit the Folder Worklog |
 |
|
Been a bad summer for me as far as computers are concerned! I'm hoping this will get me off dead center and eventually get me around to finishing DreamCatcher v2.0. In the mean time..............
While not the most original name, Iâve always been a big Jim Henson fan and this unit is slated for pcperâs Folding Frogs!!
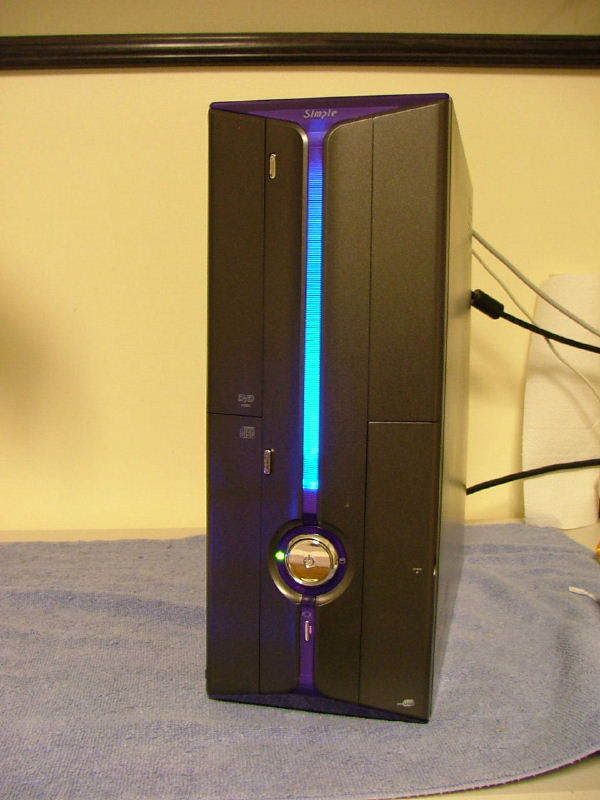
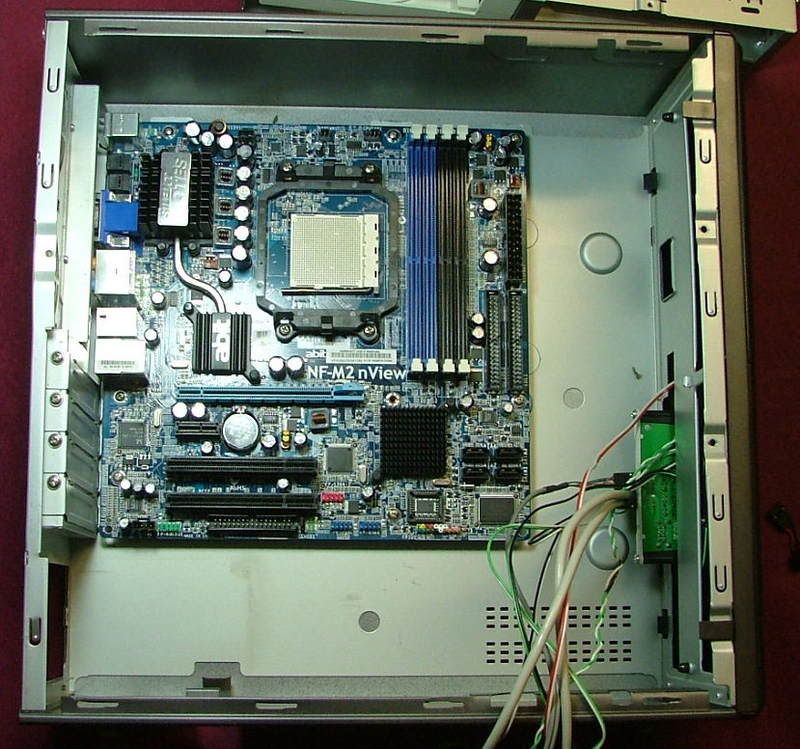
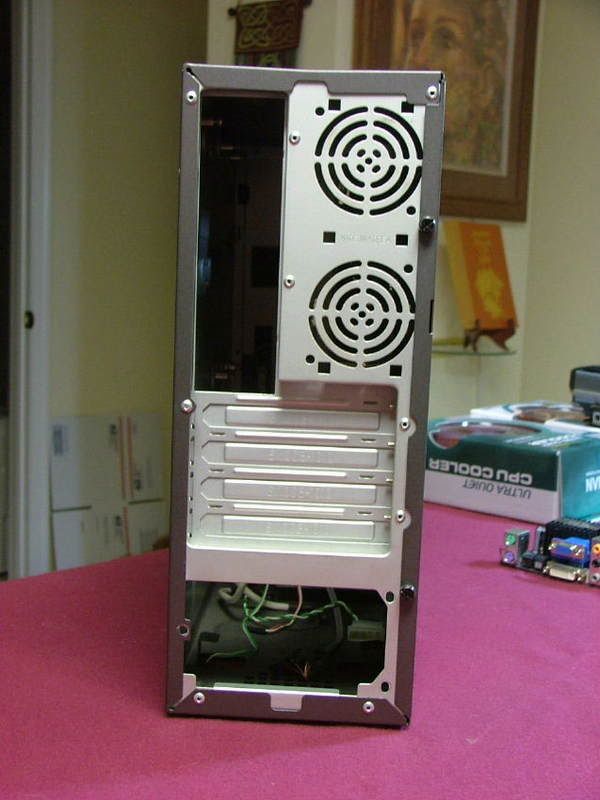
When I did the rebuild of a friendâs mATX system that was done for them years ago âre-casingâ the components was part of the deal. So I ended up with the original case. At that time it was called a SimpleMax 101 but like a lot of âuniqueâ computer components it no longer exists. Big Bruin did a nice review for the SimpleMax 101 a while back. It will explain the case structure a lot better than I can. If you review it prior to continuing youâll understand some of the issues I may (will!!) encounter.
Going fromâ¦â¦â¦..
to...............
So with the case as my primary stating point Iâve decided to attempt to create a âmicro-folder systemâ. Sadly (or typically) this will have to be a clandestine build hidden from the wife. Therefore I will attempt to use âwhat is in houseâ for components. This is what I have so far:
Case: SimpleMax 101
PSU: silenX iXtrema Micro 350W (replaces original 200W)
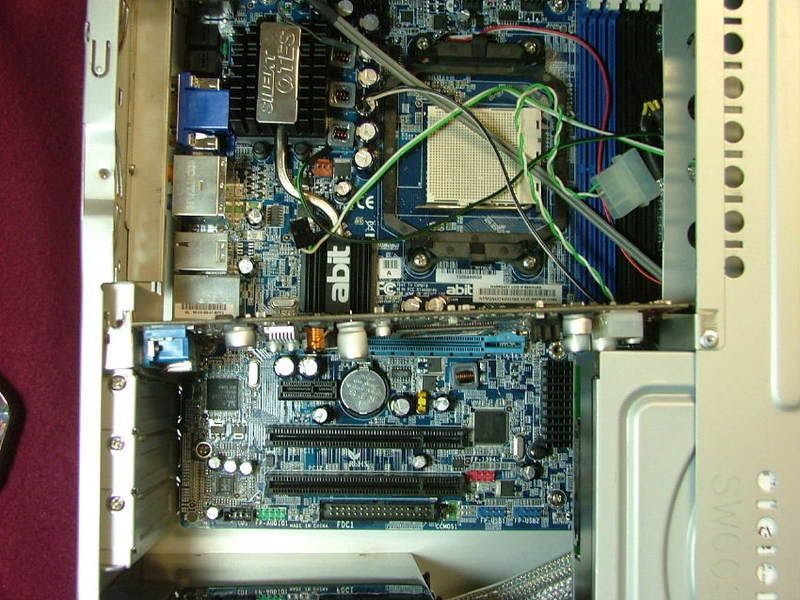
Mobo: Abit NF-AM2 nView
CPU: Opty 1210 (CCB6F 0741MPMW)
HSF: TBD Zalman
Memory: 2 x 1024 - Corsair CMX1024-6400C4 or OCZ OCZ2P800R22GK
GPU: On Board 6150 (for now!)
Audio: On Board
HDD: WD800JD 80GB SATA II
Optical: Sony NEC Optiarc DVD Burner Combo Drive
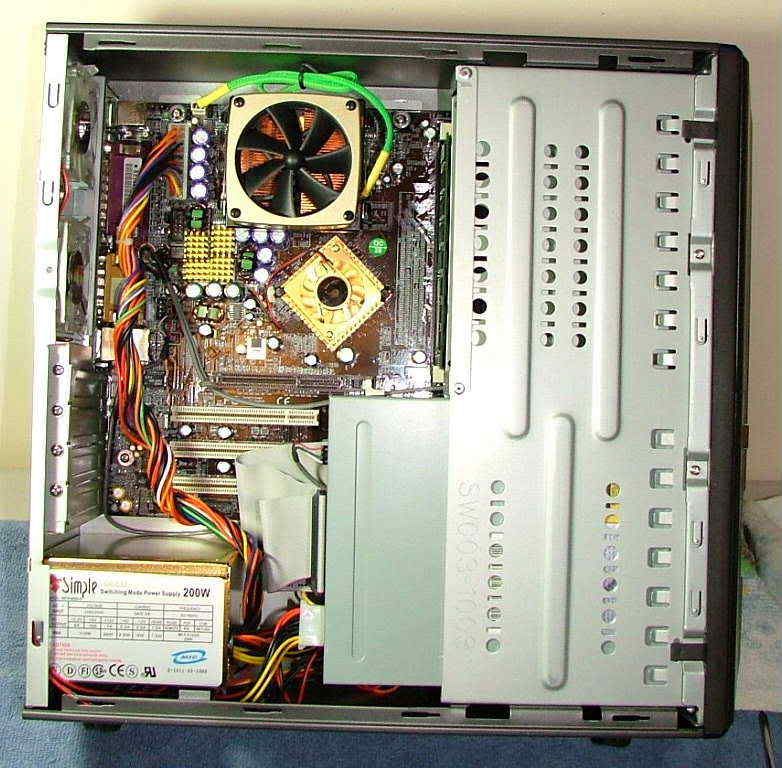
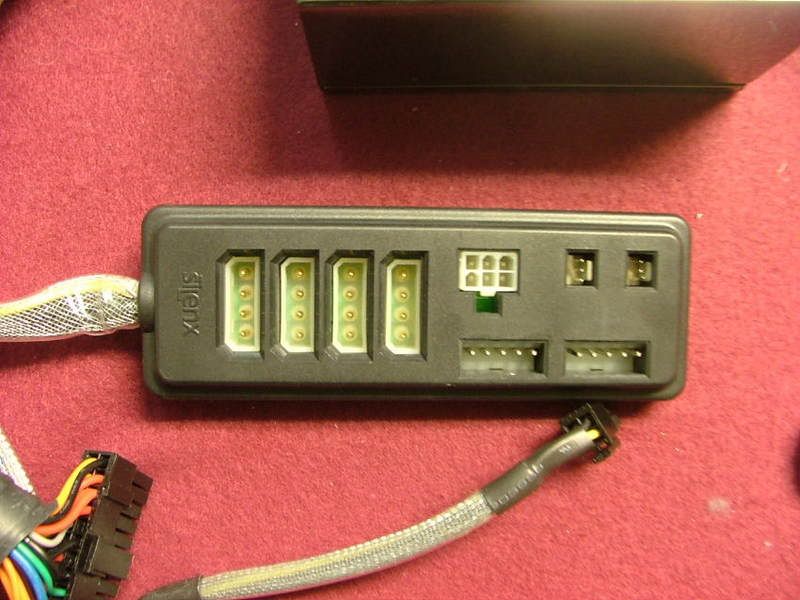
One of the first âupgradesâ I did when I got this wild hair this spring was to sneak a PSU upgrade passed this wife. The original 200W was fine when I was running the Chaintech 7NIF2 / 2500+ Barton but felt I needed more. Because of the space being so limited I jumped on the silenX iXtrema Micro 350W as it is âmodularâ. Unfortunately not that much space is saved as the cables plug into a secondary module making the PSU actually two components. Also kinda wonder how far down the food chain Iâll have to go for a GPU that wonât kill the system. Kinda wish I had sprang for the 400W as it has 20A vs. 18A for the +12V.
The PSU:
Initial when I started the project I had ordered the 300W version. This introduced me to one of my major complaints about silenXâ¦â¦their packaging sucks the big one!!! As it turns out it was a drop ship from the factory. They just do not âprotectâ the components all that well. As you will see later the unit itself has a very attractive (to me anyway) âMetallic Titaniumâ mirror finish. When the unit arrived it looked like some one had played soccer with it! It arrived with multiple scratches / scraps and with several noticeable dents in the case. Contacted their customer service department (why not it was dropped shipped) and got a pleasant surpriseâ¦â¦a responds in less than 48 hours. They allowed me to rma the unit and after thought sent them an additional 20 and updated to the 350W.
BTW please excuse the quality of some of the pics as the auto setting on the camera managed to occasionally become off position.
On arrival one ends up with just a plain white box with âMicro 350Wâ on the out side. Inside you have:
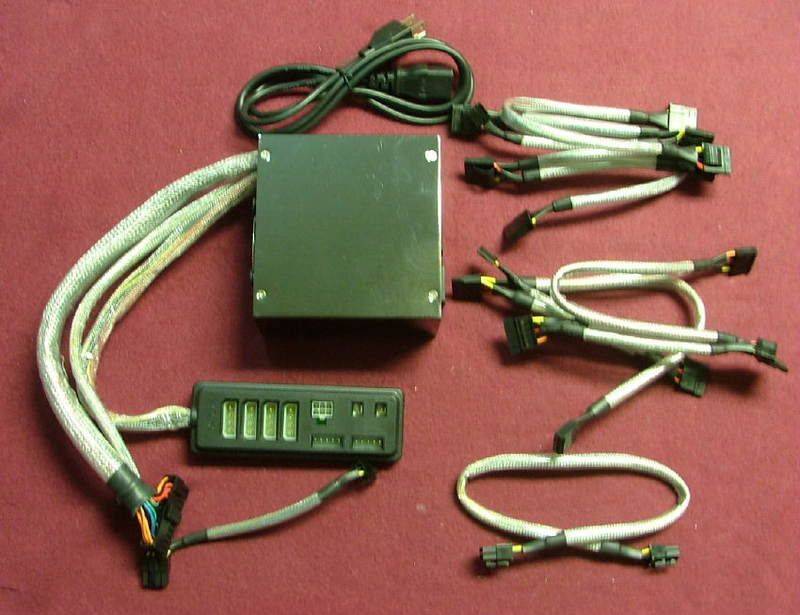
The assortment of cablesâ¦.. starting from the top:
1. 2 x Molex power cables (2 molex connectors with the usual FDD power connector each)
2. 2 x SATA power cables (2 connectors and the FDD thingy each)
3. 1 x 6-pin GPU power connector (someone dreaming?)
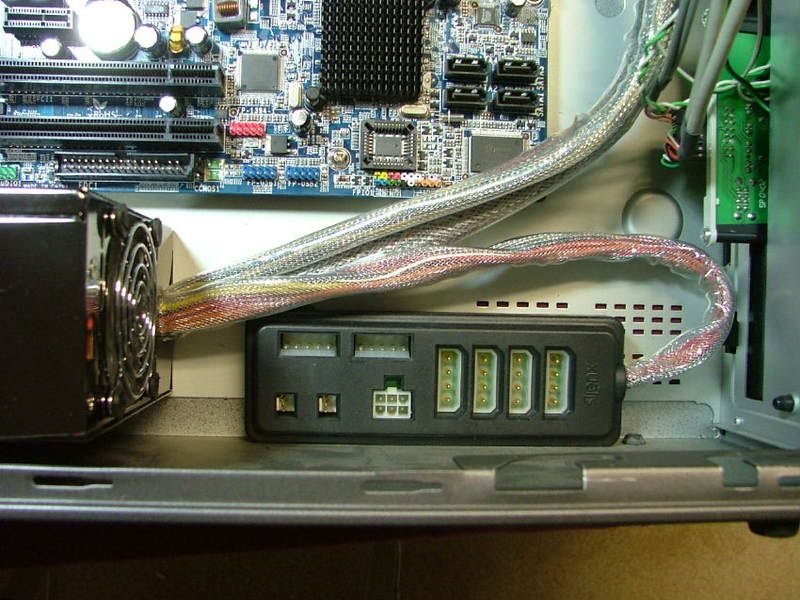
Besides having the plug-in module, the usual power connector, and an interesting 8-pin to 6-pin mobo connector. Here is a better view of the plug-in unit.
For cooling the unit comes with what appears to be two 60mm fans the factory rates at 14dB each. Also youâll notice the fans and grills use rubber âisolatorsâ to work on noise controlâ¦â¦. âFrontâ and ârearâ views.
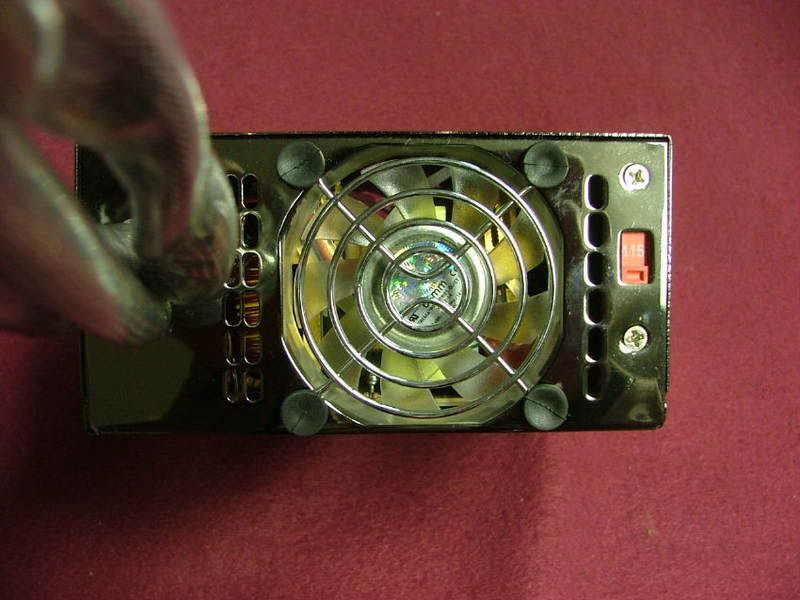 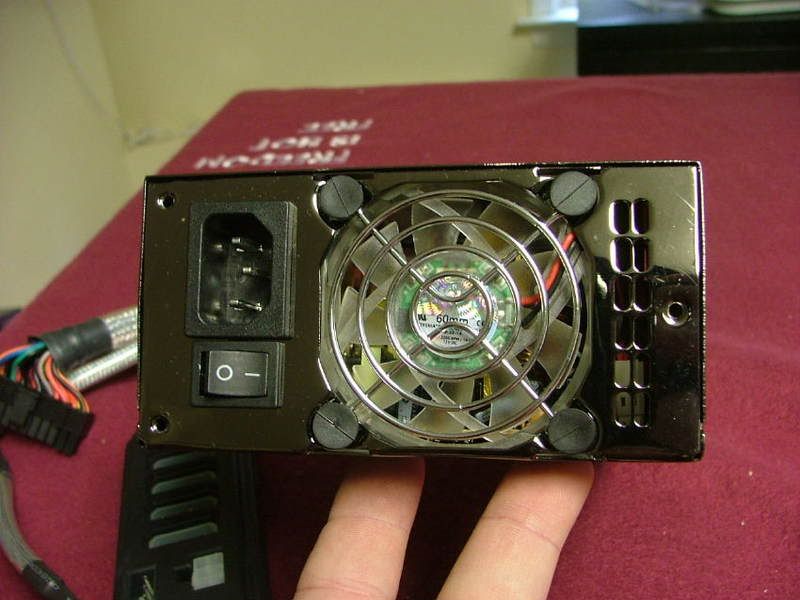
And did I mention the mirror-like finish??????
Choosing the HSF
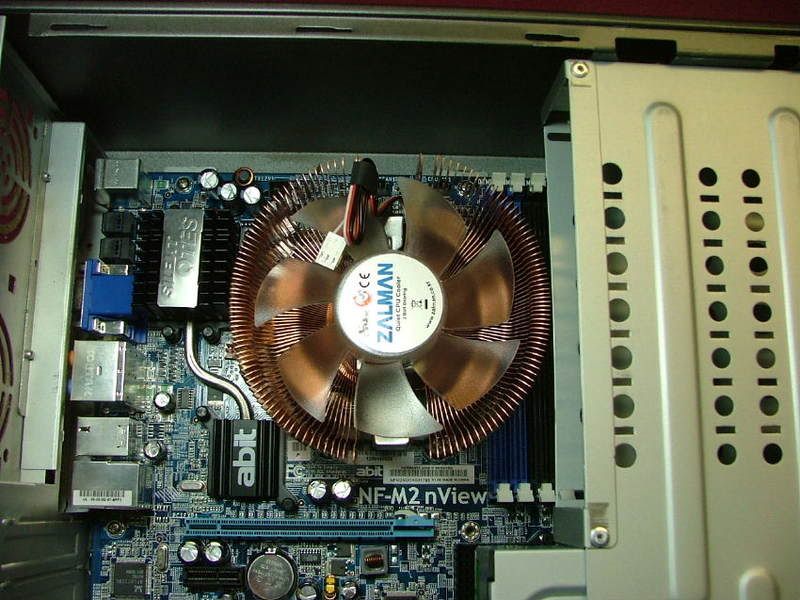
As the Opty is to be ocâed, needing a low profile, and being a Z fan boy Iâve narrowed my hsf choice down to three, the CNPS-7500 CU, 8000, or the 8700.
No sure how (eBay anyone?) but Iâve managed to have one of each on hand! From left to right..... 8000, 8700, and 7500.
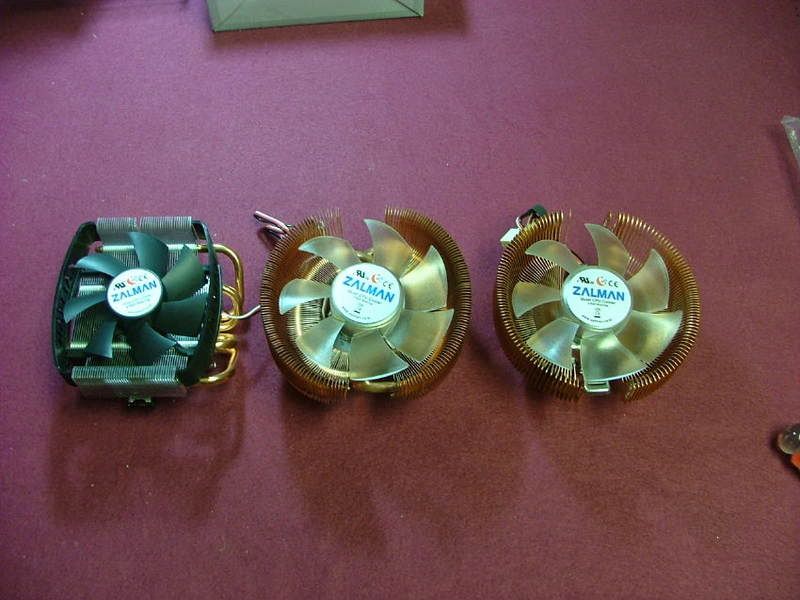
I guess as far as choice âthe bigger the betterâ would probably be the answer. However need to find which will fit in the case the best. Already know what the CNPS-8000 is capable of as I used when I test bedded another nView-1210 OCâing Thread. The major caveat however is this was done on an open tech station. Also had some experience with 8700 when I did a friendâs MicroFly build. That only leaves the behemoth of the 7500 to wonder about.
To get a feel for what dermal work may be necessary I mounted a spare dead nView in the case.
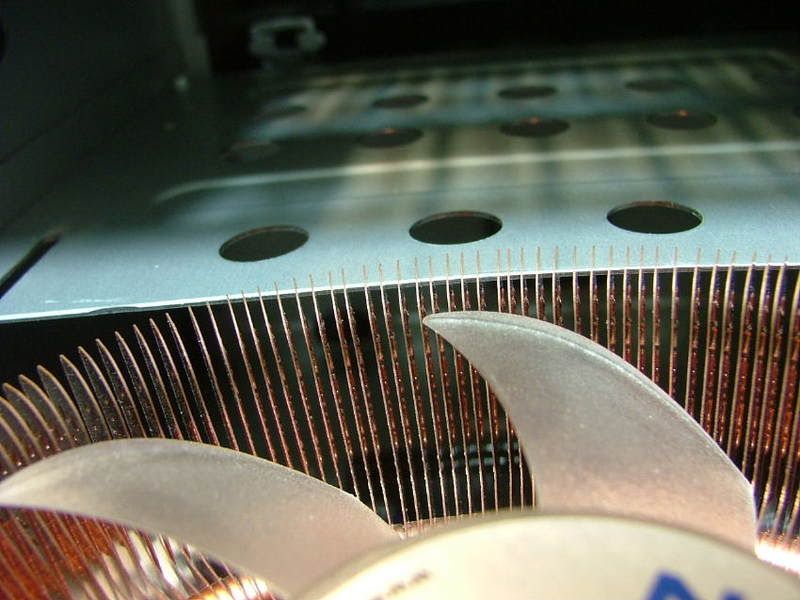
Then literally just started sitting the Zalmans in place to see what happens. What you see is the progression from the 8000 to the 7500 for fitting. One of the things that became apparent right from the start is the fact the optical drive needed to go into the secondary mount slot. The 8700 wasnât shown as it is very close to the 7500.
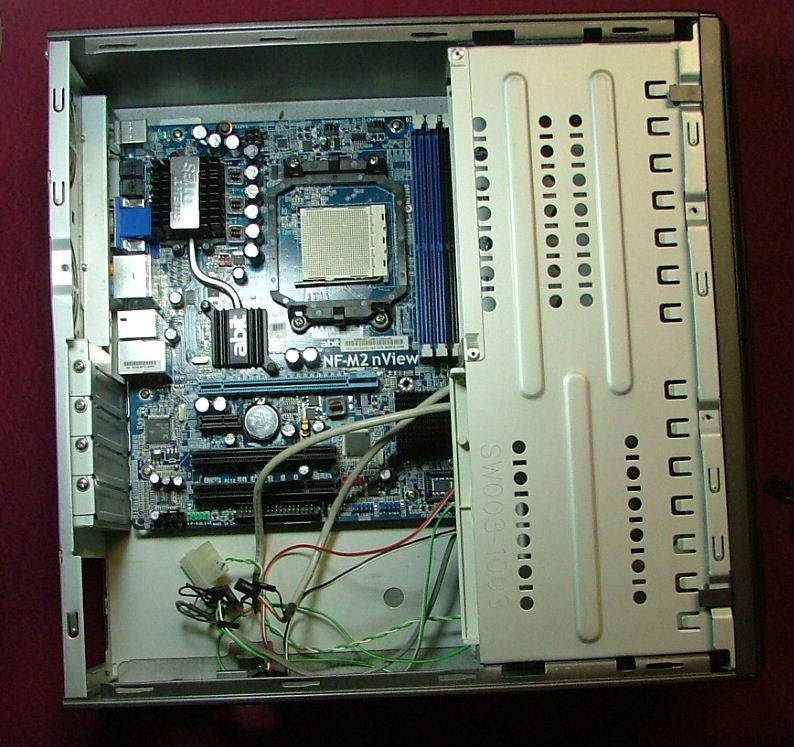 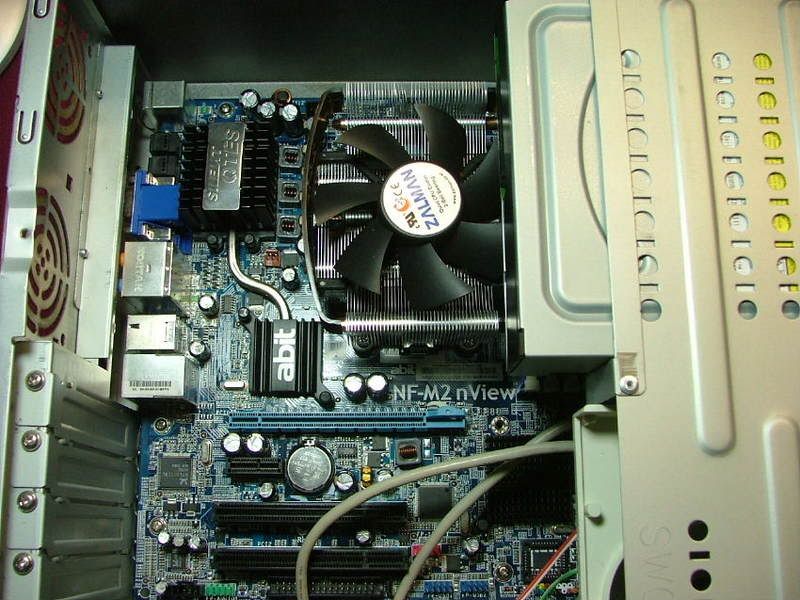 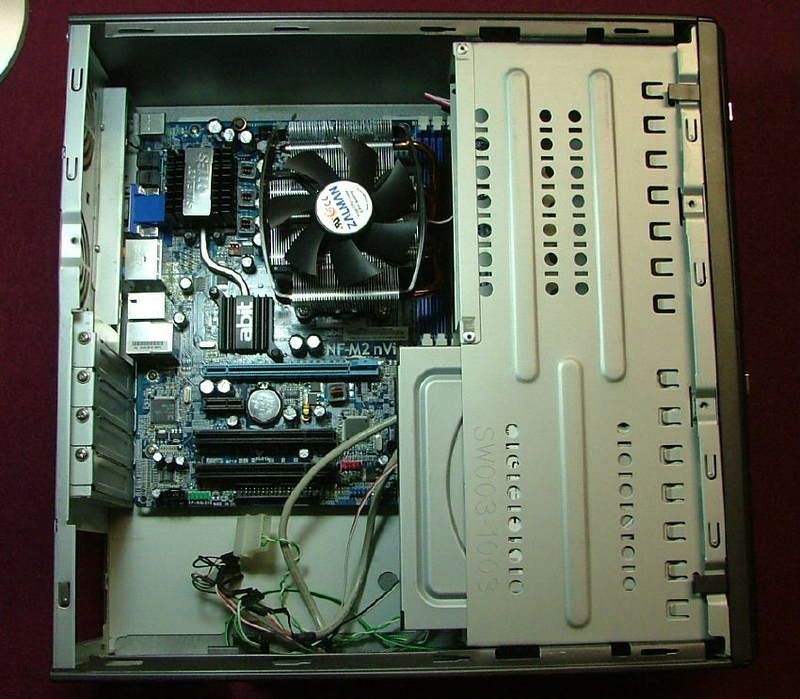
As you can see the 8000 would not require any âhammer, grind, or file to suitâ to work. However the 8700 and the 7500 needs a âclearanceâ cutout so 1. It doesnât touch the drive rack, and 2. The rack can be removed without removing the HSF. The drive rack needs to slide to rear about 1/8â to ¼â before it can be rotated up and out.
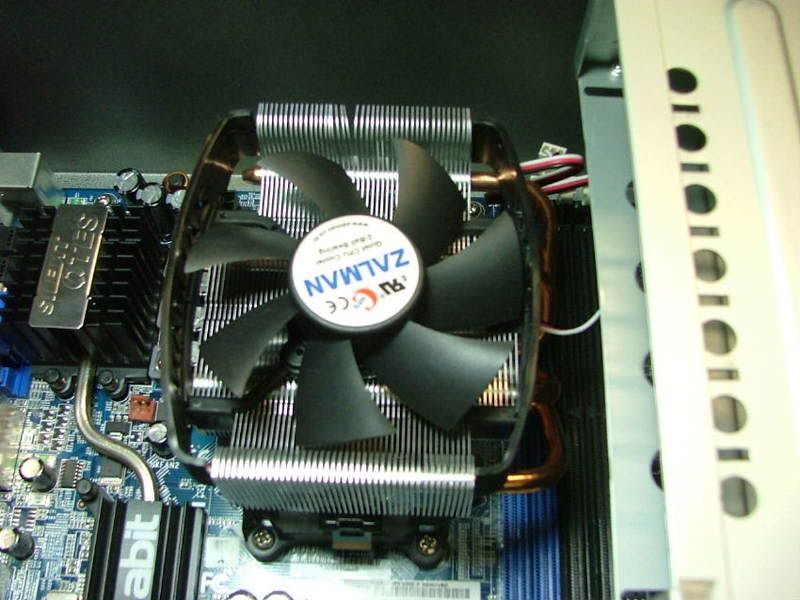  
Unless someone suggest otherwise this leads me to believe I should go the route of the CNPS-7500 and just hope the mobo can handle its 848g weight!!
Well back to the real stuff (honey dos) and look at how the PSU fit in later!!
Looking at PSU Fit
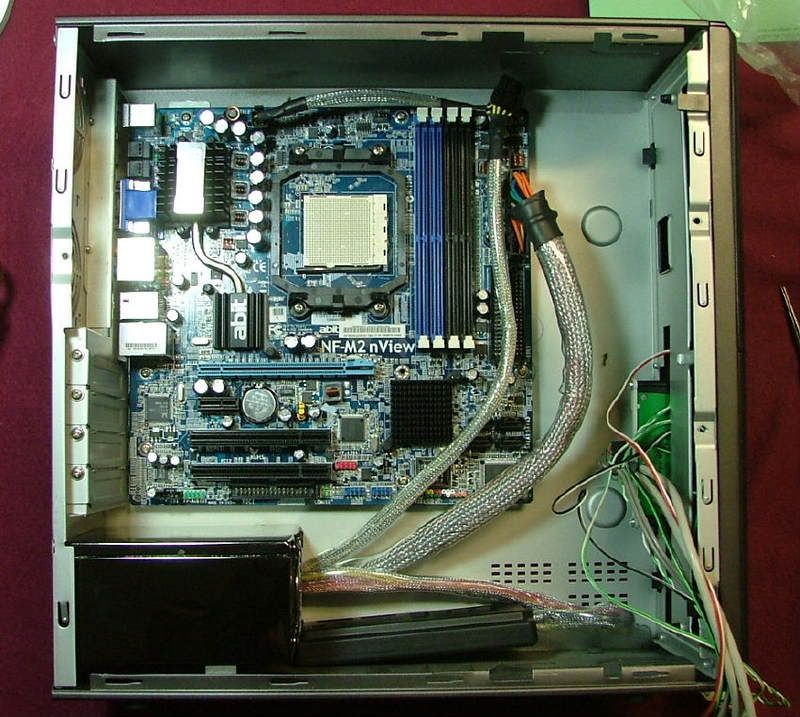
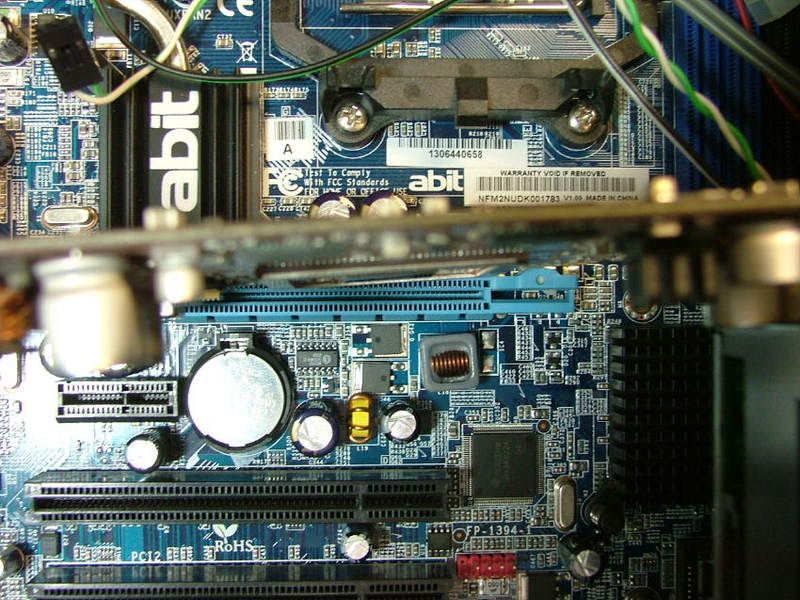
Well now on to see how the PSU physically works with the case. Mounted and one of the first things that showed up is the fact the mobo power cables âalmost didnât make itâ!! If the 6-pin cable hadnât of been a âtwo parterâ it would have not reached. Also to reach it has to go across the SATA ports on the board. This could prove to be interesting when I start setting up that cabling later. The primary cable makes it but could pose a problem as it wants to âtouchâ the power/rest header.
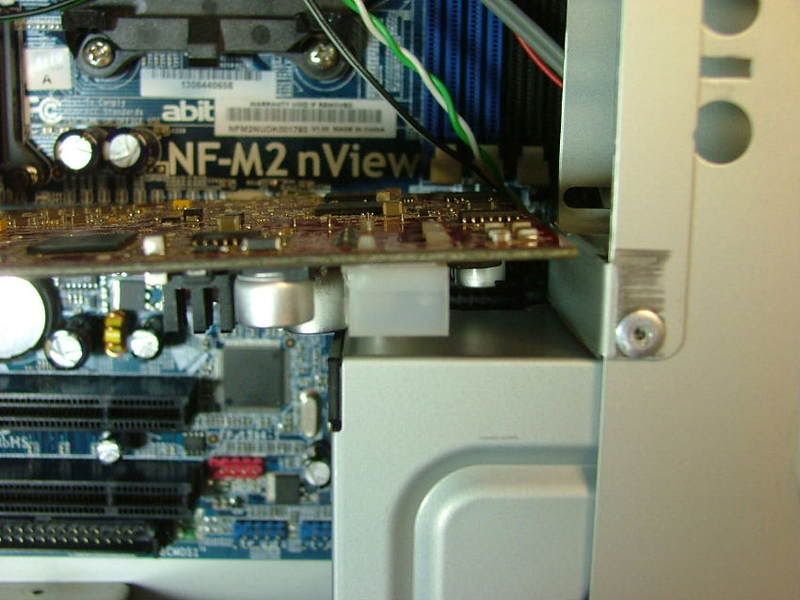
Initially I wanted to place the modular block on the bottom so as not to block any of the factory cooling holes.
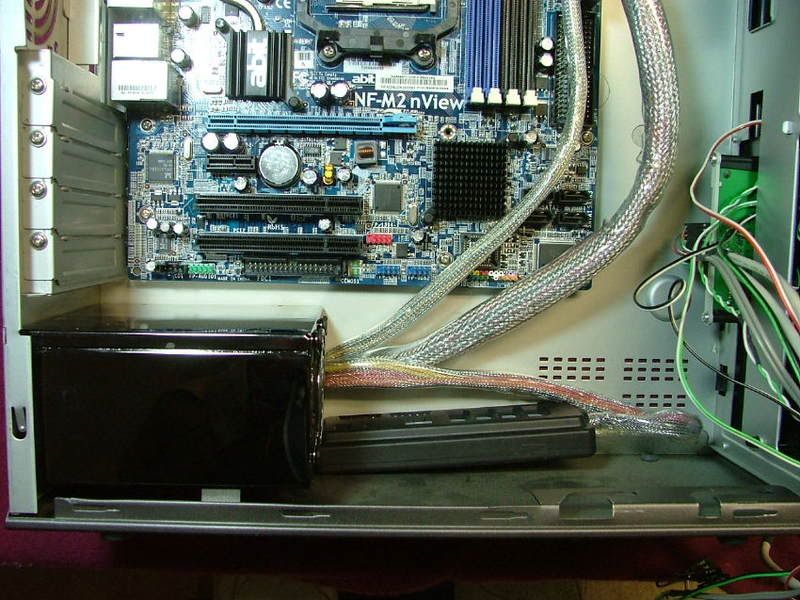
However this may not happen without some more moding! It seems when the drive cage is mounted and youâre trying to close it, it drags on the edge of the block.
Turns out it is a rivet head on the bottom of the cage. Guess I could drill it out and try for a smaller rivet or actually move where it is riveted. The other option is to place the block on the case side and block a few holes.
Know what is easiest, but just not sure I want to go that way!
Back to the honey dos and then a long look at some case cooling issuesâ¦â¦â¦â¦..
Case Cooling
The really big issue is how to improve case cooling as it pretty much sucks! Stock cooling originally was provided by two thin 60mm fans similar to what is used on some HDD coolers. Supposedly one in and one out, but as you can see by this rear view it would seem they would âfightâ each other!!
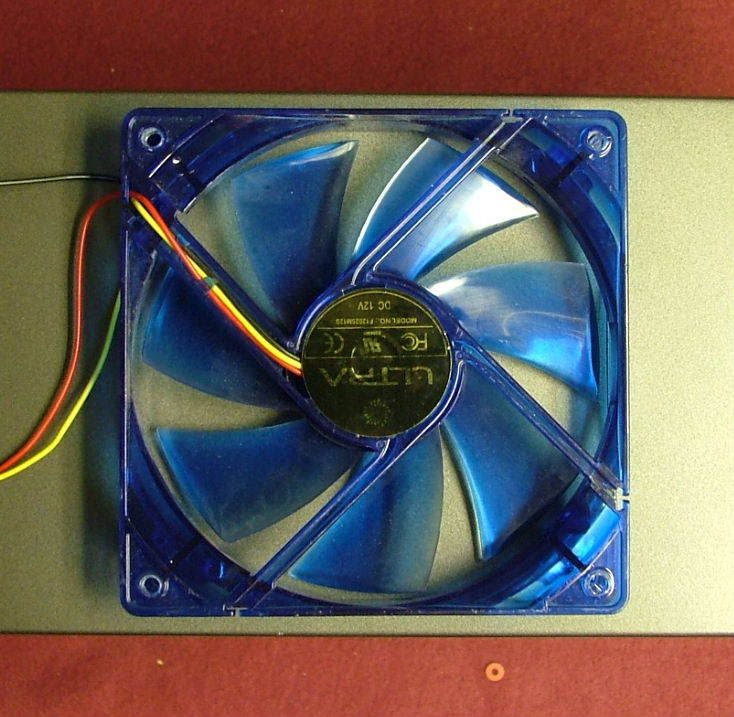
From the get go the stamped grills will go and Iâm replacing the stock fans with more noisy Evercool aluminum 60mm x 25mm Case Fans. Again these are from the parts box, therefore paid for, and no one said the folder would be silent!!
Also Iâm looking at how to add maybe a 120mm intake fan, but space is hard to find. In the first picture I taped off the available space for a fan. Everywhere else for all intents and purposes the internal components âtouchâ the side. Up top center is the approximate center of the hsf fan.
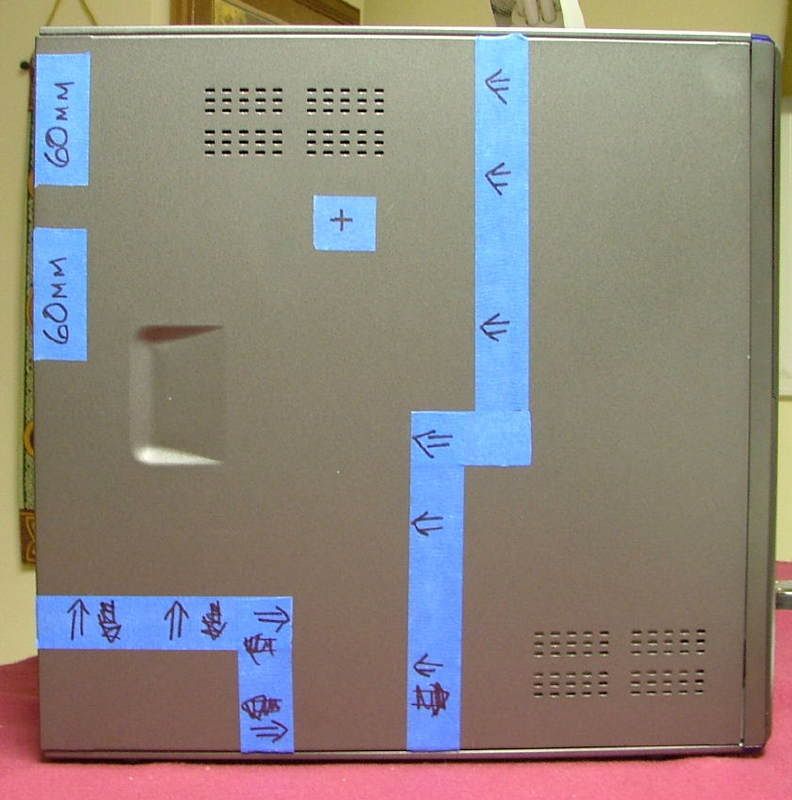
For a top fan I would be limited to a 92mm as the mobo offset will hit anything else and then it would need to be 20mm or less thick and have to be most likely offset. As the last pic shows a 120mm is as wide as the case!
Well this is all the pre-engineering Iâve had time for and any input would be greatly appreciated! If I have the time this week end I hope to may set the mobo/cpu/hsf/mem assemble up on my tech station and see what I can do on the OC side.
Oh, by the way if I were to add a low profile GPU it would run right above the point where the front tape does the dog legâ¦â¦â¦for what it is worth!
Speaking of GPU
On a side note Iâve been wondering if I could slip a decent folding GPU into the already cramped interior. Also the biggest concern initially was what the 350W psu could power and wondered if any of the 8400 â 8600s would work with the 18A and fold at a reasonable rate..
As it turns out there is a more important considerationâ¦â¦â¦â¦.size!
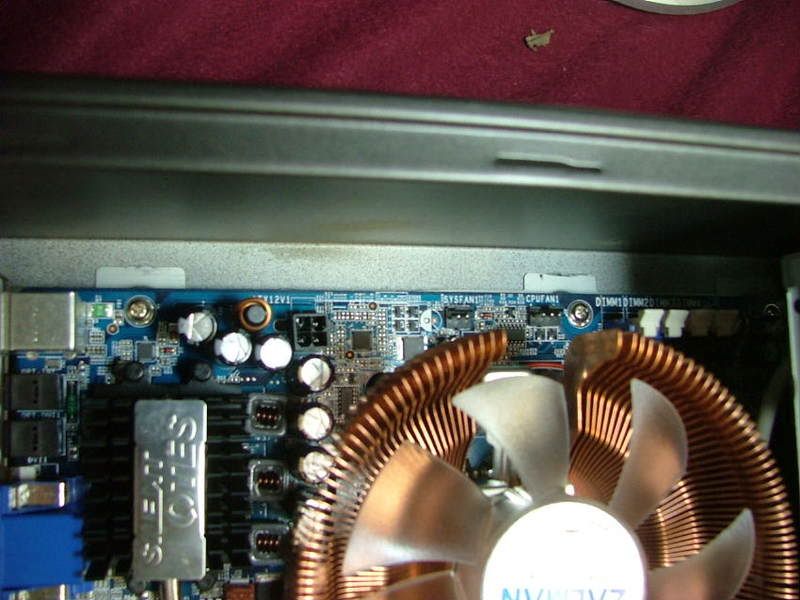
Tossed in an old 9700 without its hsf to see if height would be an issue. Nope, looks like length is it!! By moving the optical drive to the lower bay I pretty much doomed having a stand alone GPU. The caps and power connector on the old 9700 smack right into the drive. Also the card itself almost touches the frame.
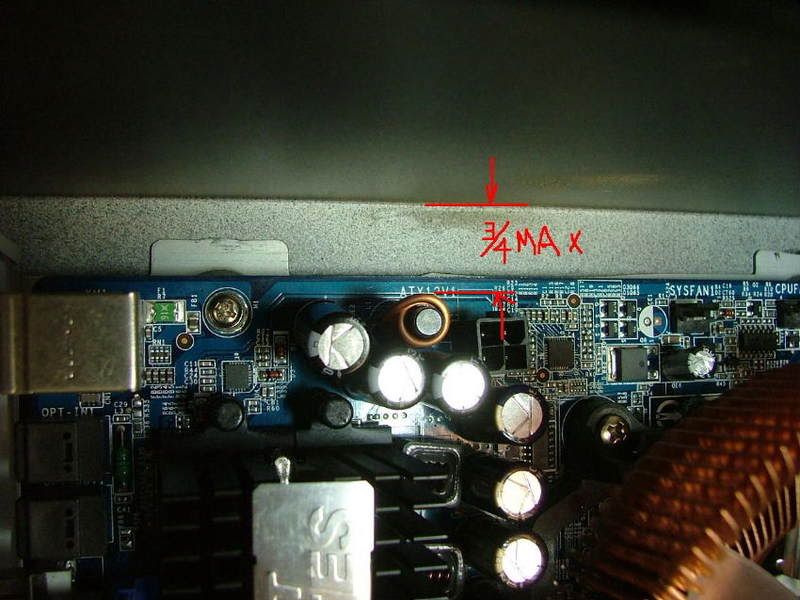
Height from the top of the gpu connector to the bottom of the drive is a tight 2 3/8â so even a âlow profileâ most likely wouldnât work. Just curious would a low profile card fold worth a snit???? Maybe like the
Galaxy 8500GT? âCourse it depends where that top cap falls as it is roughly 3 3/16â tall!
Not sure of the height of this one but it looks like the Chaintech 8600GTâs layout might let it squeeze in.
Then again I could possibly âsneakâ the $27 with MIR for the 8500GT passed the wife as opposed to the $68ish after MIR for the 8600GT.
Oh well this part is potentially âfutureâ anyway, but should be part of the âengineeringâ. Again any comments are welcome.
_________________
As of 02/01/11
DreamCatcher AM3 >> (Down Again) >> SG01 Evo, MSI 785GM-E65, PII X4 955(AQ H2O Cooled), XFX GTX285(EK H2O Cooled), Seagate 7200.10 ST380815AS 80GB, 2 x G.S. F3-12800CL7D-2GBPI, MODU82+ EMD525AWT, XP Home SP2
KestrelFlight >> (Under Construction) >> Zalman Z7+, MSI NF980-G65, PII X4 1055T, 2 x Galaxy 580GTXs, Zalman 32GB SSD, WD V'Raptor 300GB, 2 x WD 1 TB Blacks, G.S. F3-16000CL9D-4GBTD, Zalman ZM1000-HP Plus , Win7
Oz1a v2.0 >> XFX MDA72P7509 750a, PI X2 8870BE, 2 x XFX GTS250, WD 250GB, F2-8500CL5D-2GBPK, Tt TR2 600W, XP Pro SP3 |
|