|
 Posted: May 22, 2003 Posted: May 22, 2003
Author: Jason Kohrs
Manufacturer: Maxtop
Source: Maxtop
 Installation: Installation:
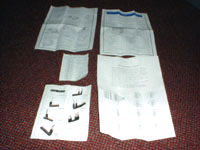
Before you begin the actual installtion, you may want to take a lok at the documentation provided with the case. As pictured in the image on the right, you receive more instructions, wiring diagrams, and other information than I have received with any case. In general, the average person should be able to figure out most of this stuff on their own, but the wiring diagrams are particularly helpful for connecting the front media connections, and so on.
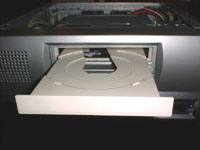 As mentioned previously, the case comes with a special 5.25” drive bay cover that should work to “stealth” any optical drive. The door is on a light hinge, so that when the tray of the drive opens, it will push the door open and allow the tray to come out like normal. The button integrated into the drive bay cover should also allow universal control of the eject button on any optical drive. This feature is a real plus in my book... You won’t have to paint your drive to match or do the more traditional “stealth” job that may require alot of work to align the blank drive bay just so on the front of your drive. As mentioned previously, the case comes with a special 5.25” drive bay cover that should work to “stealth” any optical drive. The door is on a light hinge, so that when the tray of the drive opens, it will push the door open and allow the tray to come out like normal. The button integrated into the drive bay cover should also allow universal control of the eject button on any optical drive. This feature is a real plus in my book... You won’t have to paint your drive to match or do the more traditional “stealth” job that may require alot of work to align the blank drive bay just so on the front of your drive.
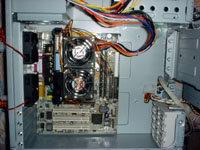 The image on the right shows a typical (but older) Micro-ATX motherboard, the MSI 6191, inside the CSX-001 case. There is plenty of room around the motherboard to make the necessary connections, and everything lines up perfectly. Upon installation I realized that although this board fit, that boards where the cpu was located too far to the right would not fit once the removable drive rack was lowered back into position. The next board is even closer to interfering, but the low profile heatsink helps to avoid any problems. The image on the right shows a typical (but older) Micro-ATX motherboard, the MSI 6191, inside the CSX-001 case. There is plenty of room around the motherboard to make the necessary connections, and everything lines up perfectly. Upon installation I realized that although this board fit, that boards where the cpu was located too far to the right would not fit once the removable drive rack was lowered back into position. The next board is even closer to interfering, but the low profile heatsink helps to avoid any problems.
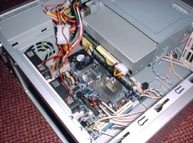 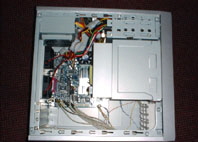 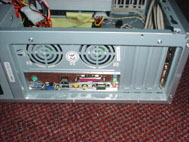
Pictured above is the VIA EPIA M9000 mini-ITX motherboard installed in the CSX-001. The board fit easily into the case and due to its extremely small size makes the CSX-001 actually look quite large. As mentioned in the previous paragraph, notice how close the cpu is to the removable drive rack. A motherboard with the same orientation that utilized a standard Intel or AMD cpu would most definitely have interference between the heatsink and the drive rack. The balance of the components installed include a 30GB hard drive, a 52x cd-rom, and 512MB PC2100 DDR.
Once everything was wired, I powered up the system and the first thing I noted was how quiet the case fans were. With (2) 60mm and (2) 80mm fans in there I was certain that there would be some sort of whine produced. Nothing distinguishable, and even though they are all definitely low flow fans, I could feel a decent amount of air being moved.
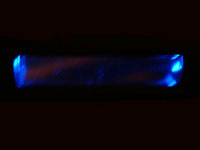
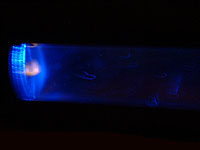
The second thing I noted was the front panel lighting effect produced by the power led and hdd activity led. Although hard to document with my camera, the two images below show what the lighting looks like in the dark. The power led is located on the right of the clear plastic rectangle and produces an intense blue glow that fills the entire area. The hdd activity led is located on the left end of the rectangle and produces a faint yellow light, as shown in the below right image.
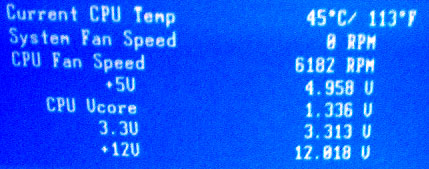
Once I had the system running for a while and was certain all of the features worked, I rebooted and entered the BIOS to get a reading on how strong the 200 Watt power supply unit was. The screen capture below shows the reported voltages, which are all well within specification, and acceptable for my needs.
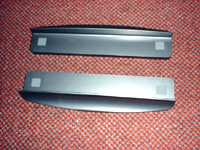
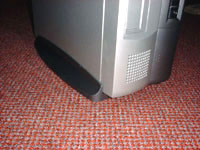
As pictured below, the CSX-001 comes with one last goody to complete the package... A set of feet that allow you to convert the horizontal, desktop arrangement of the case to a vertical, tower arrangement. Basically they are just two plastic rails with non-slip rubber grips on both the top and the bottom that will sandwich around the case and hold it upright. There is no means for securing the feet to the case, but the CSX-001 has such a low center of gravity one shouldn’t be too concerned about it tipping over.
Conclusion:
Overall, I am extremely impressed with the Maxtop CSX-001 Mini PC Chassis! It is stylish, sturdy, and incorporates a handful of special finishing touches that make installation and operation simple. Generally, when you start adding special touches to a case the price starts to add up as well, but in my opinion the price on the CSX-001 is quite reasonable for all that is included. A quick search of the internet will show that the CSX-001 is available from several online retailers, with two of the better deals being from Newegg and Dealsonic. Newegg offers the CSX-001 for $45.00 (US) plus $10 shipping, and Dealsonic offers it for $49.00 (US) with free shipping.
Although I do list two “Cons” below, these are not definite problems with the case. I did not experience either of these problems first hand, but I can sense the potential for these problems existing in some instances. I can’t test every motherboard or every optical drive in this case to be sure, but they are both things to keep in mind.
Pros:
- Extremely stylish, and equally as functional.
- Attractively priced at just over $50 (US).
- Comes complete with power supply and case fans.
- Thorough documentation.
- Quiet operation, ideal for HTPC application.
Cons:
- Potential for interference between cpu heatsink and removable drive rack depending on motherboard layout
- Potential for interference between optical drives with large doors and “stealth” bay cover.
Final Grade: A+
Special thanks to Maxtop for providing the CSX-001 Mini PC Chassis for review!
Please drop by the BigBruin.Com Forum and feel free to discuss this review.
Page 1 | Page 2 | Page 3
|