|
 Posted: January 4, 2004 Posted: January 4, 2004
Author: Jared Kuolt
Manufacturer: CasEdge
Source: CasEdge
At this point I summed up my first impression of the case with one word: solid. From the photos I had seen and my asinine assumptions, I was expecting something more like my current piece of junk. Thank *insert deity of choice here* that was not the case (pun intended).
 
Notice (above left) how scared my old case looks! The power button (pictured above right) has a smiley face on it. It is odd, but I like it anyway.
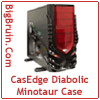
The exterior of the case is well done and it is obvious that high-quality materials were used. The horns on the front are not flimsy like I thought they would be. As a matter of fact, the red bezels are gorgeous and have an interesting depth to them. I almost refused to take them out when I put in my boring beige CD-ROMs.
I find that pre-modified case windows are often bland. This case has a simple window design, but is not overbearing nor boring. After all, it is made to go along with the Minotaur theme. The feet also go with the theme and yet maintain perfect functionality.
The interior is complicated but is fortunately user-friendly; Everything is labeled and the manual has all the information you need to get going.
 
Above left: Hard drive rail before installation. Above right: Drive rail installed.
 
Above left: face pulled of for installation of CD-ROM drives. Above right: White CD-ROM drives aren't the most aesthetic in this case, but I went with what I had.
Each set of drive bays is particular to its specific function. The 5.25 and 3.5 exposed bays require a small rail guide to be attached to every device. Note that I tried two on a CD-ROM drive and it didn't work. This frustrated me for some time, until I realized each drive requires only ONE. Once this is done, the drives slide and lock right into place. However, I would recommend taking off the face cover of the chassis. The manual had a section near the end about putting on the cover, so perhaps they had assumed that the cover would already be off?

Above: Hard drive with handle attached.
Hard drives are mounted in a way that looks almost like a hot-swappable SCSI array. This is the only part you must use screws and guess what? They are right there waiting for you! These screws have such a large head that you almost would not need a screwdriver. You first screw on the handle, then two more screws to keep it within the bay rails.

Above: Drive bays on the bottom right, and a handy clip for stray cables during installation is attached
 
Above left: Motherboard tray pulled for easy installation. Above right: It slips right back in!
Motherboards hate me and they always will. Every installation of a motherboard that I have ever done has ended up with one of my appendages bleeding. One time I even gouged my right index finger so badly that I needed stitches, and please, don't ask me how. Thankfully, this case (and others like it) have made it super easy to install the motherboard. First, pull out the motherboard plate. Second, line up motherboard holes with the plate's standoffs and press firmly into place. Replace plate and you are set! No screwing required. Take that motherboard! I didn't get hurt this time!
 
Above left: "Extension Card" lock. Above right: Look, Ma; No screws!
Placing the extension cards is easy too. There is an extension card lock (two actually, but work as one) that keeps the cards in place. To install, you unlock it, pull out the slot cover and put in the card, rinse and repeat (rinsing optional and may degrade the performance of your PC). I tested to make sure that my cards were secure and found that they were quite stable. Not as stable as having them screwed in, but very close.
Please read on to page three for more on the CasEdge Diabolic Minotaur case... Next
Page 1 | Page 2 | Page 3 | Forum | Review Index
|


