Installation:
The
NZXT HAVIK 140 was installed in a system with the following components of interest:
» Intel Core i5 2500k processor
» Gigabyte GA-P67A-UD3-B3 LGA 1155 P67 ATX motherboard
» ASUS EAH6870 1GB Radeon HD6870 graphics card
» Kingwin Mach-1 1000W power supply
» Cooler Master Cosmos II computer case
In addition, two different memory kits were used during testing and the reason why will be revealed toward the bottom of this page.
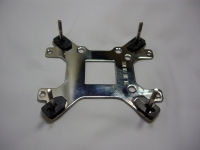
While hardware is included for both AMD and Intel processors, we will be focusing on the Intel LGA 1155 configuration, which includes the use of the backplate configured as shown below. This plate is used universally, you just have to follow the directions to set it up properly for your particular system. This assembly is then placed under the motherboard and the studs are slid through the holes around the CPU socket.
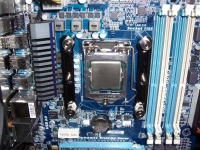
The next image shows the next few steps of the installation. First, black plastic spacers are slid over each stud and pressed flush with the motherboard's top surface. Then you place the two steel brackets on to the studs so that they run parallel to each other on either side of the CPU socket. To lock the brackets in place you then use a knurled thumbscrew on each stud. Once this is complete, you are ready to lower the CPU cooler into place.
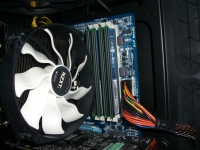
A bridge piece of sorts is placed above the base of the CPU cooler, and the threaded studs shown on the brackets above are used to lock it all in place. The whole process was no overly difficult, and thanks to the cut out in the motherboard tray I was able to do it without removing the motherboard from the case. I did find that laying the system down on one side was necessary, as the size of the cooler made holding it and tightening difficult - so I let gravity assist me. Once the cooler is in place, then the fans get attached, and in the end the whole process took under 10 minutes including the removal of the old cooler.
The next image shows one area where interference may be an issue with this cooler. As you can see, the first expansion slot is blocked. While I don't really care since it is an otherwise unused PCI Express x1 slot - some systems may have something more valuable in this position.
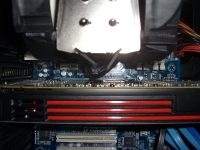
Next we see two images detailing interference with taller DDR3 memory modules. While I had been running four of these Kingston HyperX modules, I couldn't use the first slot any more, and even the second slot had the memory heatspreader touching the fan. I was down to half capacity in order to maintain dual channel mode, but I was not happy with the contact being made so I removed one fan and went back to a four module configuration.


The final image in this section shows a set of four "normal" height Patriot Memory G2 modules working just fine with this cooler. The clearance under the fan is very tight, but the heatspreader does not touch.