The Basics (continued):
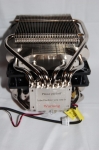
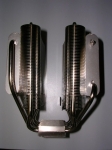
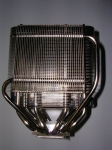
After using the included Allen wrench and carefully removing the four top bolts and two screws holding the fan in place, we can finally remove the fan along with the top cover to reveal the actual heatsink. In the pictures below you can clearly see how the two external sections are situated so that air is constantly being passed across them. You can also see the layout of the heatpipes and the construction of the nickel-plated copper base.
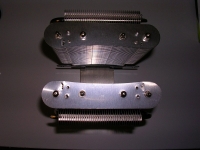
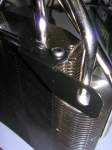
In this next series of images we see more of the overall heatsink and the placement of those heatpipes. The picture on the right shows a closeup of the mounting bracket use by Cooler Master to hold the bottom of the fan in place. In addition to the two hex bolts, there are two standard fan screws that attach to the ears shown in the picture. This is great so that if you wanted to upgrade or replace the fan in the future, it's fairly easy to do.
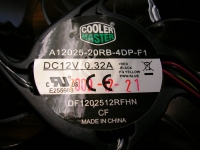
Now that we've taken a look at the heatsink, let's investigate the fan. Cooler Master has chosen one of their own fans for the task. A quick check of the model number (A12025-20RB-4DP-F1) reveals the fan to be a 120mm, 12V, 0.32A model with rifle bearings that operates in the 1000 to 1800 RPM range. It is a 9-bladed fan that produces high air flow but remains quiet at higher speeds. It seems to be their standard fan for most of their coolers.
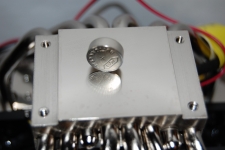
After we flip the V8 over, we finally get to the working end - the base.
Cooler Master ships the V8 with a heavy duty protective film over the polished base as you can see in the image on the left. Of course, per the warning label, you
will want to remove it prior to mounting. In the image on the right, you can see just how polished the base is. While it is not exactly mirror-smooth, Cooler Master does a fine job of smoothing the surface to ensure good contact with the CPU.