Initial Setup:
Normally this section would be full of screen captures, but the Bitdefender app blocked all applications on my phone that I tried to use to get images from within the Bitdefender app. The images below were taken from the Google Play store and are intended to show that the app is laid out rather nicely and is quite informative...
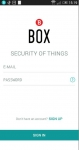
The first step in the installation is to download the Bitdefender Box app which is available for IOS and Android. Once you open the app, you either sign into your existing Bitdefender account or create a new one. Then the app will walk you through the install process. In my case I opted to install it in the Bitdefender preferred method which utilizes your current WiFi router but uses the BOX for the DHCP server function. The BOX can also be used as a stand alone WiFi router with its DHCP server, but it only supports 802.11 b/g/n and range is likely to be minimal with its lack of external antennas.
The next step is to connect the micro USB cable to power up the BOX. Then the app tells you to connect the Ethernet cable. Next I was alerted to a firmware update, which was updated with the click of a button. After the update is complete, the BOX will attempt to change the setting on your existing router. In my case my router was not supported so I had to manually log into the router and disable the DHCP server. After doing this I was getting an error saying I had no subscription, which turned out to be a sub DHCP menu that was still activated. Once that was shut off too, the install proceeded fine.
Immediately after the installation was completed the notification tab started to show new devices that were getting their IP addresses from the BOX. These devices started showing up in Notifications but also listed under Guest Devices. By simply selecting the device you can change the type of device (if needed), the name, add a picture, and add a user name. The next step allows you to determine whether the device is a Family device or Guest device. Guest devices will still have access to your network and their internet traffic while on the network will be monitored by the BOX, but they will not get any of the other features. If you chose a Family device you will be able to add other features outlined below.
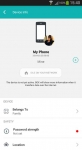
Selecting any Family device you will see a the device name, user name, and an indication of its current status. Current status' are: Protected Home, which indicates the device has protection enabled and is on your network. Idle on your Network, At Risk, Not Protected, and Protected Locally, which are pretty self explanatory as well. And finally, Protected Away which indicates that the device is off your home network but that the Private Line is enabled.
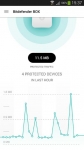
Below that you will see vendor info and MAC address for the device which can be helpful to determine which device you are looking at when you are naming them. Below that it will tell you if any vulnerabilities were detected with your devices. According to Bitdefender this vulnerability assessment is done every three days for all devices.
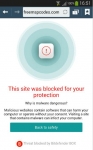
Selecting the "Belongs To" will allow you to change the device to Guest or Family as needed. If it is a Family device you will also have the ability to turn on other features. You can Choose to enable or disable Local Protection, Private Line, and Manage This Device. Local Protection enables local scanning and active threat control. The Private Line option utilizes a VPN service when that device is on another network. If you choose to enable the "Manage This Device" you will need to enable these features on the device. On IOS or Android this involves downloading the Box Agent. For Windows, when using the browser for the first time you will be redirected to join the Bitdefender network. Once you do this the app will be downloaded and installed. But selecting this will also give you more options listed under the previous tab (Device Info), more on that later.
Back at the Device Info menu you will find Network Settings. This is a super important menu if you previously had any static IP addresses. By selecting Manual Allocation you can choose to turn the device to a static IP, then select the IP address you want (provided it isn't already taken). Using this I was able to reset the few devices on this network that were statically assigned previously.
If above you selected to manage the device, you will see more sections under Device Info. First you will see Safety. Under this you will see if the device is password protected and if the password is strong or not. It will also notify you if the device is outdated. If outdated, it will allow you to remotely update the device. With some devices you can also see free space and clean up the device remotely. With mobile devices you can locate them, alarm them (local beacon to find them), lock the device, or wipe it.
For mobile devices you can also manage your mobile data and set a threshold so you don't get any surprises at the end of the month.


