Installation:
The following hardware will be installed into the
Antec One mid-tower case:
» AMD 1090T 3.2GHz processor
» 16GB (4 x 4GB) Kingston KVR1333D3N9HK4/16G DDR3 memory
» ASUS GTX 560Ti video card
» Kingston 128GB SSDNow V+ SSD
» Intel 180GB 520 SSD
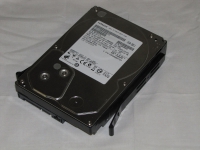
» Hitachi 2TB SATA 6Gb/s hard drive
» LiteOn CD/DVD Burner
» Corsair CS600 power supply
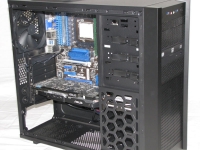
Building a system in the Antec One is done exactly like other cases, no real surprises. I didn't encounter any sharp edges when installing the components. All the cables were able to reach their destination; the USB 3.0 and front audio cables reached where they needed to go, however it did not leave a lot of slack for cable routing. Also, while talking about cable routing, the front panel cables could use a little opening on the back side of the 5.25" drive bays to route the cables back there rather than having to take them to the top hole on the motherboard tray.
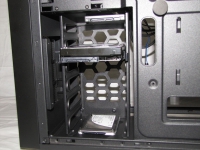
Rails are used to mount the 3.5" hard drives, which is a very common method and works great. The style of hard drive installation is unusual as everything is done from the back panel. In many cases the drives are installed from the other side and typically need the back panel removed to connect the cables. The method implemented on the Antec One makes installing the drives easier as only one panel needs to be removed. SSDs or 2.5" hard drives can be mounted a the top and bottom of the hard drive cage, the top SSD mount provided easy access to the connections, especially if you use right angle SATA cables. With the bottom mount, a straight SATA cable will be needed as as it mounts on the bottom of the chassis.
Installing 5.25" devices is pretty simple, and the hardest part is removing the drive bay covers. Removing the front bezel, you can get to the back side of it, which allows the removal of the covers. These are held in place by little clips, which is where there is a slight problem. With the top 5.25" drive bay, the cover can not be removed directly as the clips run into a part on the case. In order to put the device into the top bay, the second cover will need to be removed and the top one slid down to be removed.
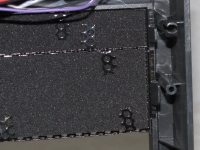
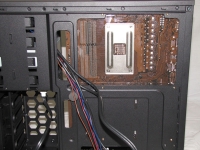
After the motherboard is installed, I noticed another slight issue. The cable routing holes are partially covered by the motherboard. This is not a game changer, however it is an issue that can make it more difficult to route the cables behind the motherboard. The picture on the right shows the motherboard from the back side, and you can see how much of the cable routing holes are covered, which looks to be about 1/3 of the holes. In addition, the amount of space provided by the CPU bracket cutout shows that it should accommodate almost all CPU locations.